
Dress up your mantle, or any part of your home, with an easy Halloween garland made with yarn, twine, and pipe cleaners. It is an inexpensive craft project easy enough for kids.
You are going to LOVE this Halloween garland! It is easy to make using yarn, twine, and pipe cleaners. It’s also crazy inexpensive. This craft is easy enough for even little kids to help make. Just follow the instructions for how to make a yarn pumpkin, yarn ghost, and yarn spider. Make as many as you want and hang on twine to make it a cute Halloween garland. Use it with Halloween Luminaries on a mantle, table, or ledge to create a fun Halloween mood.
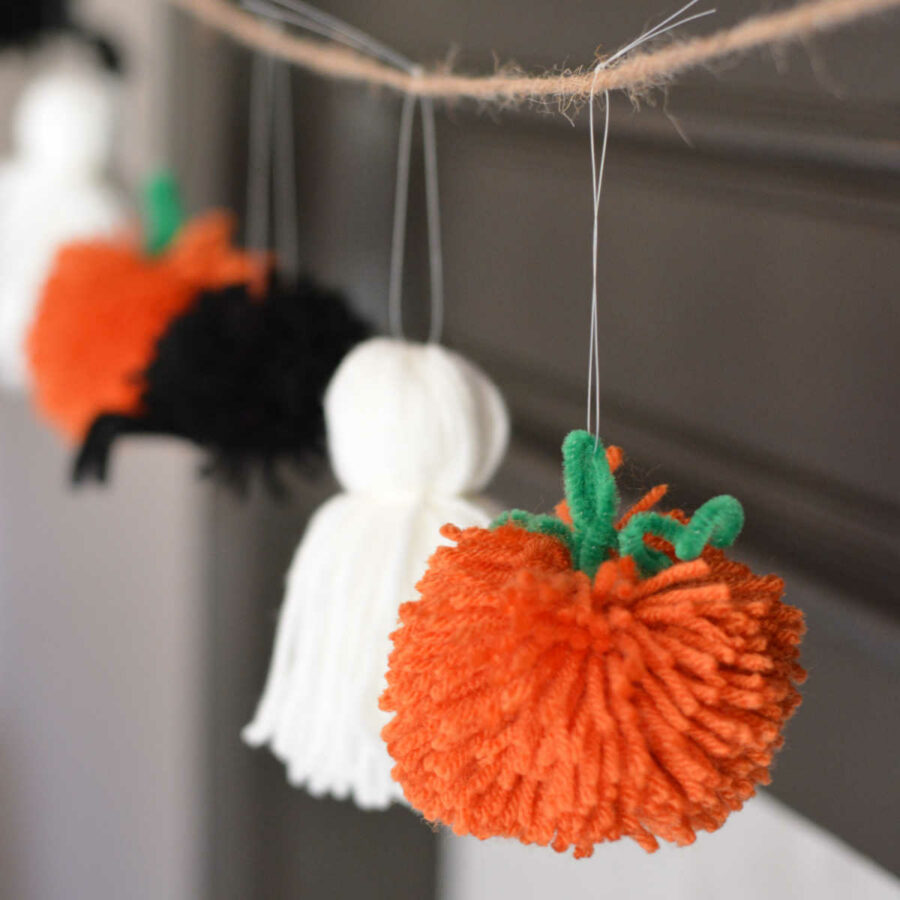
Pumpkins and Ghosts and Spiders! Oh My! Halloween Garland
Halloween Garland Materials:
- Orange Yarn (Red Heart in Carrot)
- Black Yarn (Red Heart in Black)
- White Yarn (Red Heart in Soft White)
- Twine
- Fishing Line (optional – I used this for hanging)
- Dining Chair (mine is about 16″ wide)
- Green pipe cleaners (1 per pumpkin)
- Black pipe cleaners (2 per spider)
- Sharp Scissors
Halloween Yarn Garland
Pin For Later-

Reader’s Favorite!
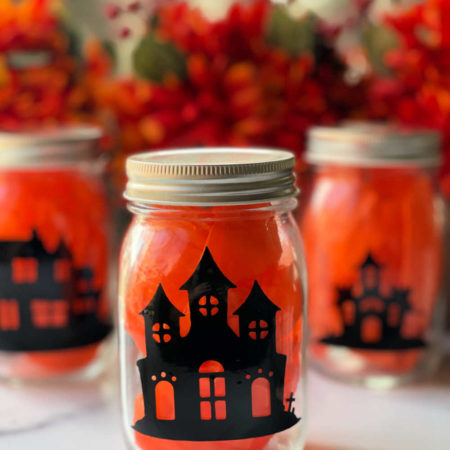
Halloween Luminaries Mason Jar Craft
-
Reader’s Favorite!
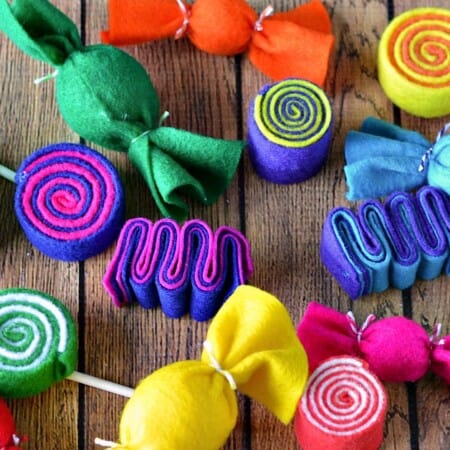
Colorful Felt Candy Garland
How to Make a Halloween Garland Directions:
For each of the three shapes (spider, pumpkin, and ghost), you wind yarn around a chair, slide it off, tie it and cut it into your shape.
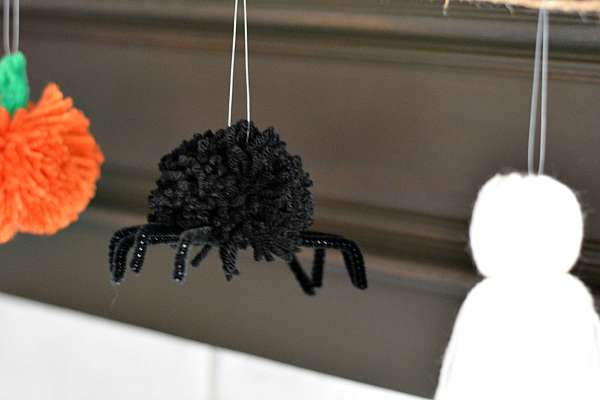
How to make the Halloween Garland Spider
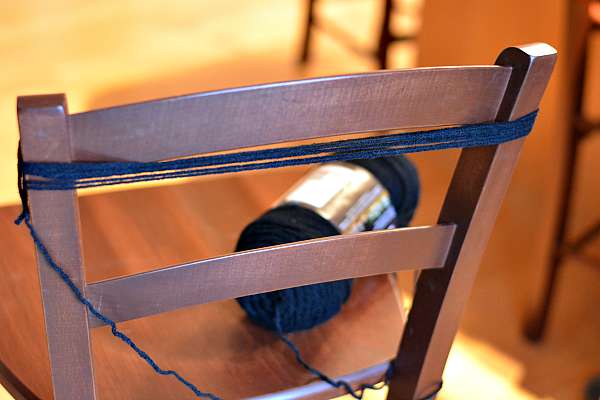
To make the spider, one chair wrapping will make 3 spiders. Wrap the black yarn around a chair 75 times, keeping it loose enough so you can slide it off but not so loose that it falls off.
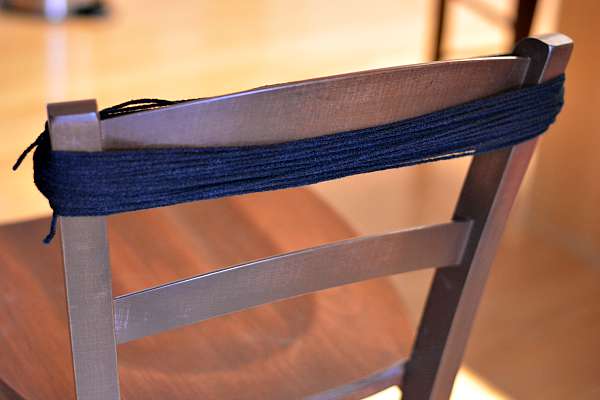
The more you wrap, the thicker and denser the pom will be. Slide the yarn off the chair, keeping the loops separate.
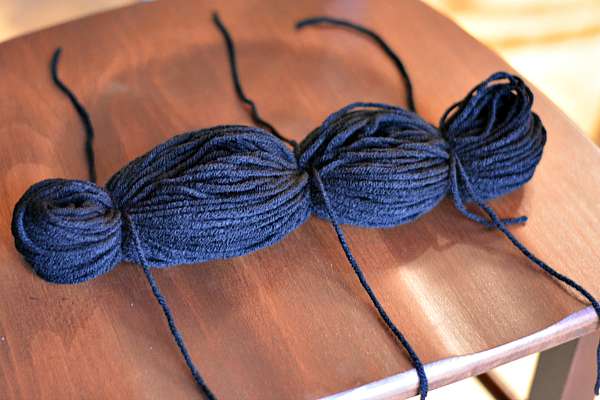
Next, cut three 14″ pieces of black yarn. TIGHTLY tie the pieces around the black yarn as shown. Double knot each piece. Cut the loop of yarn on the right and left of the center (tied) strand. Cut the looped ends. You will have three spiders.
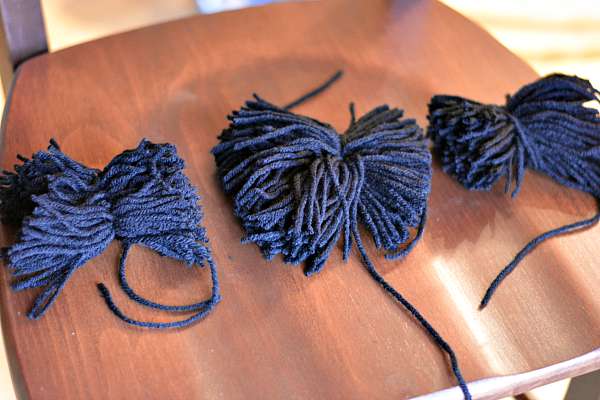
When doing this, ensure to KEEP THE TAIL LONG (the part you tied onto the loop to make sections). Hang onto it and trim yarn to create the spider shape.
Now, you make the spider legs using black pipe cleaners. cut two black pipe cleaners in half, giving you four pieces. Place your spider upside down onto a flat surface. Lay your pipe cleaners over your tail and use the tail string to tightly attach the pipe cleaners to the body. Double knot the tail string. Using your fingers, bend the pipe cleaners to resemble legs. You can trim the tail OR use it (if you can) to hang it.
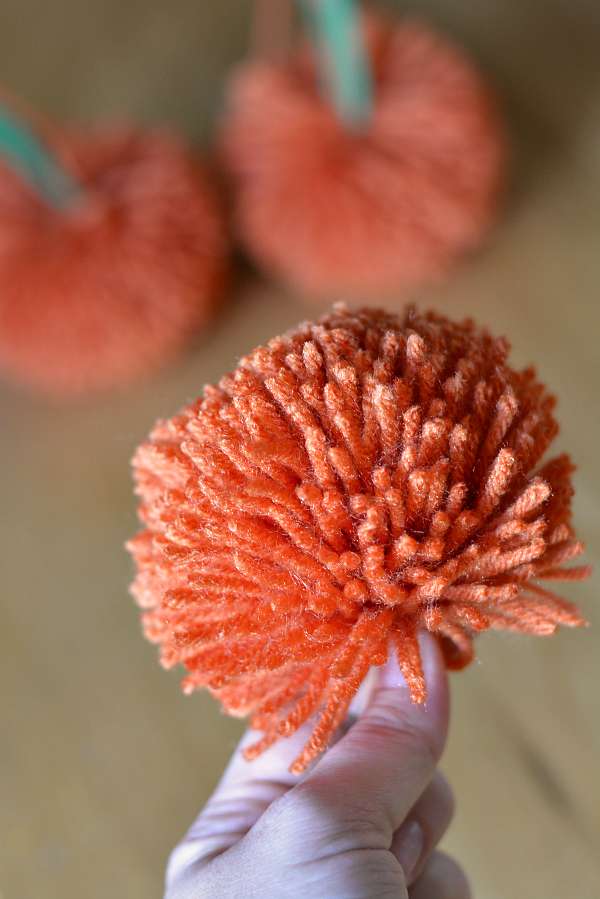
How to make the Halloween Garland Pumpkins
Follow steps 1-3 above that you did for the spider, but use the orange yarn only wrap the warn around the chair 150 times. Again, this will make 3 pumpkins. After you trim your pumpkin, following the same method as the spider, you’ll need to add a stem.
To make the pumpkin stem, place the center of a green pipe cleaner across the tail and tie the tail in a double knot to affix the stem. Then, fold the pipe cleaner downward to make a stem and some vines. You can do anything you want here. Keep the tail long to hang or cut it off.
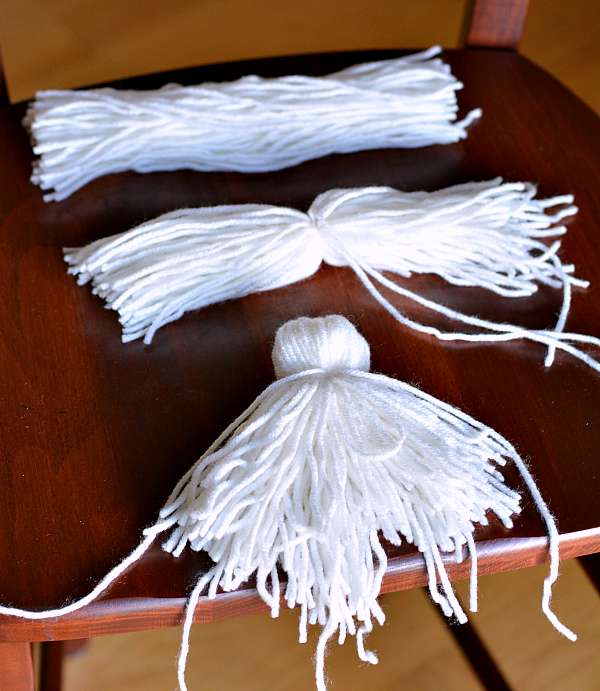
How to make the Halloween Garland Ghosts
Do the same thing you did for the spiders and pumpkins and wrap your yarn around the chair. The ghosts take about 150 loops. Remove the yarn from the chair and cut one end, so you have a long bunch of yarn. Cut that chunk of yarn into thirds.
Now, cut six 14″ pieces of white yarn. Set 3 pieces aside. Tie one piece of yarn tightly around the center of each of the three chunks. Keep the tail separate if you want to use it to hang; otherwise, you can just add it into the mix of ghosts.
Fold the bunch of yarn down the center/in half and smooth the yarn. Tie the remaining yarn near the folded end to make a head. Trim the ghost body as desired.
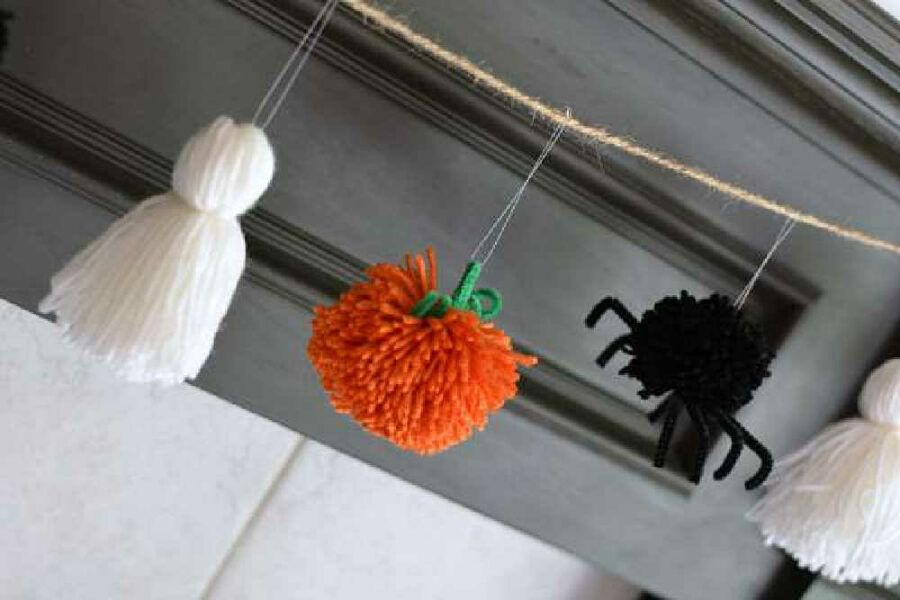
Put Them All Together as a Garland:
Use fishing line to hang the garland pieces onto twine. For the spider, tie the line onto one of the strands on the top of his head. For the pumpkin, weave the fishing line through the stem to hang. And for the ghost, weave fishing line through the top of the head to hang. If you still have your tails, you can easily use those to tie them onto the garland.
Keep the trio loose. A simple slip knot around the garland will work well; that way, you can space it even once you have it hung.
Halloween Yarn Garland
Pin For Later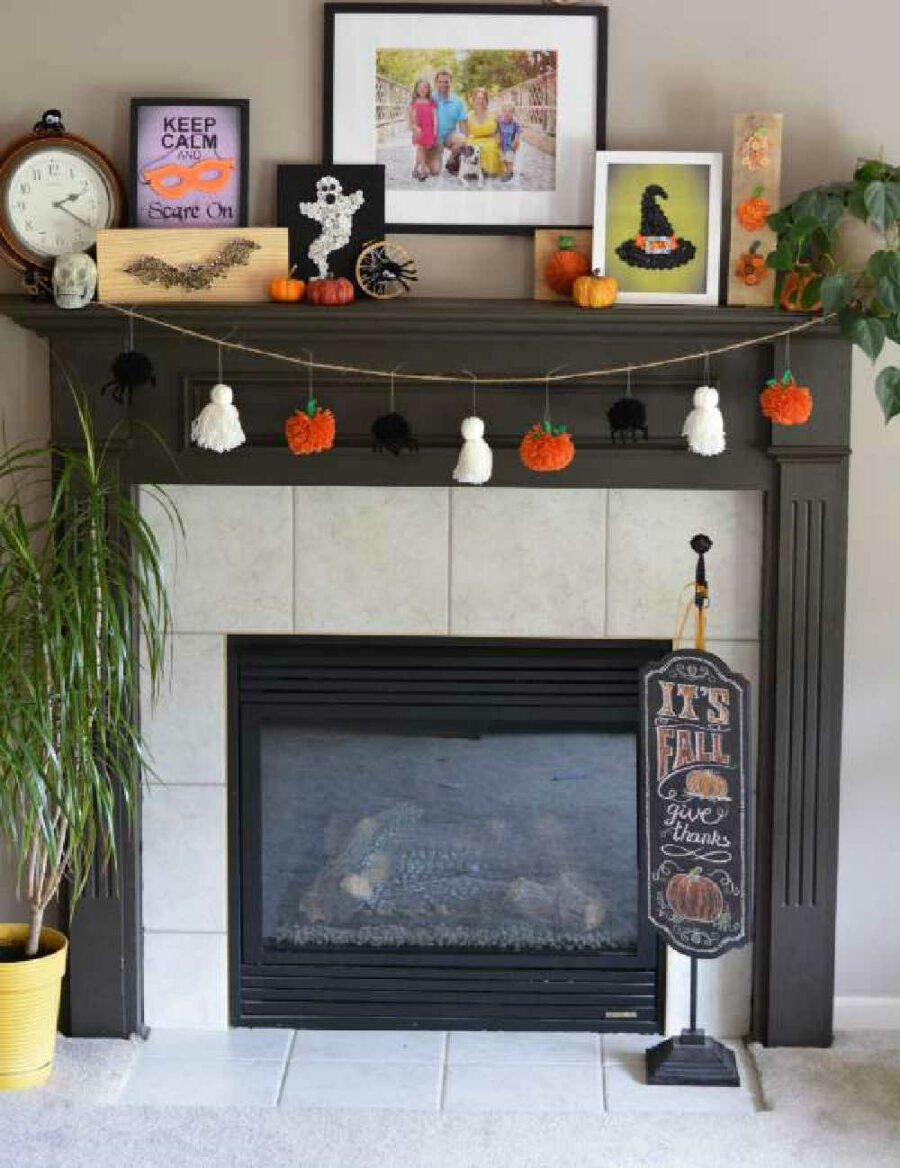
Pair the garland with our Keep Calm and Scare On project to create an adorable, inexpensive Halloween display for your home.
Halloween Yarn Garland

An easy Halloween garland of pumpkins, ghosts, and spiders made with yarn, twine, and pipe cleaners.
Materials
- Orange Yarn (Red Heart in Carrot)
- Black Yarn (Red Heart in Black)
- White Yarn (Red Heart in Soft White)
- Twine
- Fishing Line (optional – I used this for hanging)
- Green pipe cleaners (1 per pumpkin)
- Black pipe cleaners (2 per spider)
Tools
- Dining Chair (mine is about 16″ wide)
- Scissors
Instructions
- Wrap the black yarn around a chair 75 times, keeping it loose enough to slide it off but not so loose that it falls off. Slide the yarn off the chair, keeping the loops separate.
- Cut three 14″ pieces of black yarn. TIGHTLY tie the pieces around the black yarn as shown. Double knot each piece.
- Cut the loop of yarn on the right and left of the center (tied) strand. Cut the looped ends, keeping the tail long. You will have three spiders.
- Cut two black pipe cleaners in half, giving you four pieces. Place your spider upside down onto a flat surface.
- Lay your pipe cleaners over your tail and use the tail string to attach the pipe cleaners to the body tightly.
- Double knot the tail string. Using your fingers, bend the pipe cleaners to resemble legs. You can trim the tail OR use it (if you can) to hang it
- Follow steps 1-3 above that you did for the spider, but use the orange yarn only wrap the yarn around the chair 150 times. Again, this will make 3 pumpkins. After you trim your pumpkin, following the same method as the spider, you’ll need to add a stem.
- To make the pumpkin stem, place the center of a green pipe cleaner across the tail and tie the tail in a double knot to affix the stem.
- Fold the pipe cleaner downward to make a stem and some vines. You can do anything you want here. Keep the tail long to hang or cut it off.
- Wrap your yarn around the chair. The ghosts take about 150 loops. Remove the yarn from the chair and cut one end for a long bunch of yarn. Cut that chunk of yarn into thirds.
- Cut six 14″ pieces of white yarn. Set 3 pieces aside.
- Tie one piece of yarn tightly around the center of each of the three chunks.
- Keep the tail separate if you want to use it to hang; otherwise, you can add it to the mix of ghosts.
- Fold the bunch of yarn down the center/in half and smooth the yarn. Tie the remaining yarn near the folded end to make a head. Trim the ghost body as desired.
To make the spiders - 1 chair wrapping makes 3 spiders:
To make the pumpkins - 1 chair wrap makes 3 pumpkins:
To make the ghosts - 1 chair wrap makes 3 ghosts:
Hang the pumpkins, ghosts, and spiders from a piece of twine. Use fishing line to hang the garland pieces onto twine.
For the spider, tie the line onto one of the strands on the top of his head.
For the pumpkin, weave the fishing line through the stem to hang.
For the ghost, weave a piece of fishing line through the top of the head to hang. If you still have your tails, you can easily use those to tie them onto the garland.
Keep the trio loose. A simple slip knot around the garland will work well; that way, you can space it even once you have it hung.