
Create a Halloween haunted village with Halloween luminary jars. First, cut out haunted houses using a Cricut Joy and black Smart Vinyl. Then, use transfer tape to apply each house onto a different craft or mason jar. Add color to the mason jar luminaries with optional tissue paper inside the jars. Light up the Halloween jar luminaries with a battery-operated candle inside the jar. Enjoy your haunted village all Halloween season long.
Halloween Luminaries Mason Jar Craft
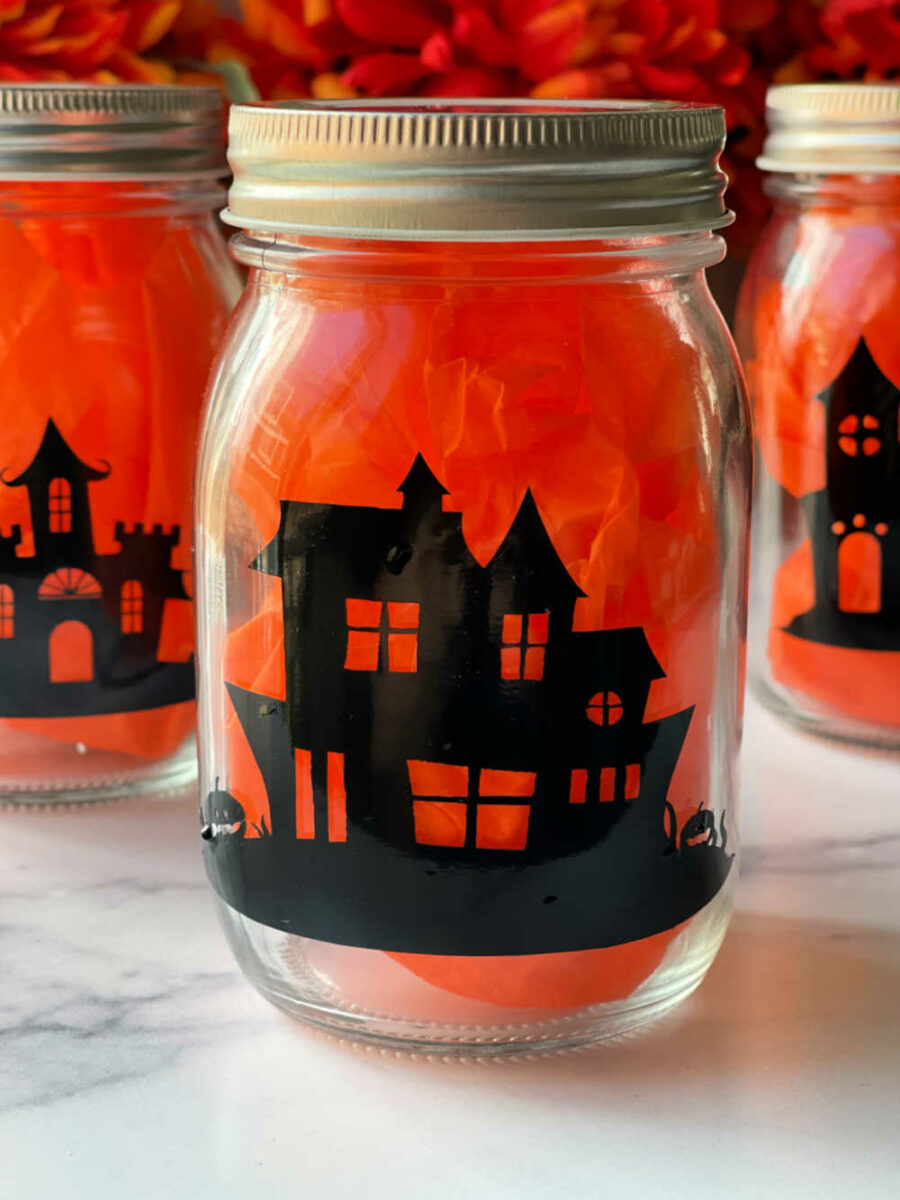
This spooky Halloween Village made with mason jars is a cute and fun way to decorate for Halloween. This haunted village is easily made with Haunted Mansion SVG files and glass mason jars.
You can still make the luminaries even if you don’t own a Cricut or other cutting machine! Simply print out the haunted houses using the PDF version and cut them out with scissors. Then use ModPodge or glue to adhere them to the jars. Super simple and easy to make no matter how you do it.
-

Reader’s Favorite!
Candy Apple Twister Halloween Party Game
-
Reader’s Favorite!
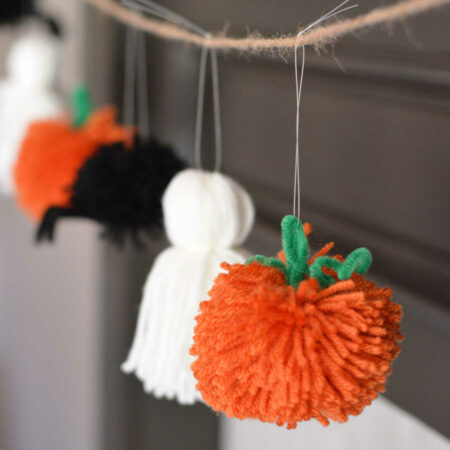
Pumpkins and Ghosts and Spiders! Oh My! Halloween Garland

Halloween Luminaries Supplies
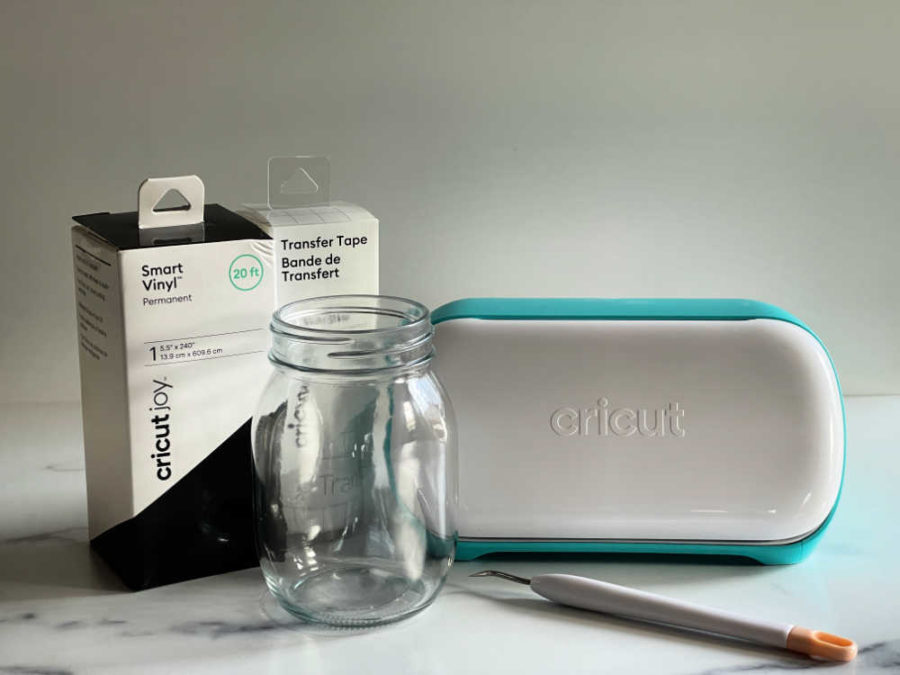
- Cricut Joy
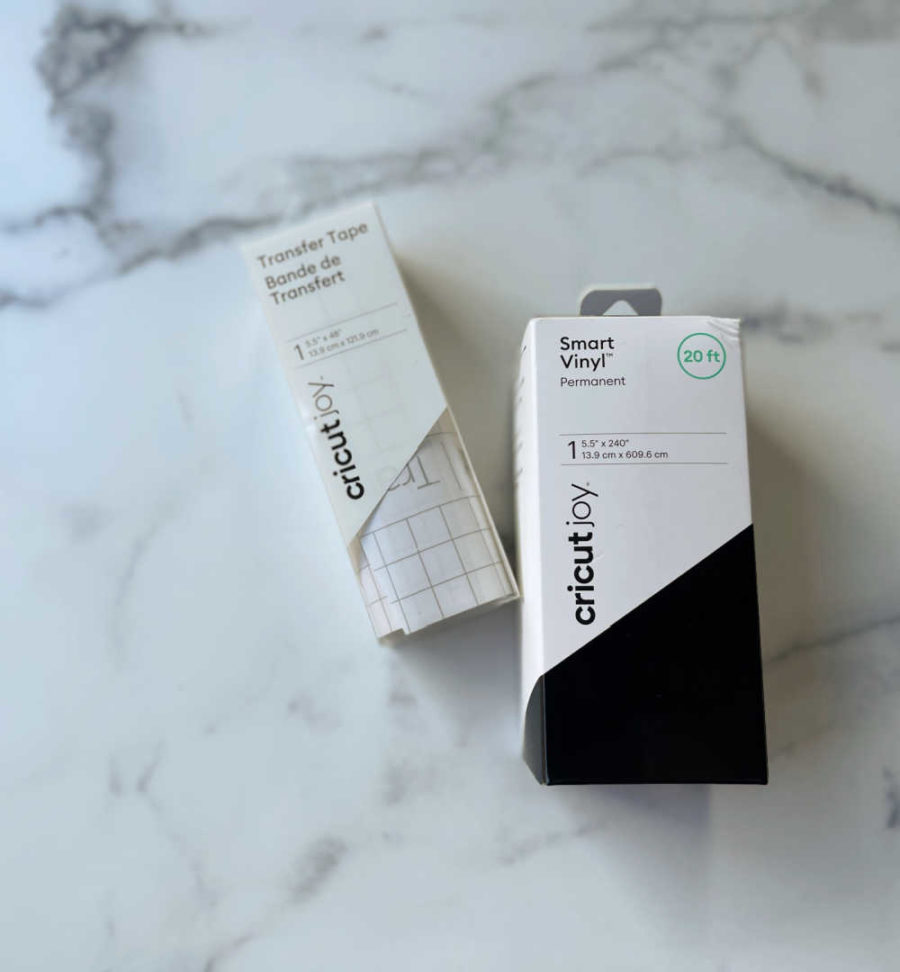
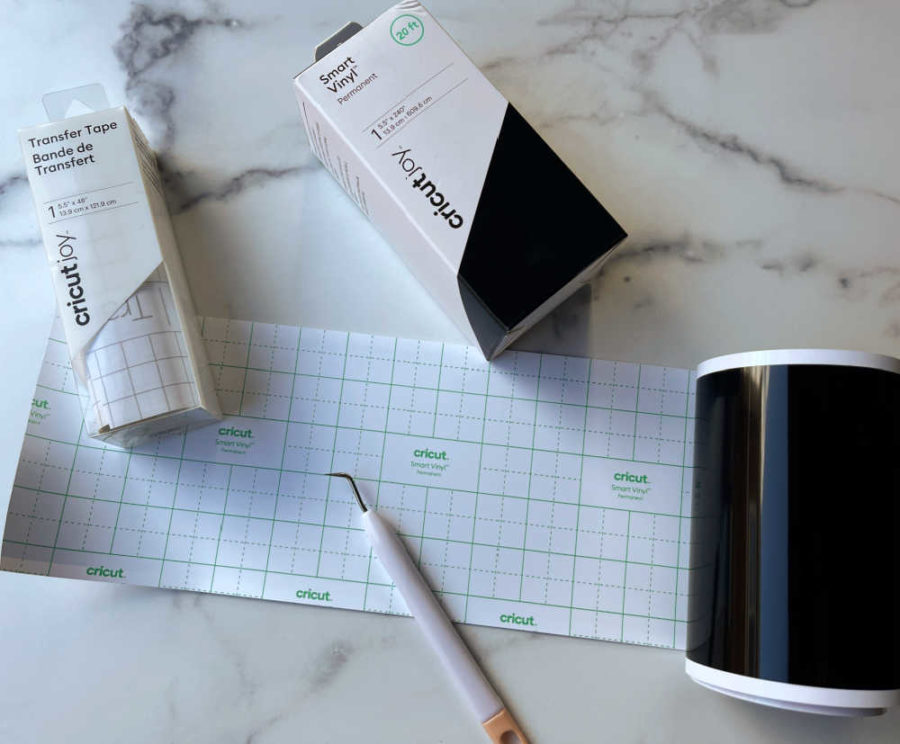
- Cricut Joy Smart Vinyl – Permanent in Black
- Cricut Joy Transfer Tape
- Weeding Tools
- 16 oz Glass Jars – we bought craft jars, but canning jars will work as long as they have a flat side
- Tissue paper
- Battery-operated candles – we love ones that flicker and have a timer and/or a remote
- Haunted House SVG Bundle
Halloween Luminary Directions
Download The Haunted House SVGs and Upload to Design Space
Download the Haunted Mansion files to your computer. Then, upload the houses into Design Space. You can follow these directions on How to Upload an SVG or Image to Cricut Design Space if you need help.
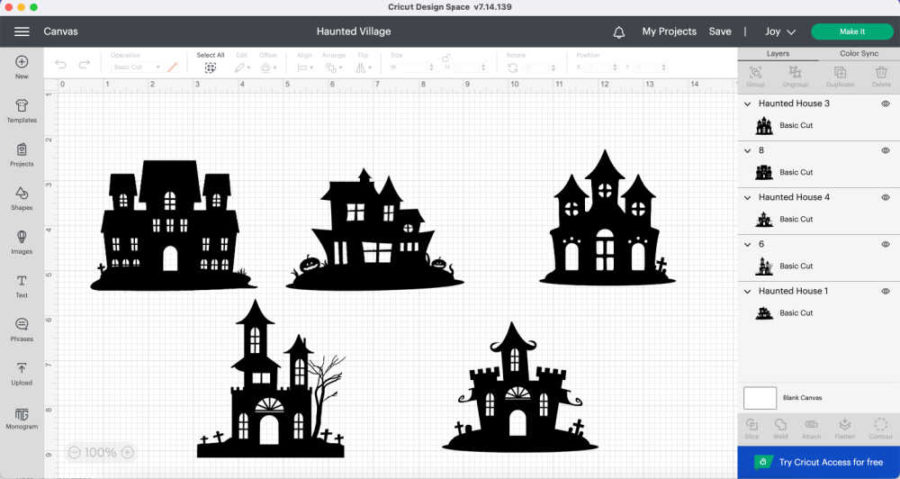
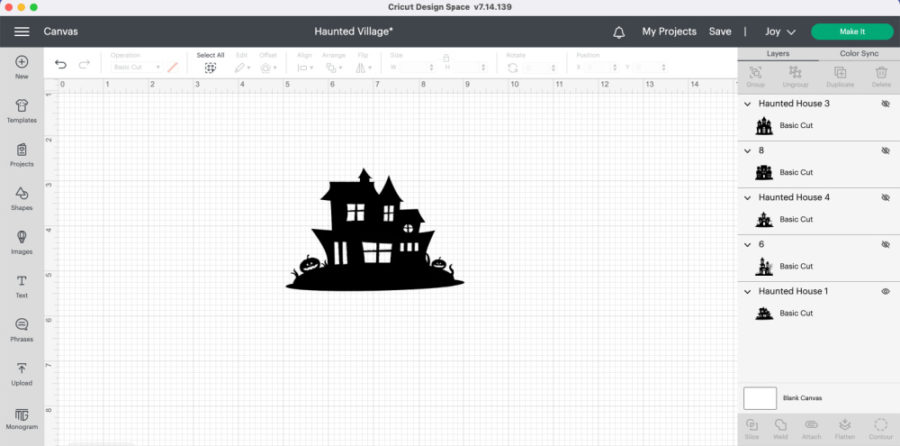
Adjust the size of the houses to fit on your jars. We used 16 oz glass craft jars and sized the houses roughly 3″ by 3″. You can adjust the size to be bigger or smaller. Once you are happy with the size, Click “Make It” on the top right.
Working with Cricut Smart Vinyl
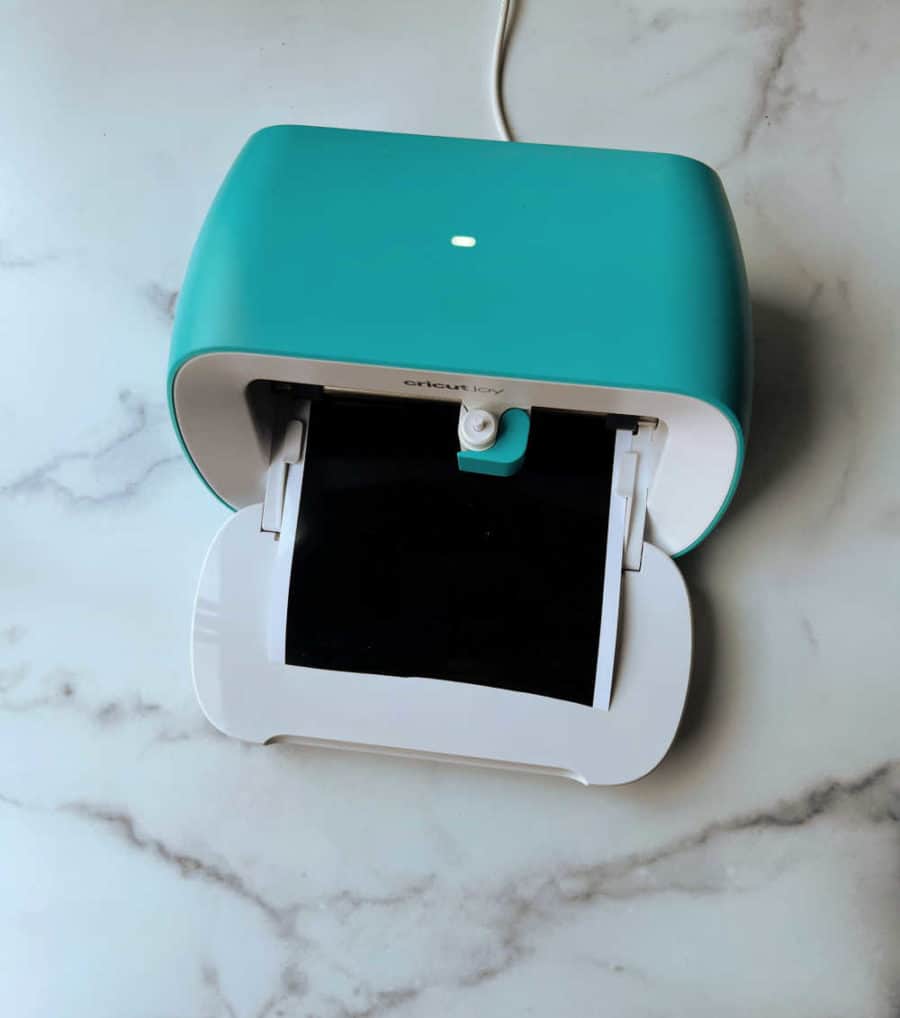
For this project, we are using a Cricut Joy and Cricut Joy Smart Vinyl, which does not require a mat for cutting. You load the vinyl directly into the Joy. Check out The Ultimate Guide to Cricut Vinyl for more information on what kinds of vinyl you can use for this project. Design Space will tell you how long of a piece of vinyl you will need to cut.
The Cricut Smart Vinyl is designed to load directly into the Joy. You just cut the vinyl as long as needed.
This was our first time working with Smart Vinyl on the Joy, which was wonderful! It was super easy to work with. Smart Vinyl is also really easy to weed. You can also make these using regular vinyl and a mat, but the Smart Vinyl makes this quick and easy.
Cut The Design
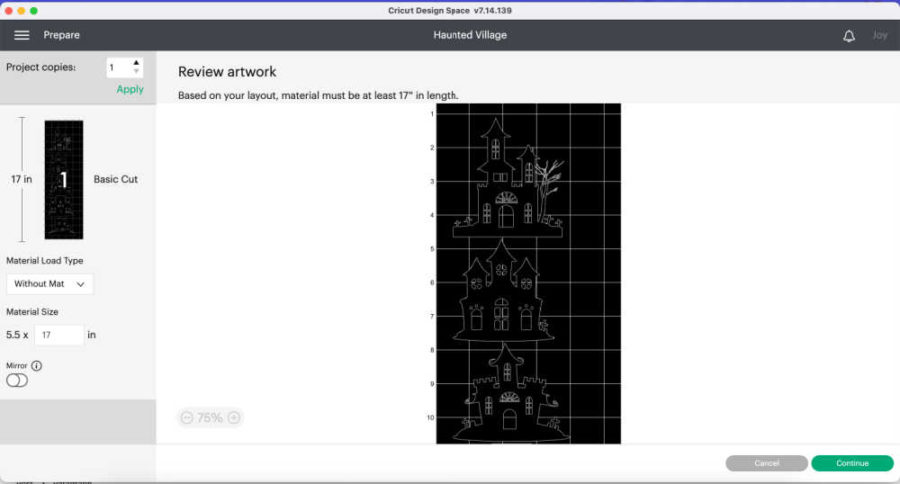
You can choose to cut all 5 houses at once or cut them one at a time. Cutting all 5 at once requires a long piece of vinyl. For the cut above, Desing Space says the vinyl needs to be 17″ long to cut all 5 houses at about 3 x 3 each. If you prefer to work with smaller pieces of vinyl, cut each house separately.
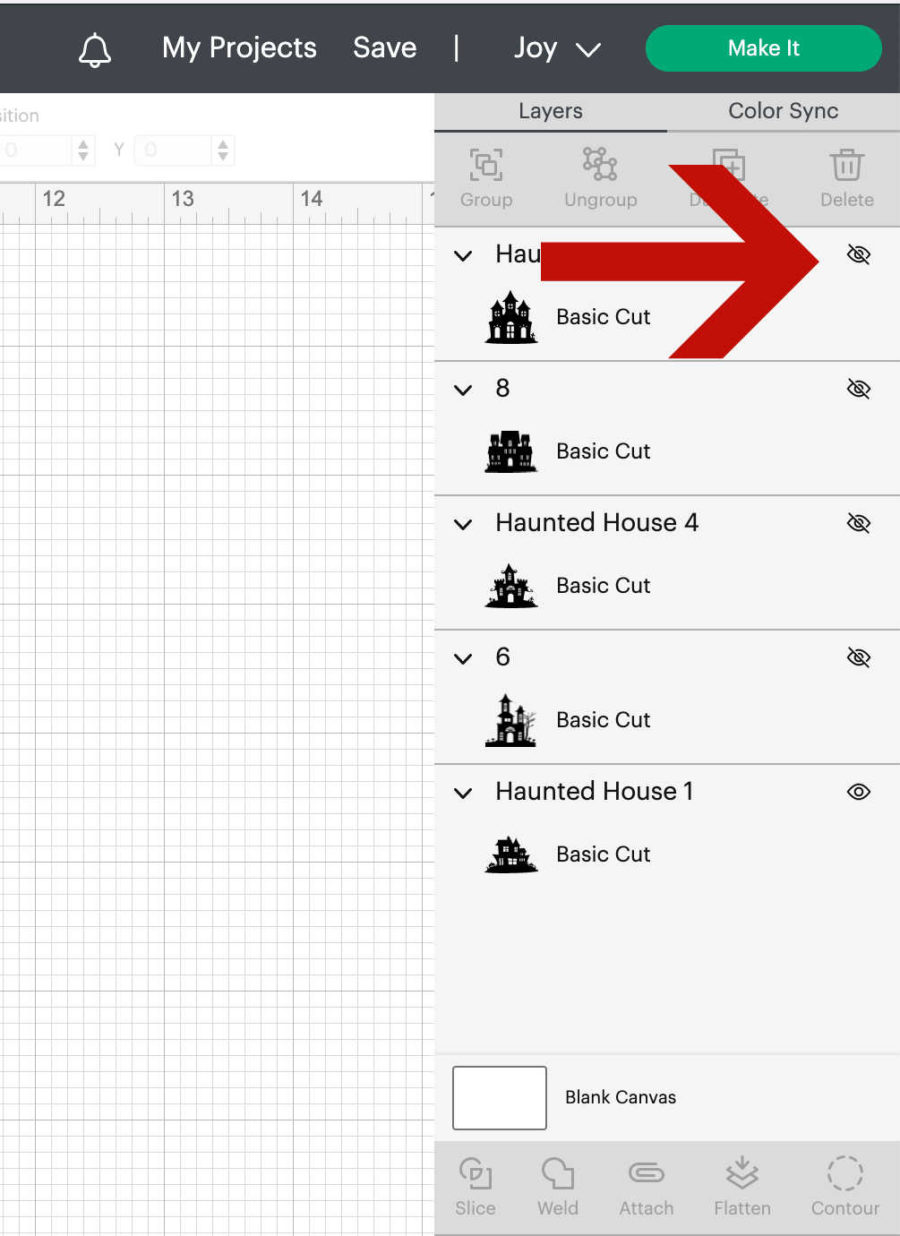
To print one house at a time, you need to hide the houses you don’t want to cut. To do this, click the eye next to the houses you want to hide on the right side of the canvas.
If the eye has a line through it, that part of the design is hidden and will not be cut.
Cut Settings
The process is the same no matter how many houses you cut at a time. Hit “Make It’ on the top right of Design Space Canvas.
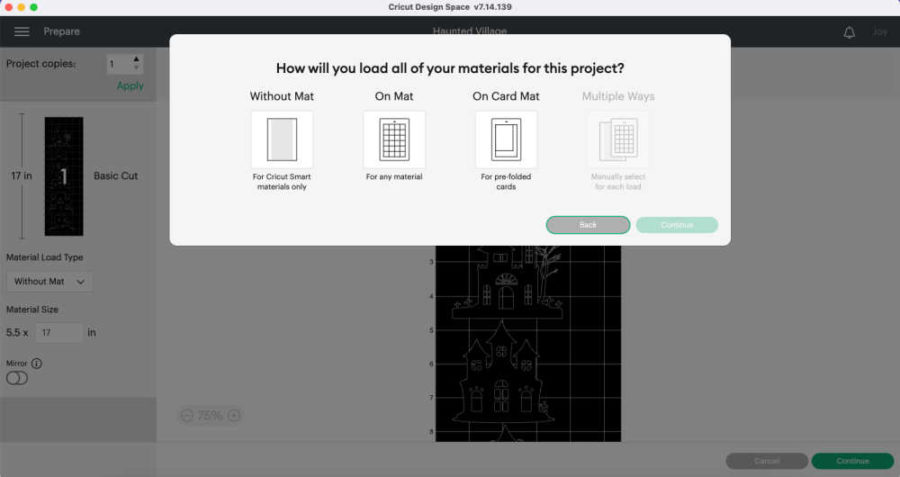
Using Smart Vinyl, you will choose “Without Mat.” If you need a mat, then choose that option. Cut the Smart Vinyl to the length indicated on the top of the screen. Click “Continue.”
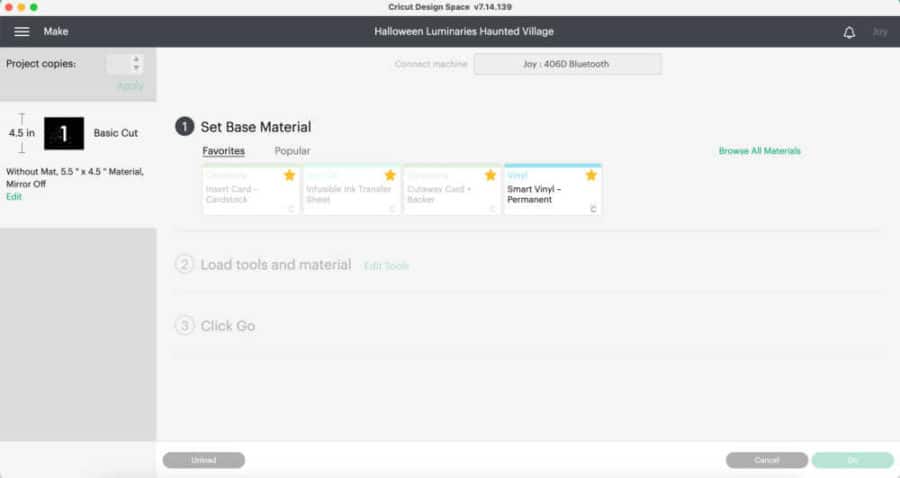
Choose Smart Vinyl Permanent and load the vinyl into the Joy when prompted.
Click “Go” when prompted. Unload when the cut is finished.
Weed the Design
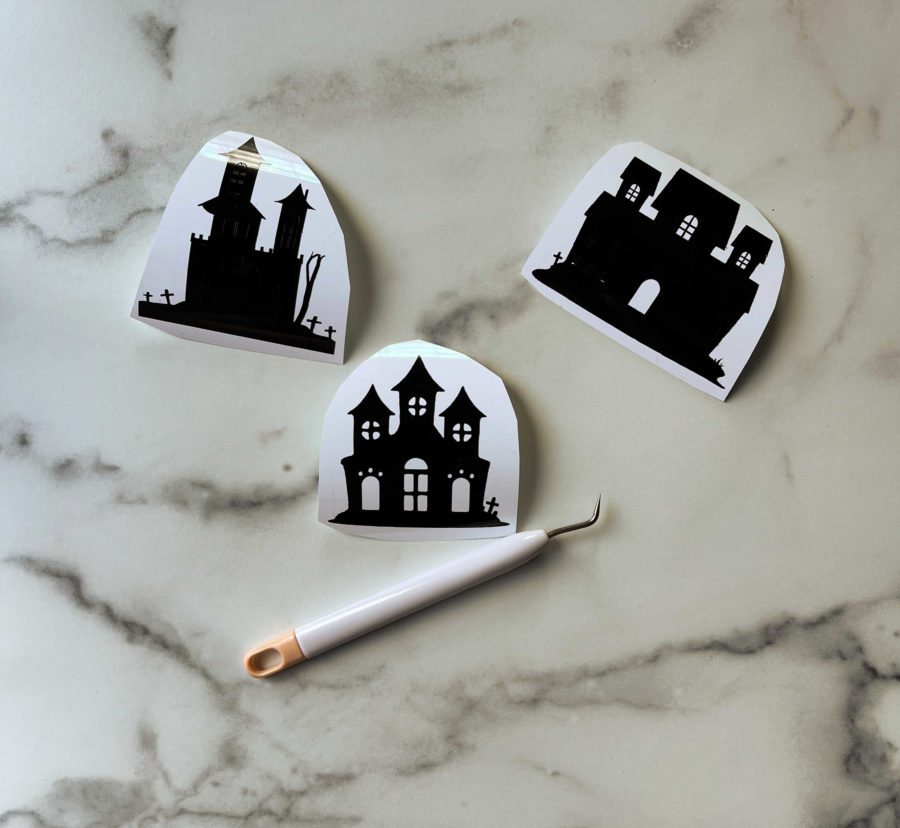
Once all the houses have been cut, or as they are cutting, weed the design. The Cricut Smart Vinyl is very easy to weed. The outside vinyl will easily pull off. A weeding tool is useful to pull out the windows, doors, and other smaller details.
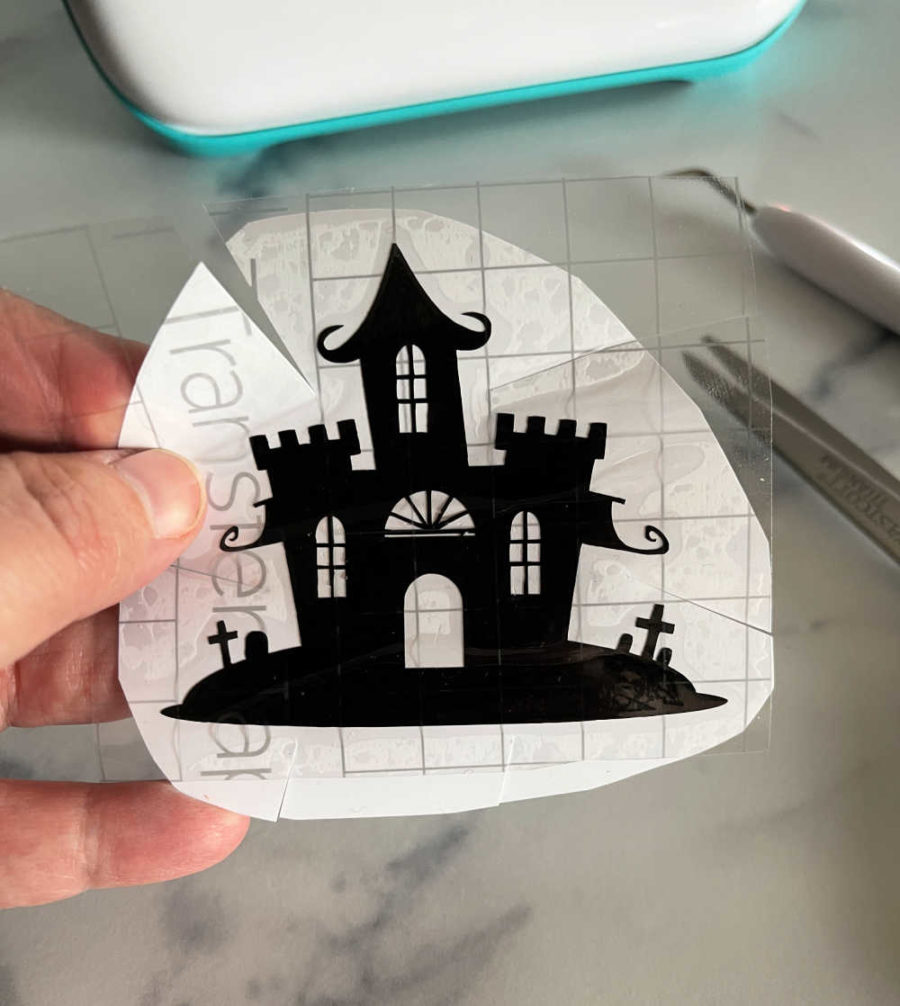
Transfer the House to the Jar
The next step is to put a house on a jar. Cut a piece of transfer tape to fit the house. Transfer paper has 2 layers: a white backing and a clear tape front. Remove the white backing from the clear tape.
Place the front of the house onto the clear tape of the transfer paper.
Use a scraper or weeding tool to rub the design so that it transfers from the white backing to the clear tape. Rub the design’s front and back to get it to stick.
Take scissors and create very small cuts around the house, cutting through the tape and the backing. This will help the design lay flat on the round surface of the jar.
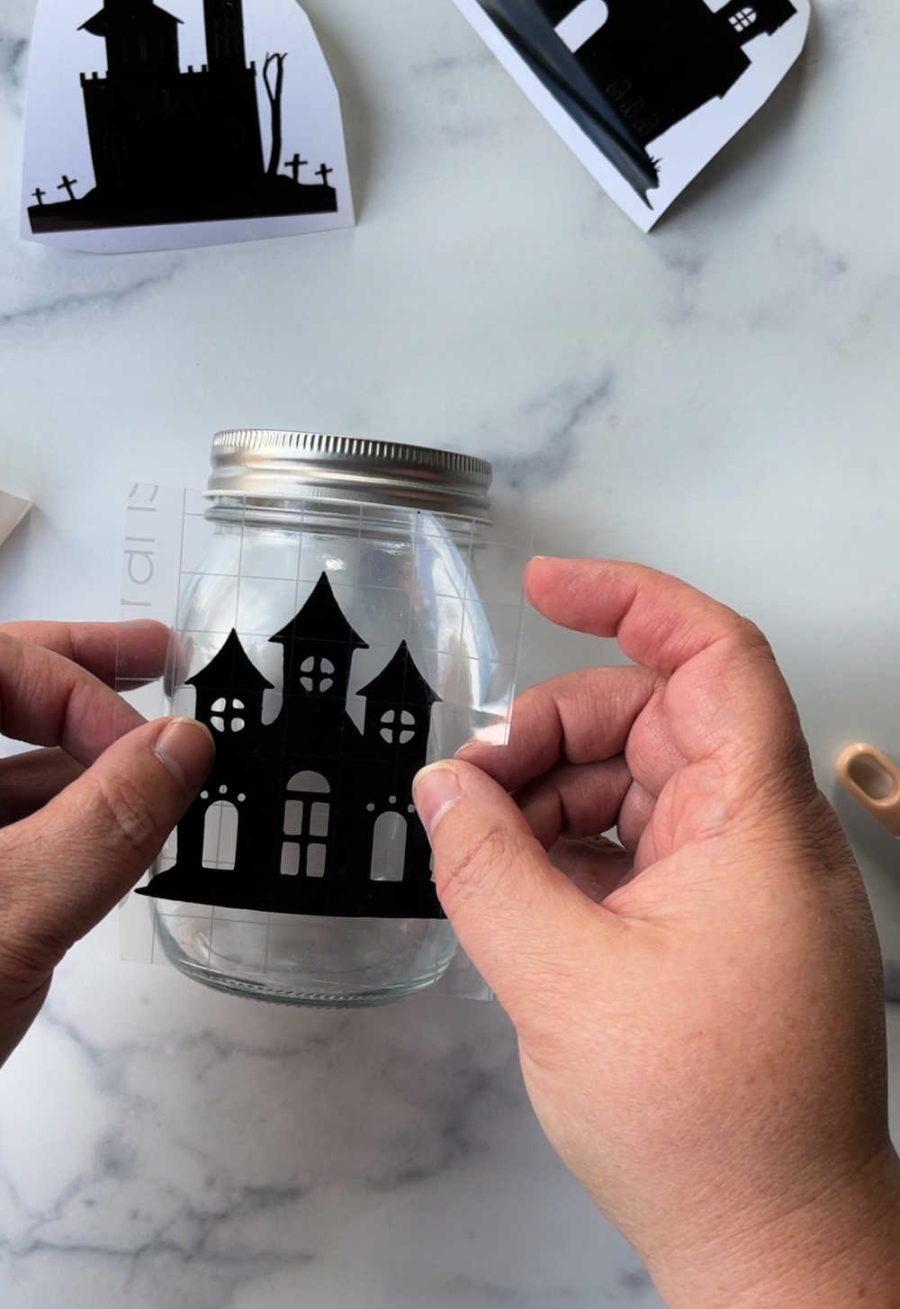
Wipe the jars off with a soft, lint-free cloth. Remove the white backing from the house. The house should stick to the clear transfer paper. Place the house where you’d like it on the jar.
Start in the middle of the design and slowly work your way up, down, and around, sticking the house to the jar and pulling off the clear tape. Go slowly and remove air bubbles as you push down and out. A few of ours had tiny air bubbles, and the vinyl folded in a few areas. Since it’s black and these will be seen at night, it doesn’t show.
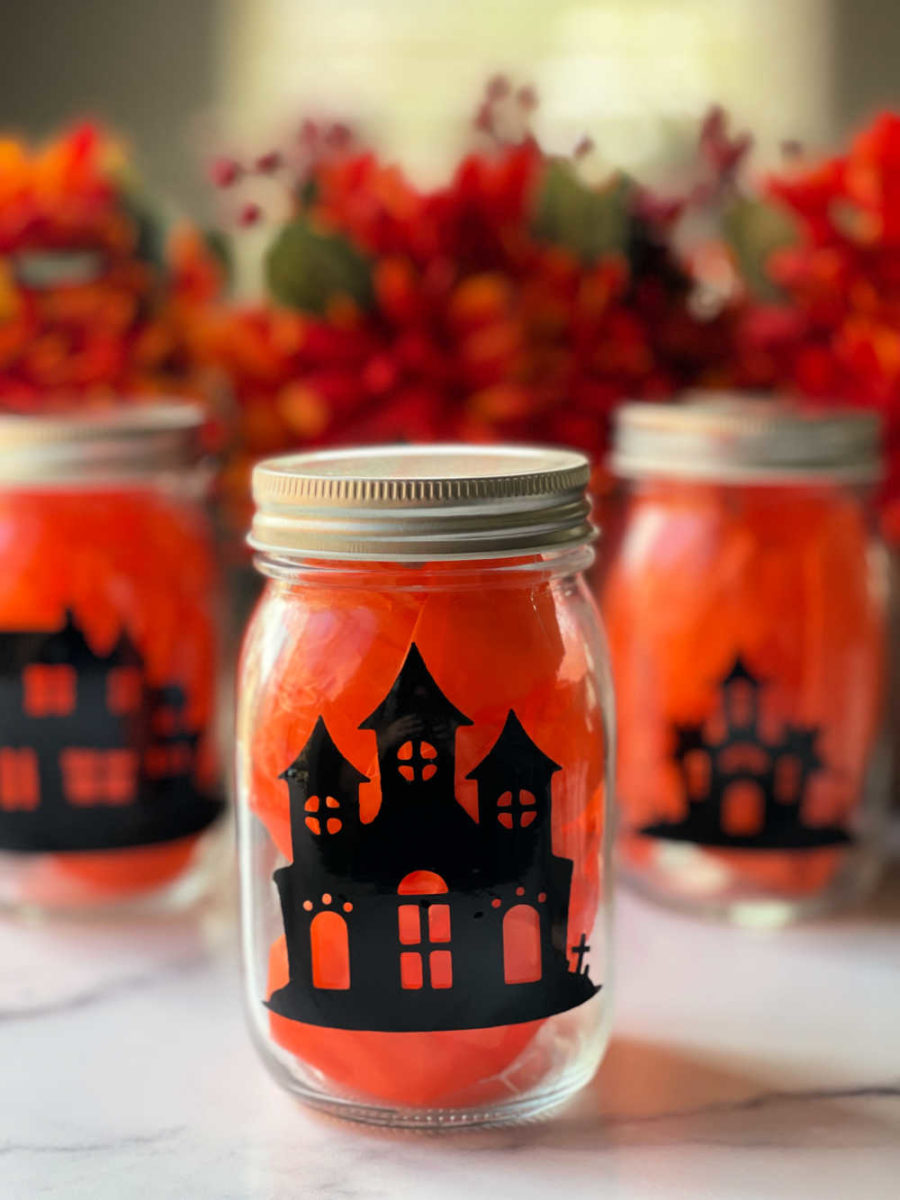
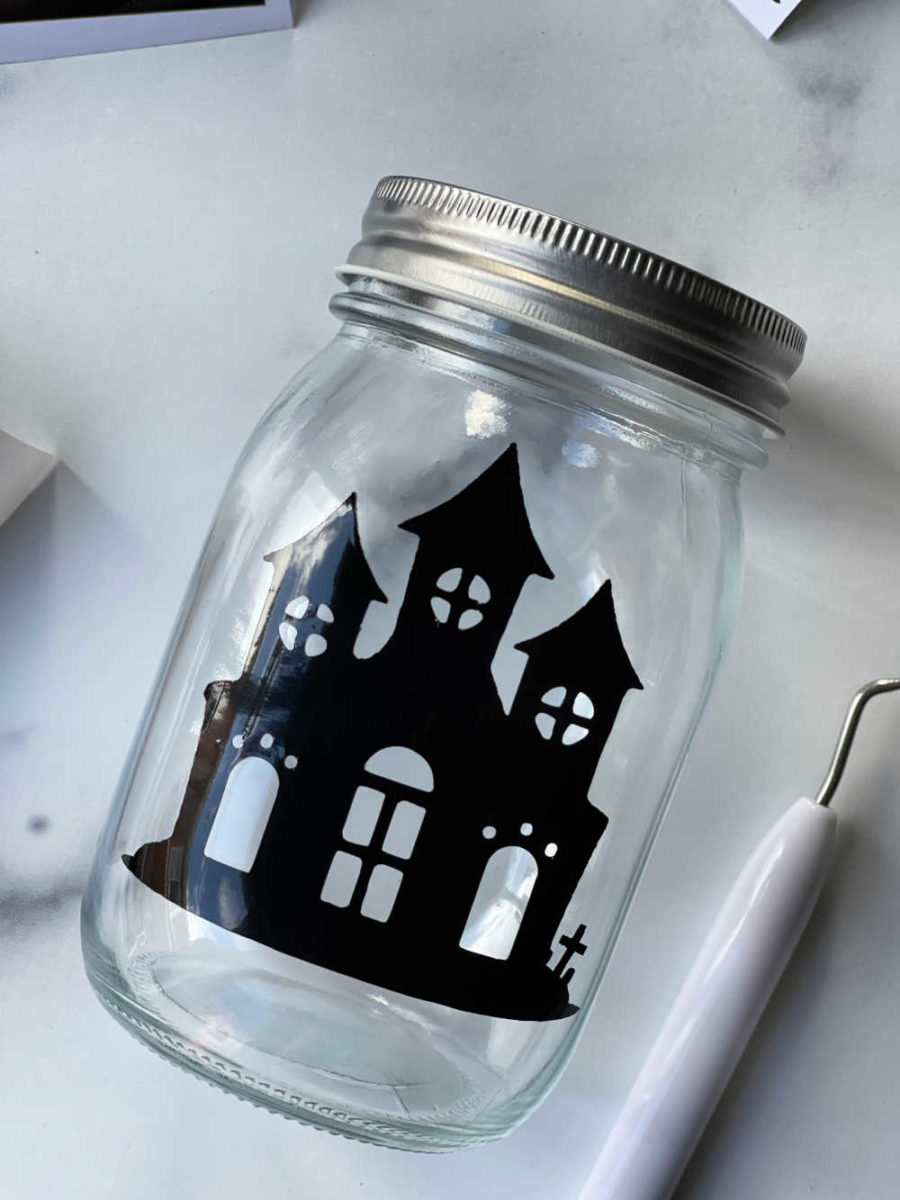
And that’s it! Your Halloween luminaries are ready to display. Add a small battery-operated candle at night to make them glow. You can leave them clear. We added half a sheet of orange tissue paper to give them some color.

Halloween Luminaries
Equipment
- Cricut Joy
- Weeding tools
Materials
- Cricut Joy Smart Vinyl Permanent in Black
- Cricut Joy Transfer Tape
- 16 oz Glass Jars
- Tissue Paper
- Battery-Operated Candles
- Haunted Mansion SVGs
Instructions
- Upload the Halloween Luminaries in to Design Space.
- Click "Make It" to immediately cut the houses or click "Customize" to edit the design.
- Once you are ready to cut, click "Make It."
- Choose "Without Mat" on the next screen.
- Cut the Smart Vinyl to the length indicated in Design Space on the next screen.
- Ensure the Cricut Joy is on and click "Continue" on the bottom right.
- Design Space will connect to your machine.
- Choose Smart Vinyl Permanent as the material.
- Load the vinyl into the Joy when prompted and click GO.
- When the Joy is finished cutting, unload the design and weed it.
- Once weeded, place transfer tape over the design.
- Cut small slits through the tape and the backing.
- Remove the house from the white backing onto the tape.
- Place the house on the jar. Start in the middle and slowly work your way around and out, removing any air bubbles or folds as you peel the transfer tape off.
- Add tissue paper and a candle inside the jar if desired.