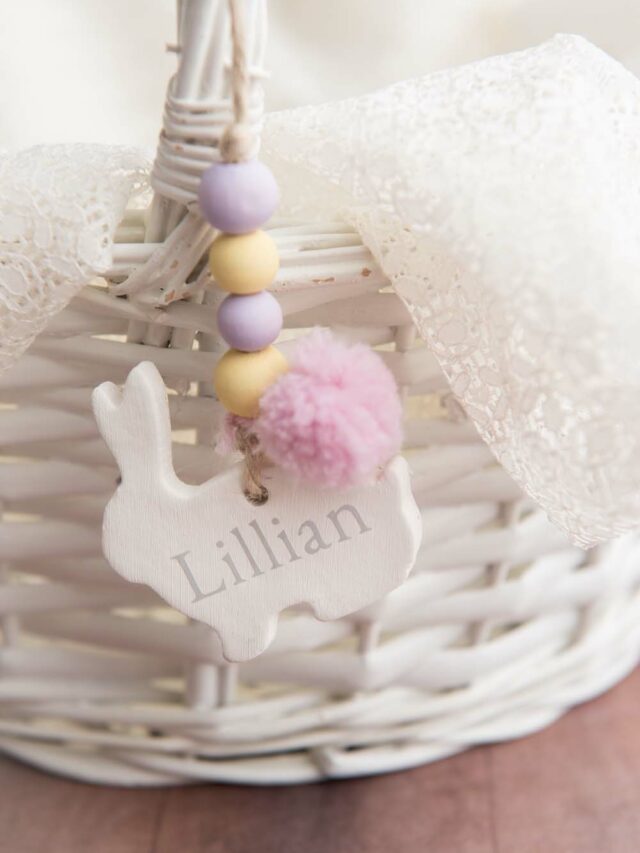
Make DIY Easter basket tags using air dry clay and adhesive vinyl! These cute and customizable tags are easy to make and add a special touch to any Easter basket. With their durable air dry clay base and personalized vinyl designs, these tags are the perfect way to add a bit of personality to your Easter gift-giving. In this tutorial, we’ll walk you through how to make your own DIY Easter basket tags step-by-step, so you can create a one-of-a-kind Easter basket that your loved ones will cherish.
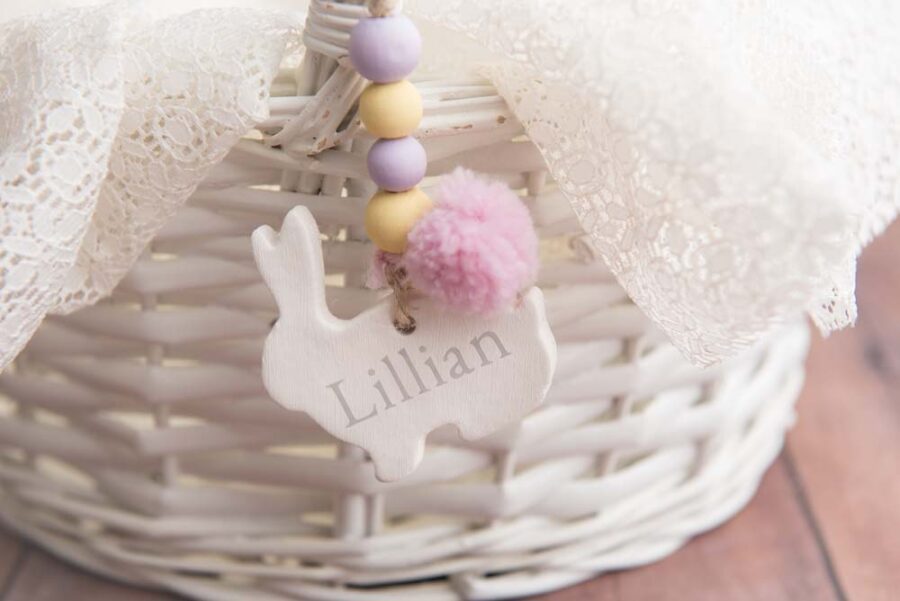
DIY Easter Basket Tags
Easter Basket Tags Materials and Tools
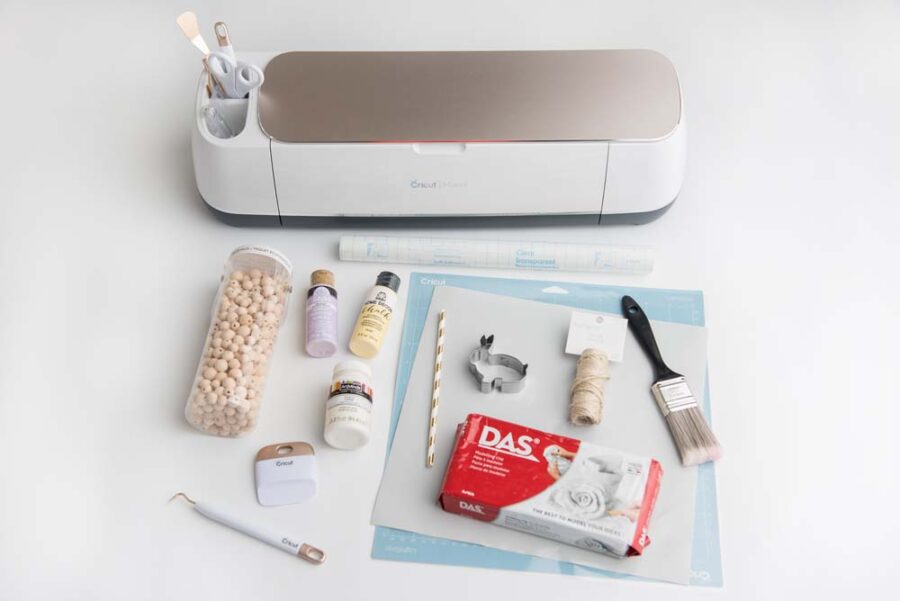
- Cricut Cutting Machine
- Permanent adhesive Vinyl – Check out our Vinyl Guide for more information on which vinyl is best to use
- Transfer Tape
- Cutting Mat if not using Smart Vinyl
- Unfinished wood beads
- Twine
- Craft paint – we used white, yellow, and purple
- DAS Air Dry Clay
- Easter cookie cutters – any shape you like about 2″
- Paint brush
- Weeding tools
- Cricut scraper tool
- Wax paper
- Straw
DIY Easter Basket Tags
Pin For Later-
Reader’s Favorite!
Easter Bunny Plate with Cricut
-
Reader’s Favorite!
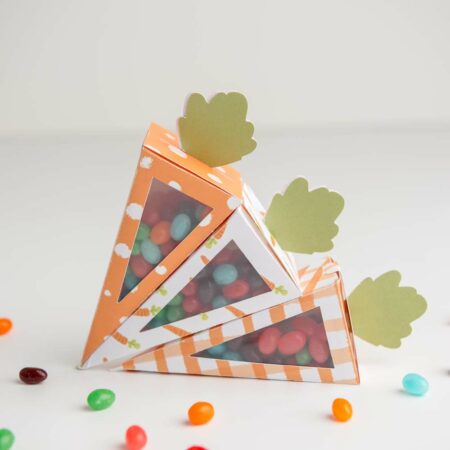
How to Make a Carrot Treat Box with Cricut
Easter Basket Tag Instructions
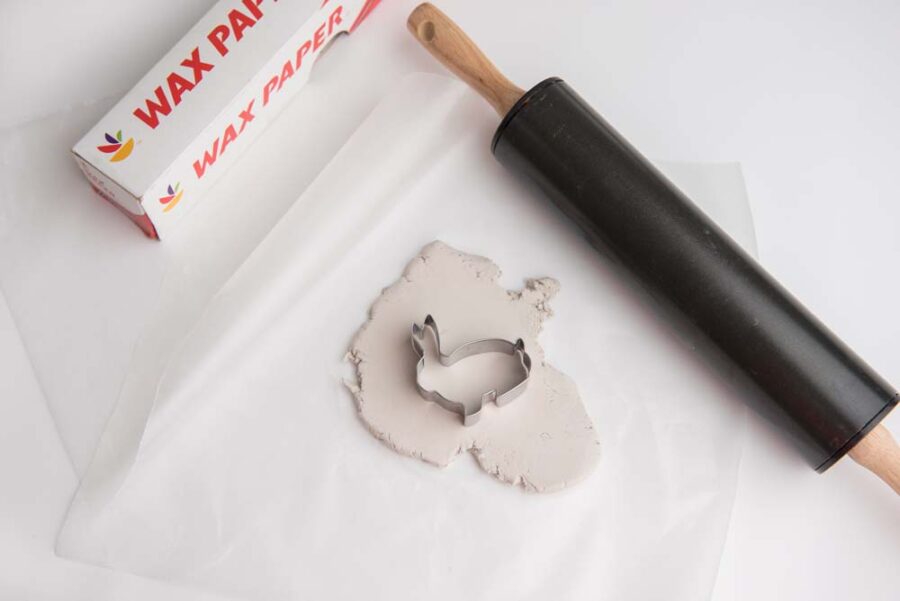
For easiest clean-up and drying, use wax paper when working with the clay. Lay out a wax paper sheet and roll out the clay about 1/4 inch thick. Continuously flip the clay to ensure a smooth surface on both sides.
Add a few drops of water if the clay seems a bit dry. If clay begins to form hair line cracks, lay a sheet of wax paper on top of the clay while using the heat and pressure from your hands to smooth over the top surface of the clay slowly.
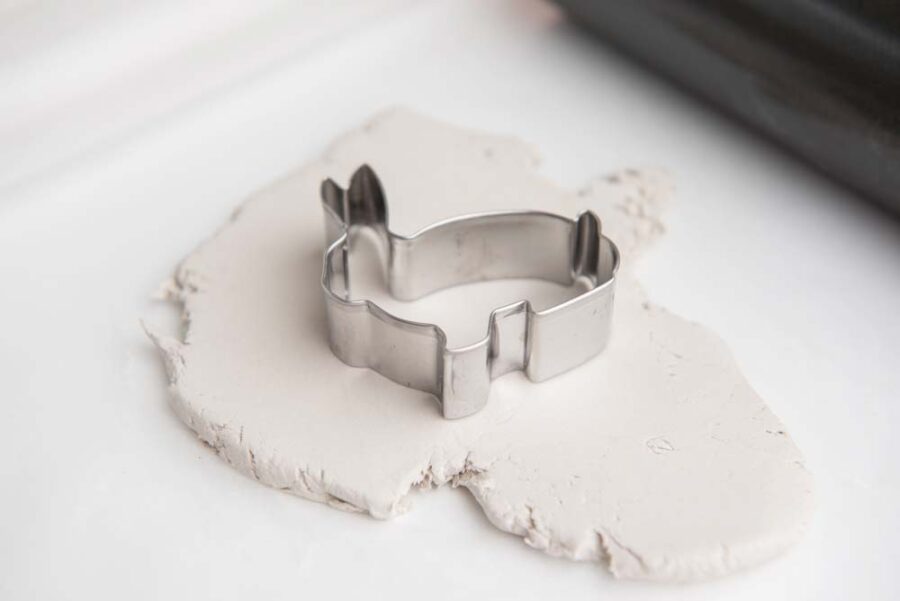
Next, use the bunny cookie cutter to create the bunny shape. To create a hole to thread the twine, use a straw or cake pop stick towards the top of the cutout.
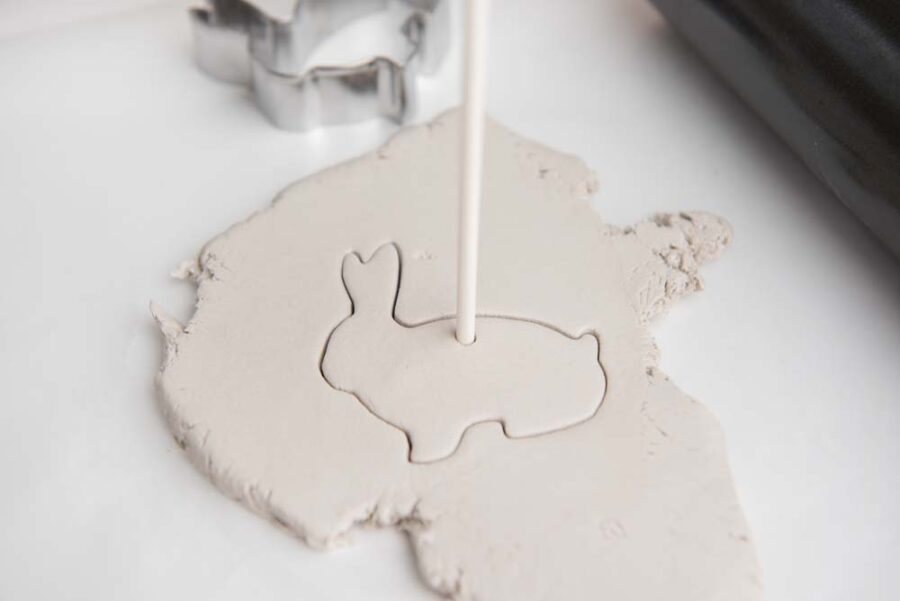
Allow the tags to dry fully for 24-48 hours. This is air dry clay; there is no need to use heat for drying. Check out How to Make Clay Essential Oil Diffuser Necklace for comparing air dry vs. heat dry clay and some tips on using air dry clay. You could use heat-dry clay for the basket tags.
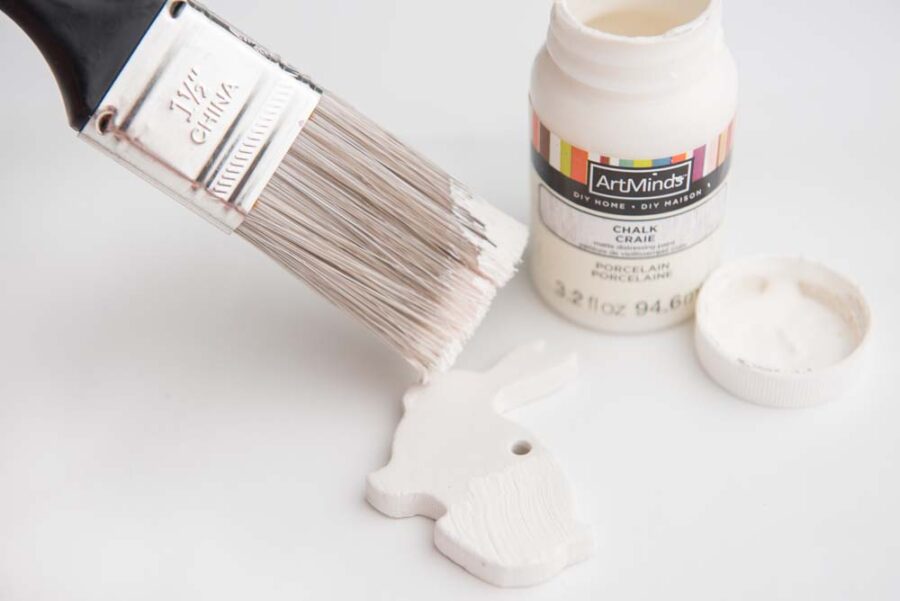
Once the clay is fully dry, paint the tag with white paint and again allow it to dry completely.
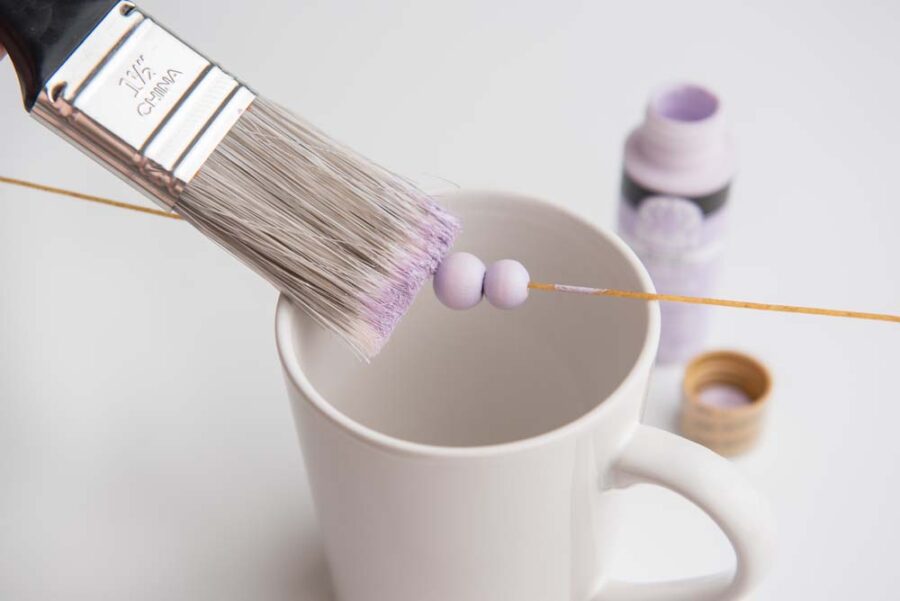
While that is drying, paint the wood beads. I’m using two larger and two smaller beads, but you can choose any size combination you like best. You can also change the colors. Allow the beads to dry.
Tip: Use a stick or small rod to string beads across a cup or mug for easier painting.
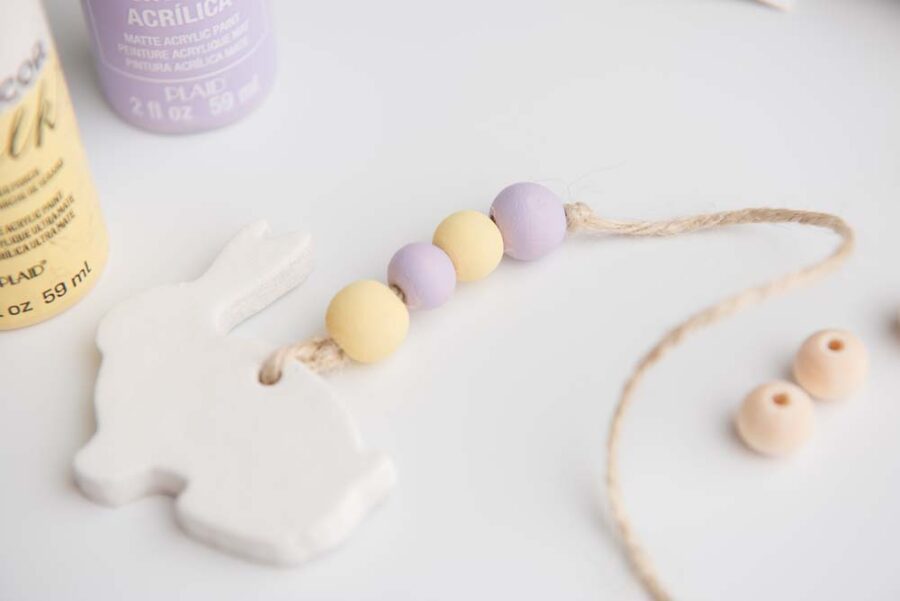
When the tag and beads are dry, thread the twine through the clay bunny and tie a knot towards the top of the hole. Add wood beads, alternating colors or sizes depending on your preferred style. Once all beads are attached, tie another knot towards the top of the last bead to keep them in place. Set the tag aside.
Create Names for Tags in Design Space
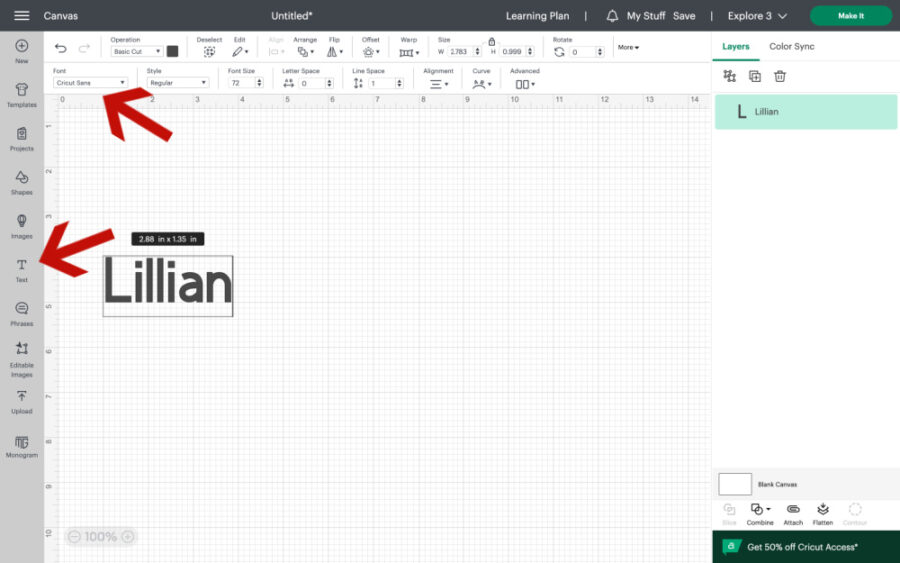
Open a new canvas in Design Space. Add a text box and create the name you want to add to the tag. Sizing will depend on the length of the name; however, I’ve found a good size to be around 1.5” width by 0.5” height. Use any style font that you like. You could also add the year.
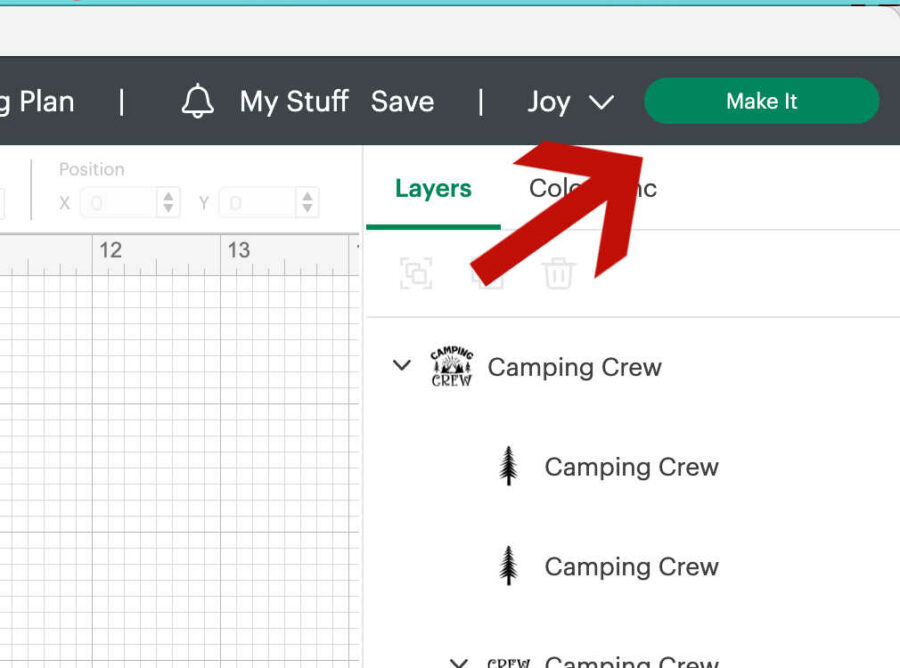
Then click “Make it” on the top right of the screen.
Choose how to load your materials into the Cricut machine.
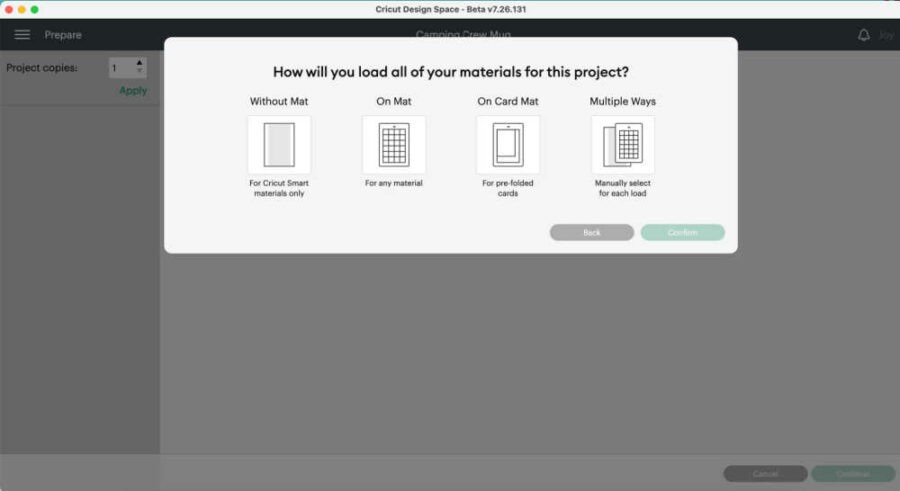
On the next screen, you will choose if you are using a mat or SmartVinyl. Cricut SmartVinyl can be cut without a mat on a Cricut Explore 3, Maker 3, or the Joy. If you are not using SmartVinyl, then click the mat option. You can also cut SmartVinyl on a mat if you prefer. Pick your option, and click “Confirm” in the bottom right corner.
Review the image before cutting.
On the next screen, you will see how the Cricut will cut your image on the vinyl. It will tell you how long the SmartVinyl you will need to be. If you use a mat, it will show you where the image will be on the mat. You can move the image around as needed.
You can also adjust how many images you want the machine to cut on this screen.
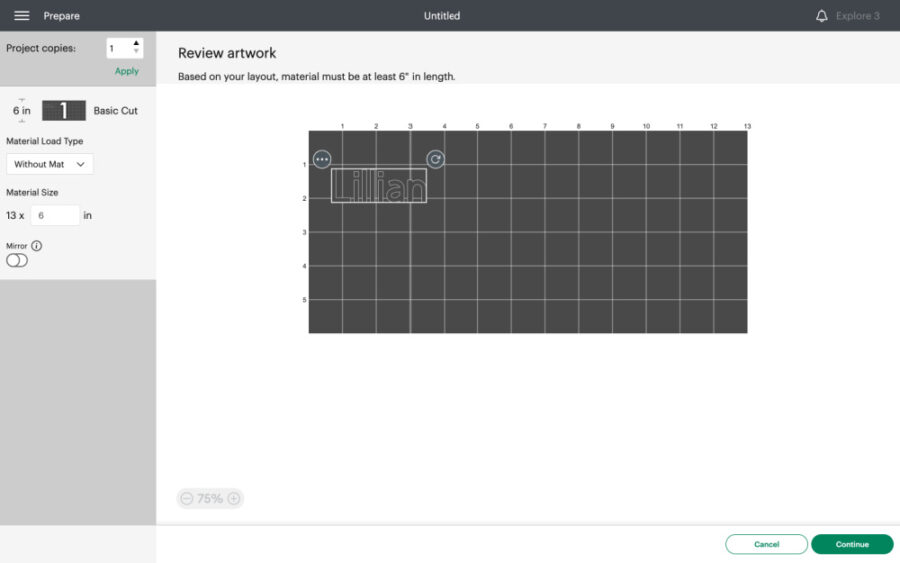
Once you are happy with how many to cut and where they are on the vinyl, turn on your machine and get it ready to cut. If you are using a mat, put the vinyl on the mat, color side facing up.
If using SmartVinyl, cut SmartVinyl to the length needed for the project. Then, click “Continue” on the bottom right of the screen.
Pick your material and load it into the Cricut.
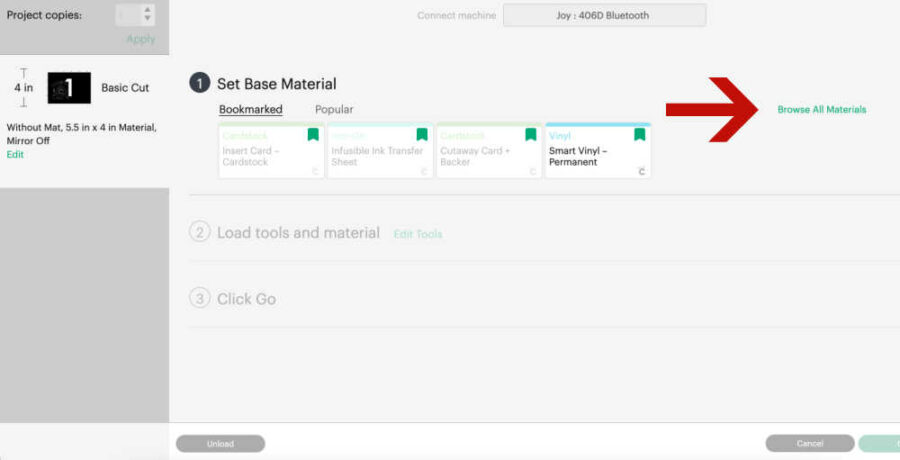
Once you click continue, Design Space will connect via BlueTooth to your machine. Once it has connected, you will choose the material you want to cut. You can click “Browse Materials” to find the vinyl you are using.
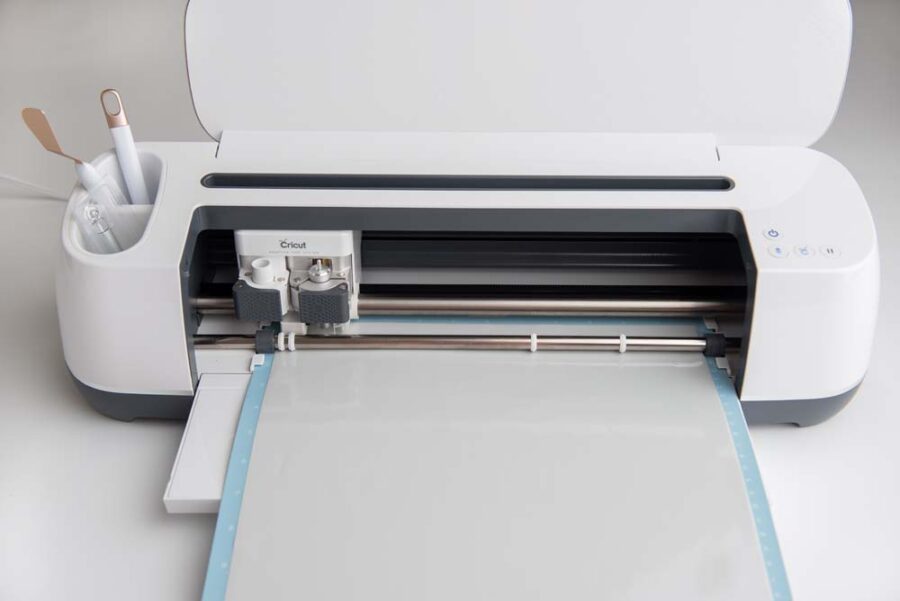
Load the SmartVinyl or the mat into the machine. It is set to default pressure. It will also tell you which blade you need to cut the vinyl. Because you are using vinyl, you will likely only need the fine-point blade.
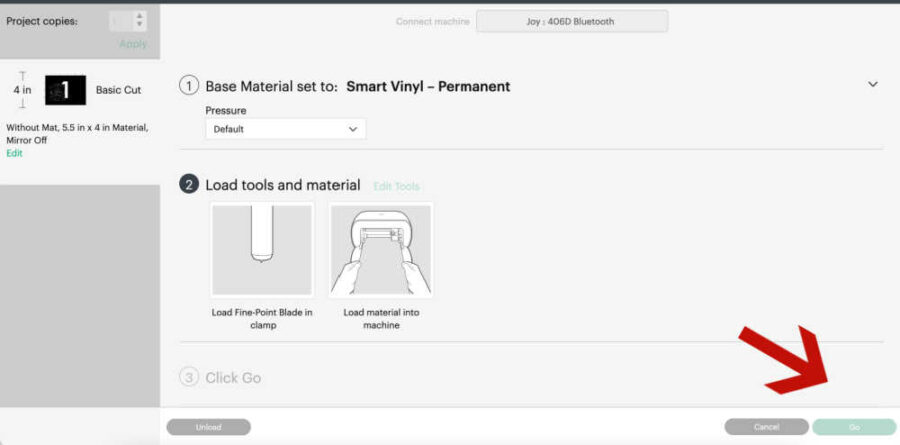
Once the SmartVinyl or mat is properly loaded into the machine, the “Go” button on the bottom right of the screen will highlight. Push that, and the machine will begin its cut.
Once the cut is finished, unload the mat or SmartVinyl and click “Done” in Design Space.
Weed the design.
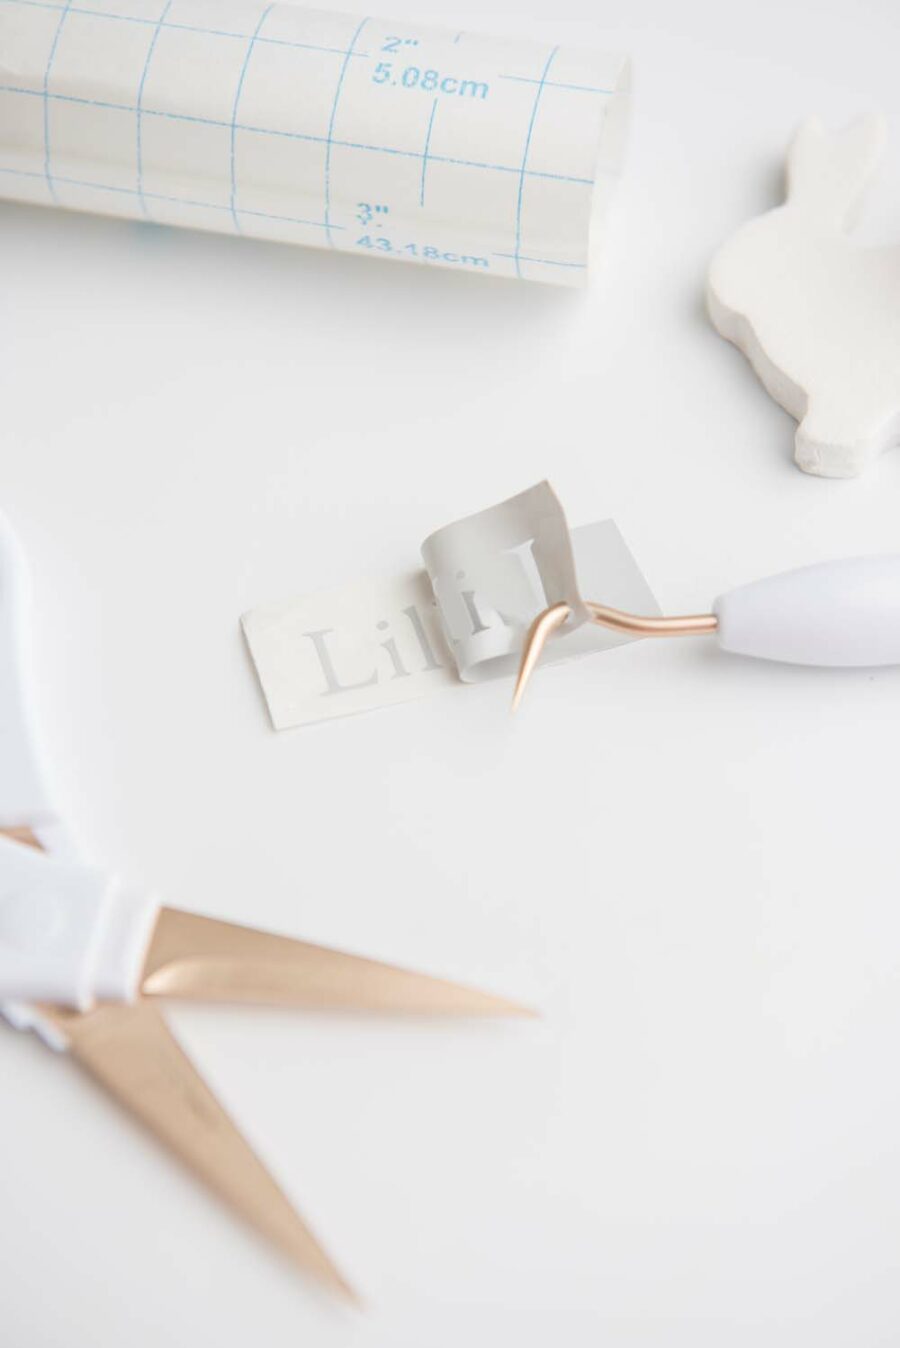
Once the design is unloaded, remove the vinyl from the mat. Using weeding tools, remove the image’s unnecessary and excess vinyl parts. This is called “weeding.” You will weed out the vinyl you don’t need for the final image.
Use transfer tape to adhere the design.
After fully weeding the design, you will use transfer tape to remove the image from the white backing and place it onto the Easter basket tag. Cut a piece of transfer tape the same size as the image. You can trim it to be as small as you like.
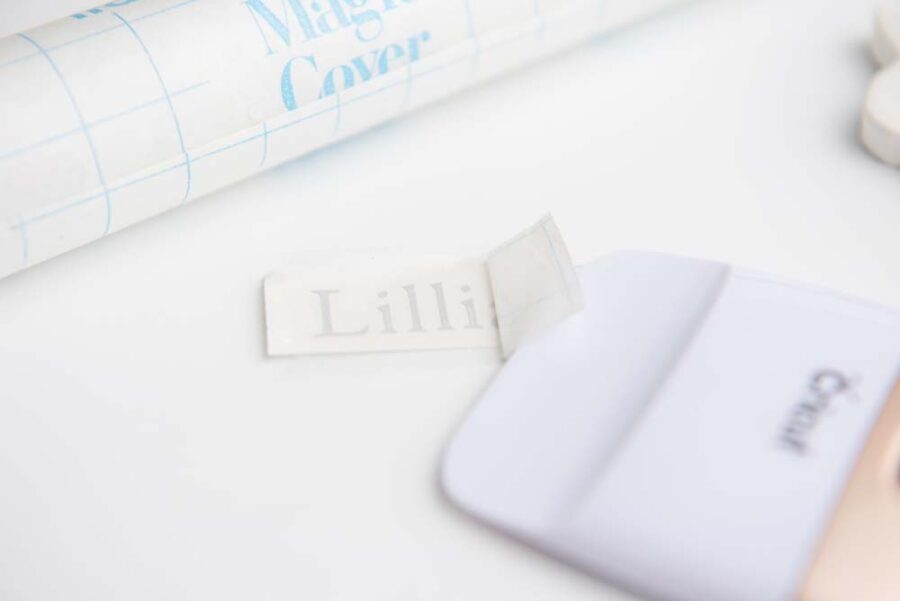
Remove the clear part of the transfer tape from the white backing. Place the clear tape over the top of the image. Rub the transfer tape onto the vinyl image. You want to attach the vinyl to the clear transfer tape. I like using the Cricut Scraper tool for this. Rub both the front and back.
Carefully peel the white backing off the vinyl, making sure that the vinyl has attached to the transfer tape. The vinyl can be stubborn and want to stay put. Just be patient and keep rubbing and gently easing it onto the tape.
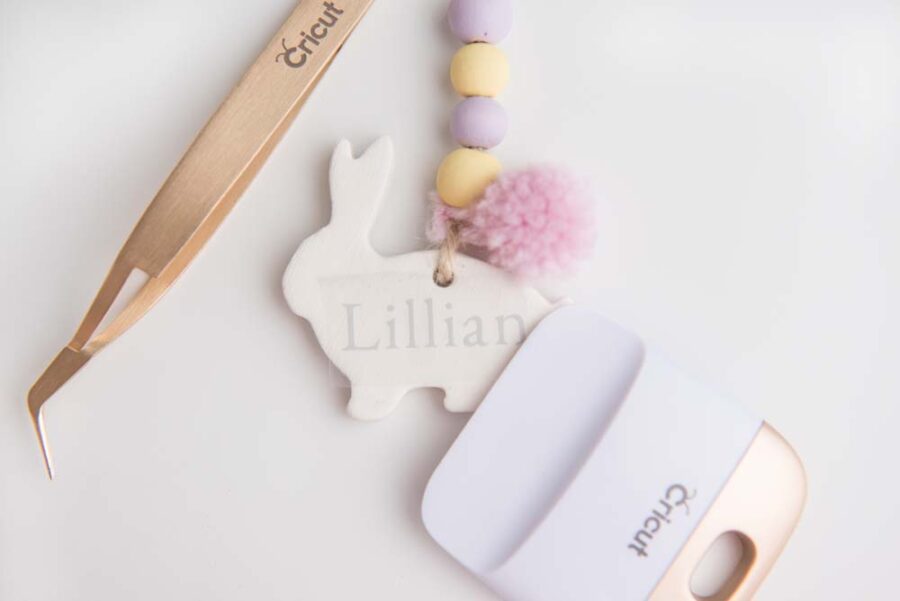
Once the vinyl is on the clear tape, adhere to the tag. Rub the transfer tape again to adhere the design to your Easter basket tag.
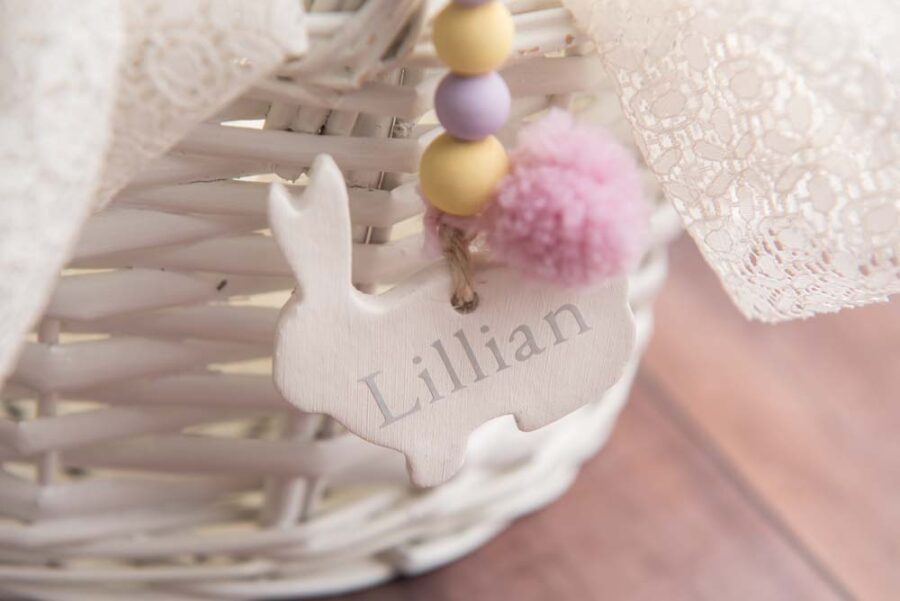
Tie the tag to your Easter basket, and you’re all finished! You can further personalize the basket tags by adding fun charms, pom-poms, or the date or year.
DIY Easter Basket Tags
Equipment
- Cricut Cutting Machine
- Cutting Mat if not using Smart Vinyl
- Paint brush
- Weeding tools
- Cricut scraper tool
- Wax paper
- Straw
Materials
- Permanent adhesive Vinyl
- Transfer Tape
- Unfinished wood beads
- Twine
- Craft paint
- DAS Air Dry Clay
Instructions
- Lay out a wax paper sheet and roll out the clay about 1/4 inch thick. Continuously flip the clay to ensure a smooth surface on both sides.
- Use the bunny cookie cutter to create the bunny shape. To create a hole to thread the twine, use a straw or cake pop stick towards the top of the cutout. Allow the tags to dry fully for 24-48 hours.
- Paint the tag with white paint and again allow it to dry completely.
- Paint the wood beads.
- Thread the twine through the clay bunny and tie a knot towards the top of the hole.
- Add wood beads, alternating colors or sizes depending on your preferred style. Once all beads are attached, tie another knot towards the top of the last bead to keep them in place.
- Open a new canvas in Design Space. Add a text box and create the name to add to the tag. Sizing will depend on the length of the name. Use any style font that you like.
- Then click “Make it” on the top right of the screen. Follow the prompts to choose mat or matless cutting and material type. Load mat or vinyl and cut out the name.
- When cutting is complete, unload and weed the vinyl leaving the name.
- Use transfer tape to adhere the name to the Easter basket tag.
- Tie the basket tag on your Easter basket.


