
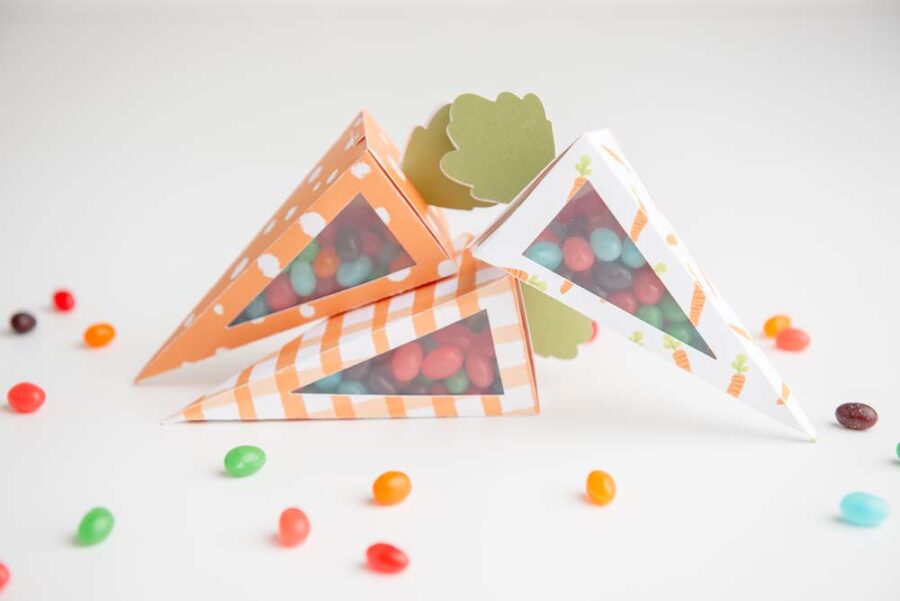
Make a paper carrot treat box using cardstock, glue, acetate sheets and a Cricut cutting machine. This DIY project is perfect for Easter celebrations and springtime brunches as a fun way to give treats. The carrot boxes pair well with Easter carrot decorations like Paper Carrot Garland for a fun carrot themed Easter celebration
If you’re a fan of creating unique and personalized party favors or gift boxes, a Cricut cutting machine is the perfect tool! With its precise cutting abilities, a Cricut machine allows you to cut out and make intricate designs easily. This tutorial will show you how to create a carrot treat box using your Cricut machine. So grab your Cricut and let’s get started!
How to Make a Carrot Box with Cricut
Carrot Box Materials and Tools

- Cricut Cutting Machine
- Scoring stylus or Scoring wheel
- Card Stock – 8.5 x 11″, 65-80 lb in 2 different colors or patterns
- Acetate Sheets
- Cricut LightGrip Cutting Mat (Blue)
- Craft Glue – we like Bearly Art Craft Glue for paper crafts
- Carrot Box SVG file
- Weeding tools
How to Make a Carrot Treat Box
Pin For Later-

Reader’s Favorite!
Printable Easter Bunny Basket
-
Reader’s Favorite!
Easter Bunny Plate with Cricut


Carrot Box Instructions
Upload the SVG file into Design Space.
We use Design Space on a Mac laptop. The app may be a little different for uploading.
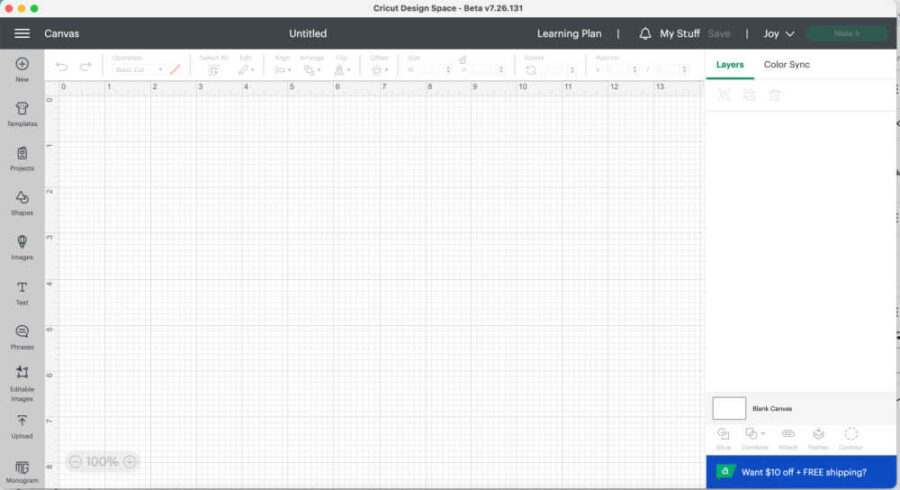
On your laptop, open Design Space and click “New Project” on the top left of the screen. This will bring you a blank canvas, as you see above.
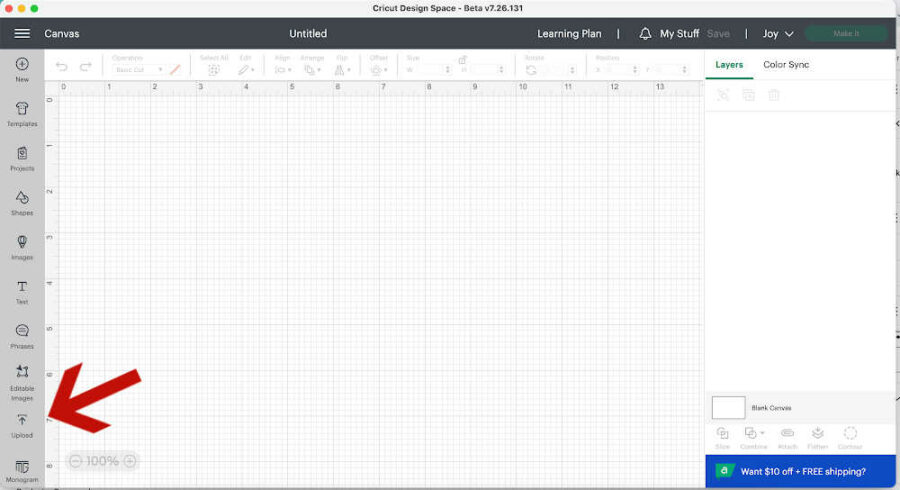
Click “Upload” on the bottom of the gray dashboard on the left side of the screen.
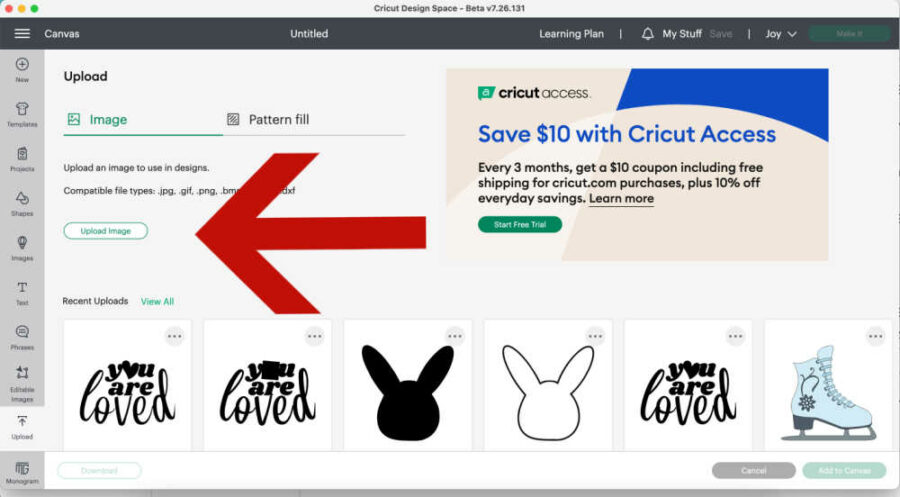
Click “Upload Image” on the next screen.
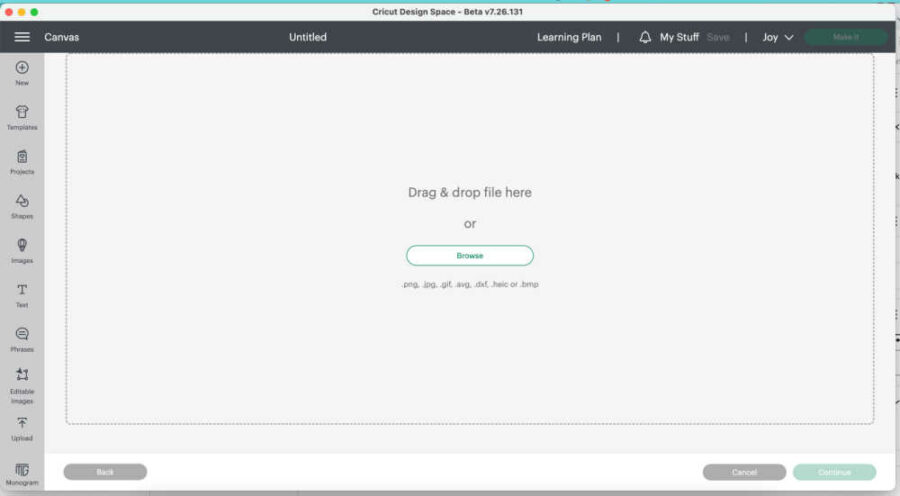
Click “Browse” and choose the carrot box SVG file you want to upload.
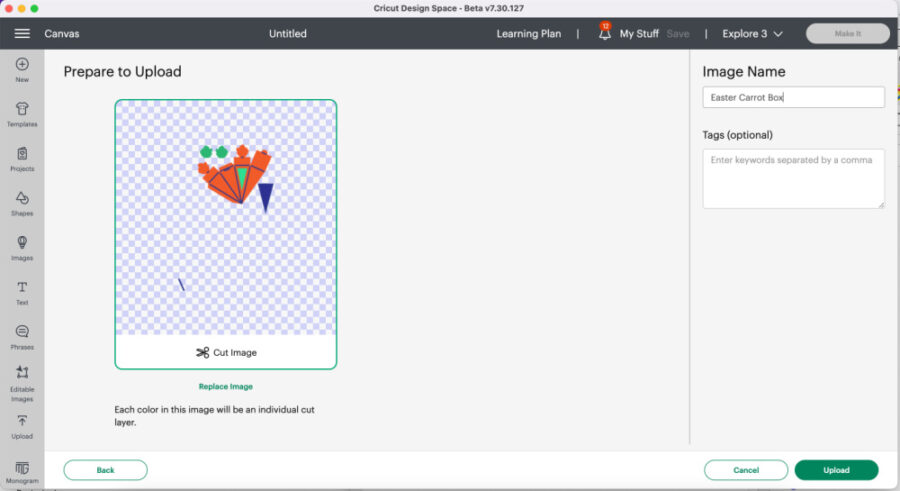
On the top right, name the file and then press upload on the bottom right. This will add the SVG to your Design Space account.
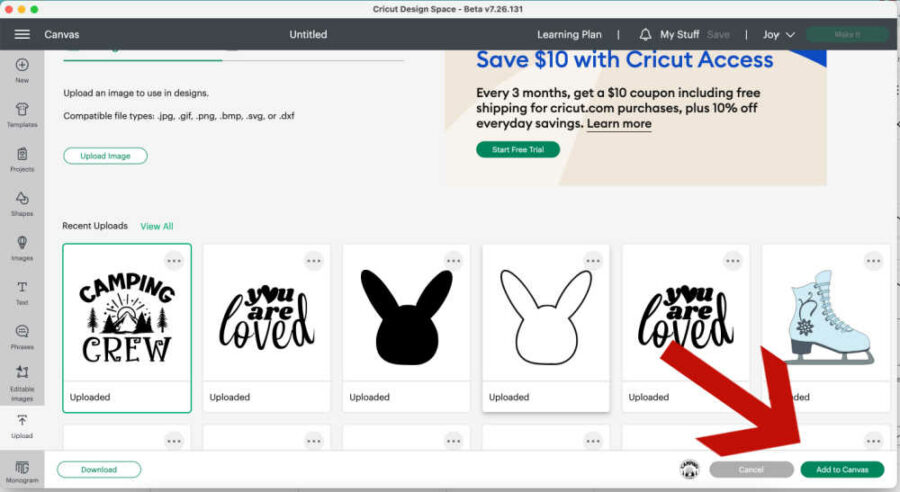
The next screen shows that the SVG has been uploaded and is ready to select. Click “Add to canvas” on the bottom right. Your image is now on the Design Space canvas, ready to be edited and cut.
Cut and Score the Carrot Box
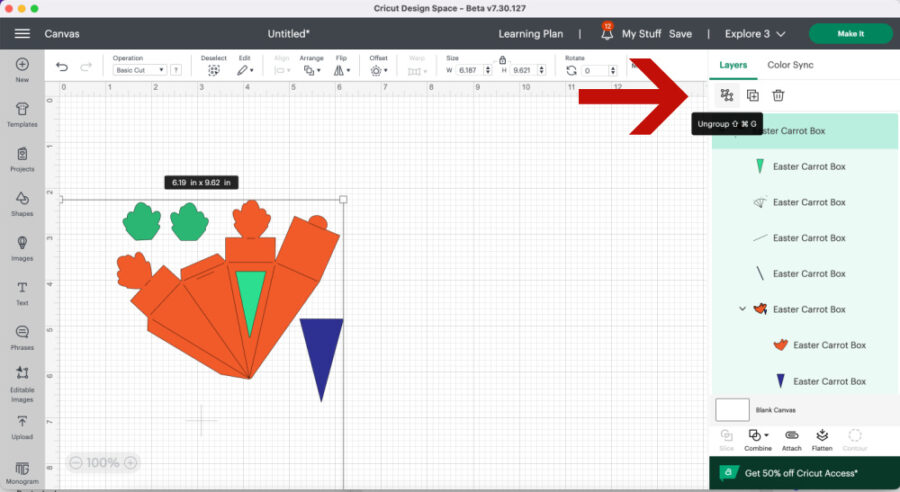
Highlight the file and click “Ungroup” on the top right so you can work on all layers.
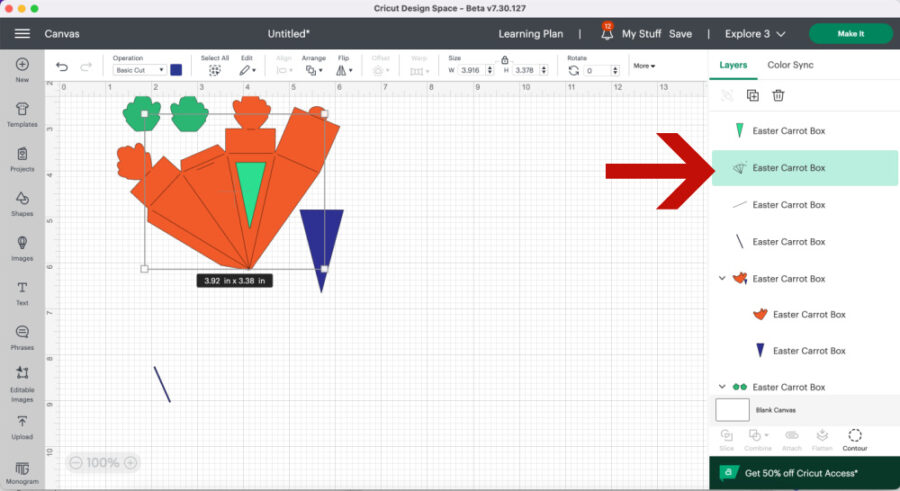
On the right side, find the layer that contains all the scoring lines. Click on that layer so it is selected.

Under “line type” on the top left toolbar, click the drop-down and click on “score.” The lines will change from solid to dotted.

On the layers panel, use the eye icon to turn off the blue acetate window and the green stems. These will be cut separately for the window and colored stems.
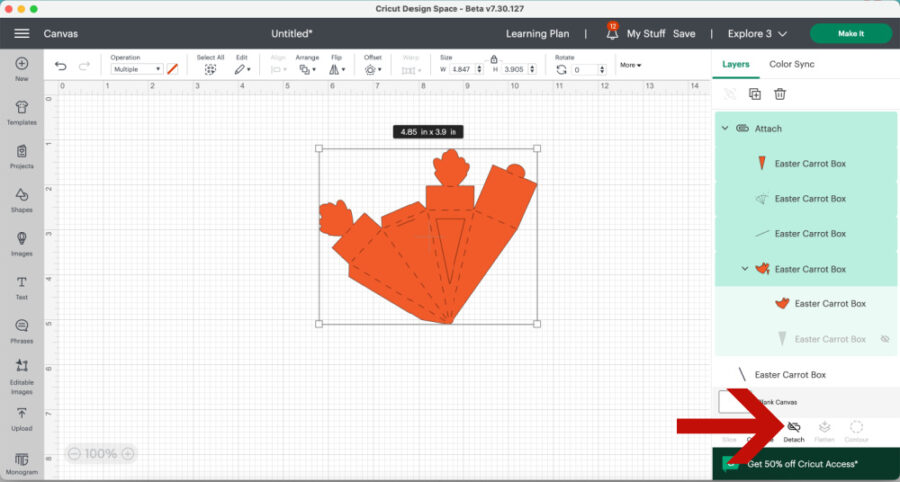
Next, highlight the entire group and attach. Attaching will ensure that the scoring lines will be on the same mat as your cutting layer and keep them together.

Turn the file vertically to get the most out of the cut (you can use 8.5×11” card stock this way), then change the size to a width of approximately 8 inches and a height of approximately 10 inches.
Send the carrot box to your Cricut machine to cut.
Choose your machine in the drop-down box on the top right. Choose your machine.
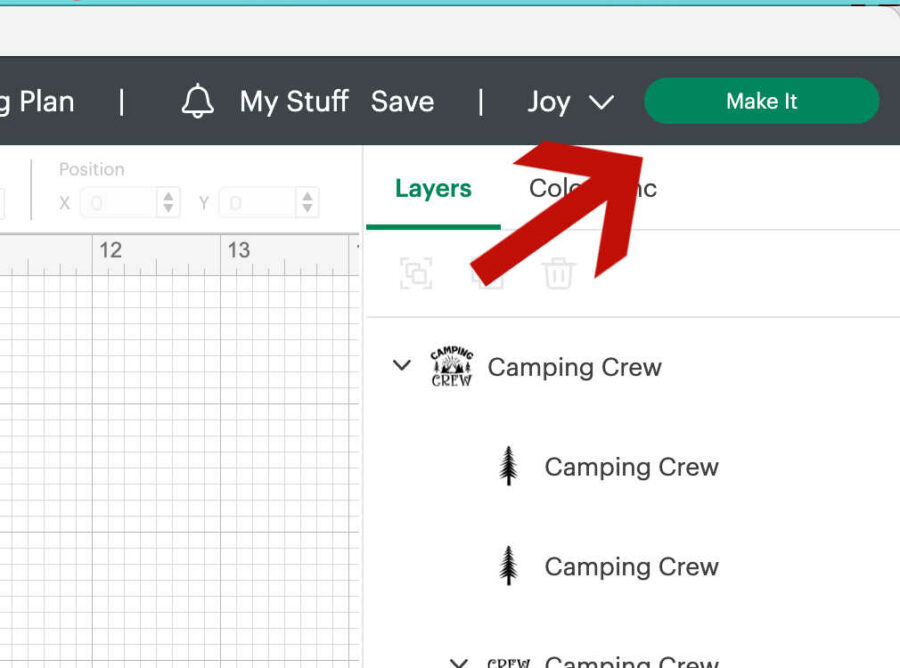
Click “Make It” in the window’s top right corner.
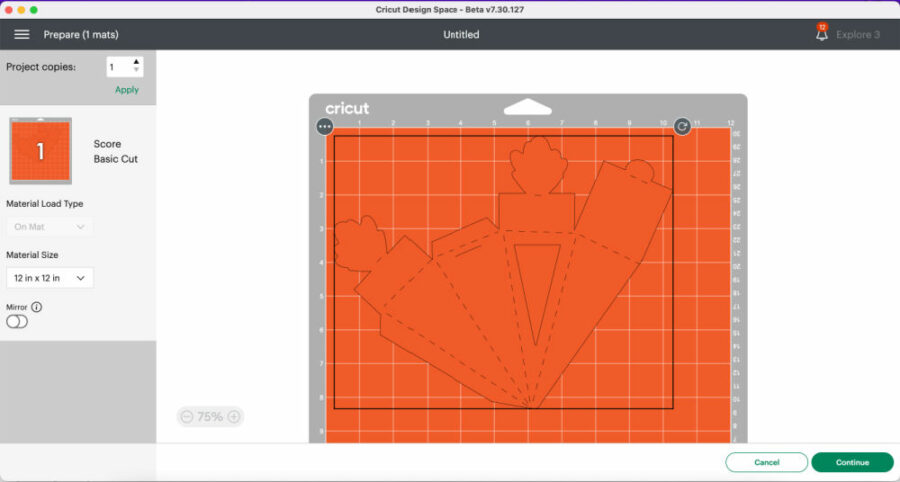
This is how your mat should look on the next screen if score lines have been properly attached. If all looks correct, hit continue.
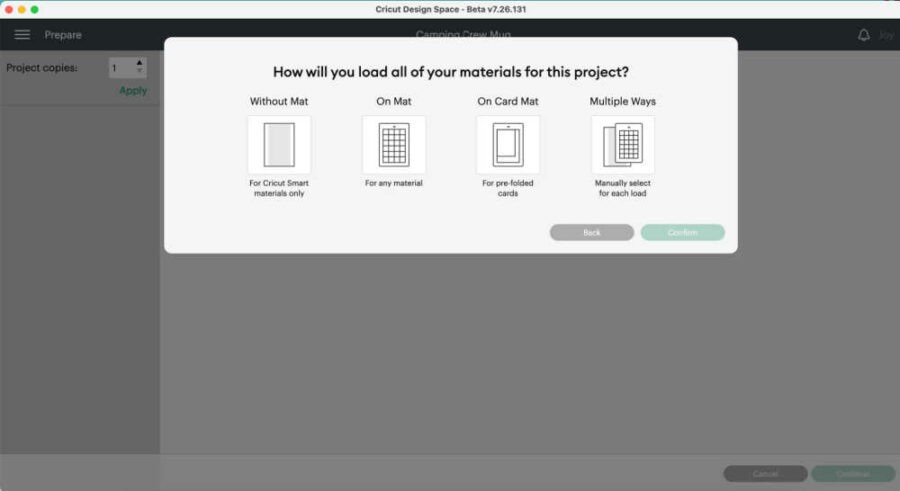
On the next screen, you choose the option “For any material” to cut On mat. Turn on your Cricut machine. Then, click “Confirm” in the bottom right corner.
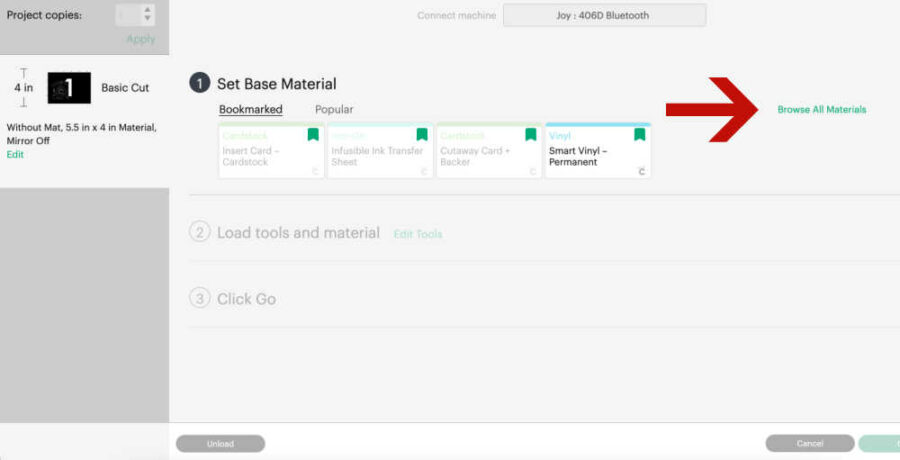
Design Space will connect to your machine via Bluetooth. Choose the material options for medium card stock.
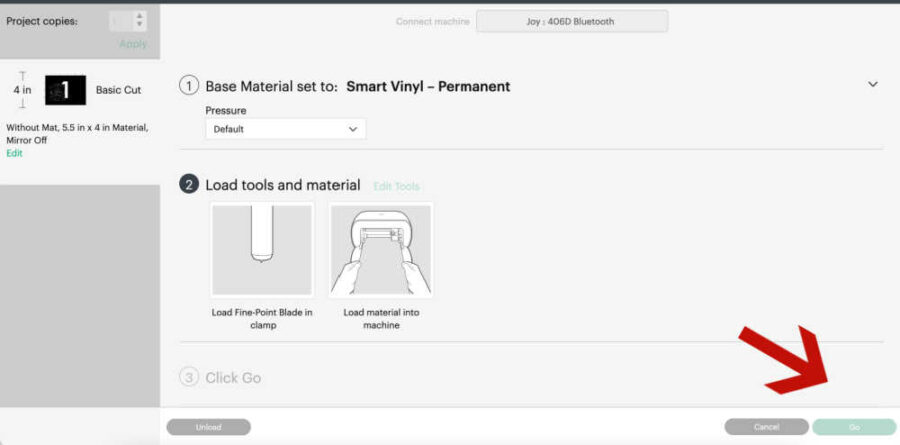
It is set to default pressure. When cutting card stock, I like to use more pressure (just to be safe). If using a scoring stylus instead of scoring wheel be sure to let your machine know under edit tools.

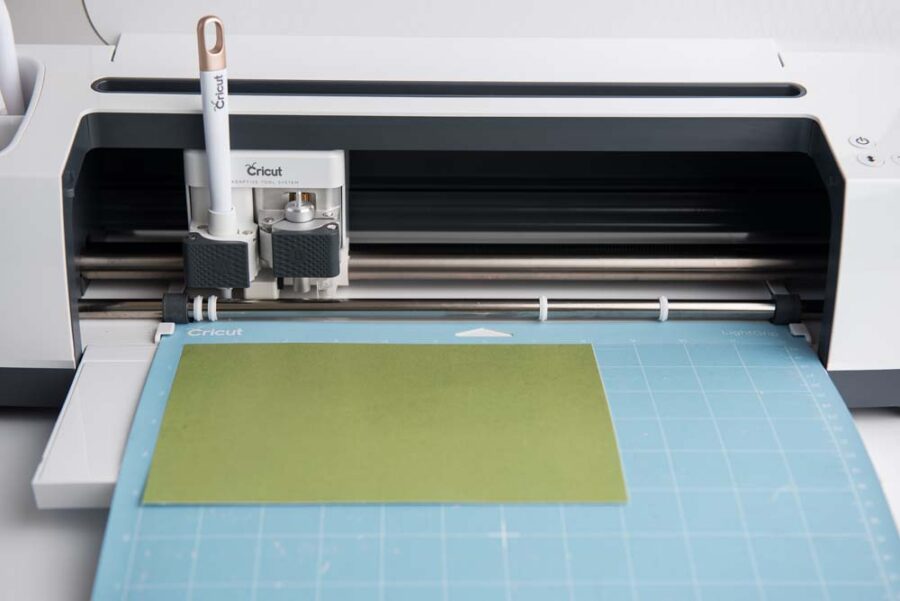
Load the card stock onto a blue LightGrip mat. Note that Design Space turned the carrot back to horizontal. Make sure to put the paper on in the same orientation as it looks on the screen.
Once the mat is properly loaded into the machine, the “Go” button on the bottom right of the screen will highlight. Push that, and the machine will begin its cut. Once the cut is finished, unload the mat and click “Done” in Design Space.
Cut out the acetate sheet.
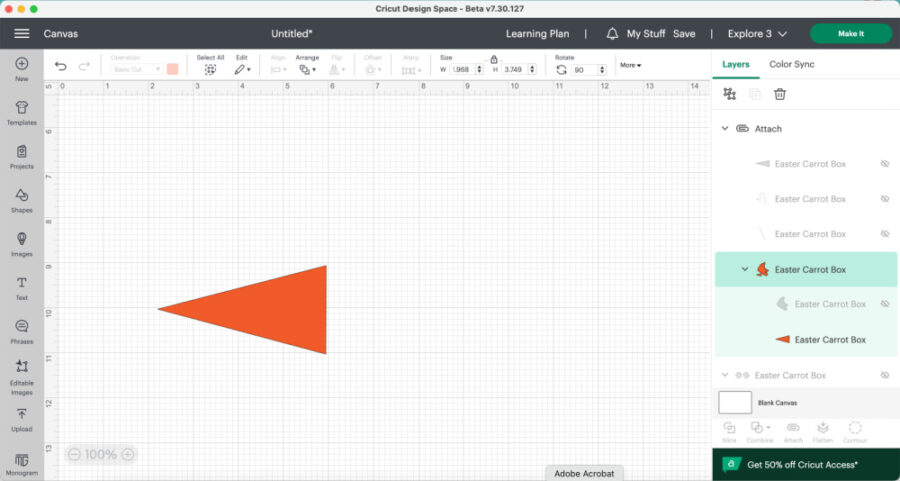
Turn the acetate triangle back on in the layers panel and turn off all the other layers.
Hit make and choose “On mat” on the next screen. Choose acetate as the material. Adjust the pressure to More pressure. Load a sheet of acetate onto a blue LightGrip mat and load into your machine. Hit “Go” and unload the mat when the cut is finished.
Cut out the carrot leaves and stems.
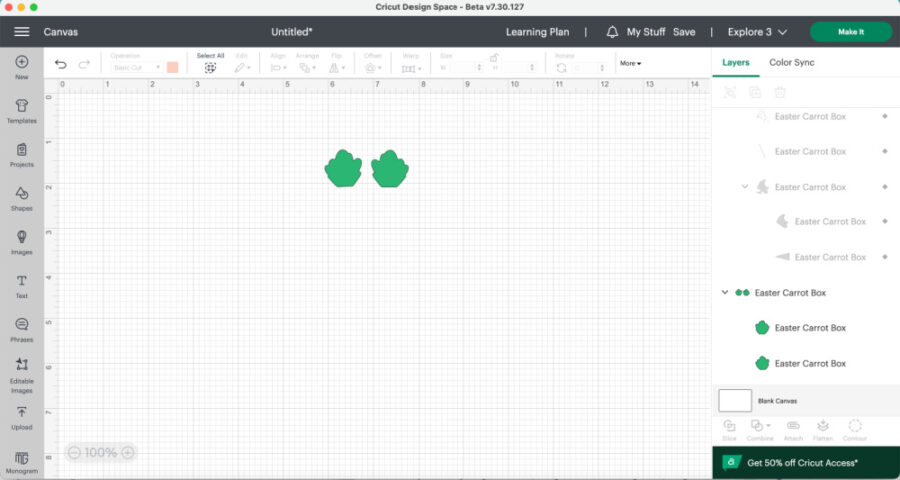
Turn the green stems back on in the layers panel and turn off all the other layers.
Follow the same process as above to cut out the stems and leaves. Hit make and load a sheet of green or patterned card stock on to a blue LightGrip mat. Set material to medium card stock, more pressure and hit go.
Assemble the Carrot Boxes
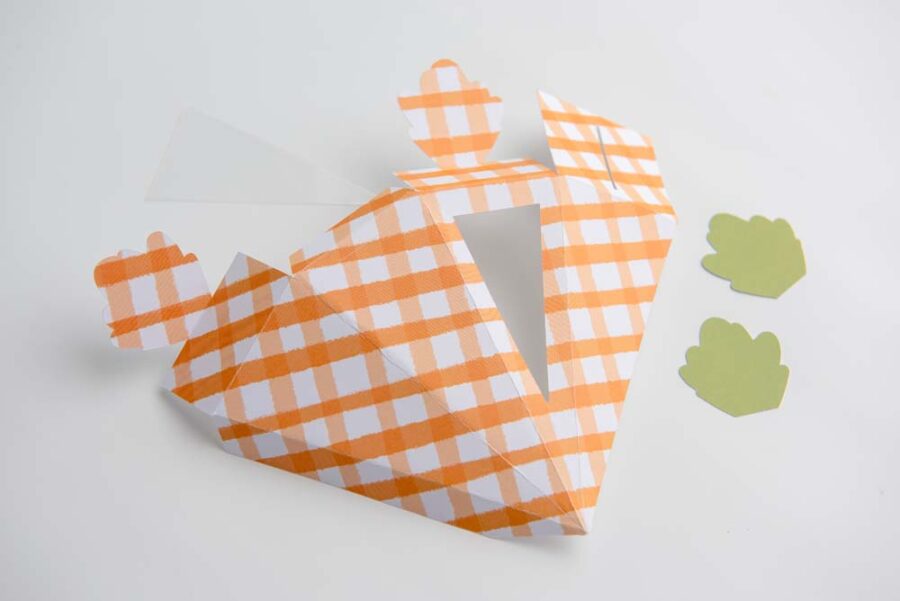
Once all pieces are cut, assemble the boxes. Begin by folding all the score lines.
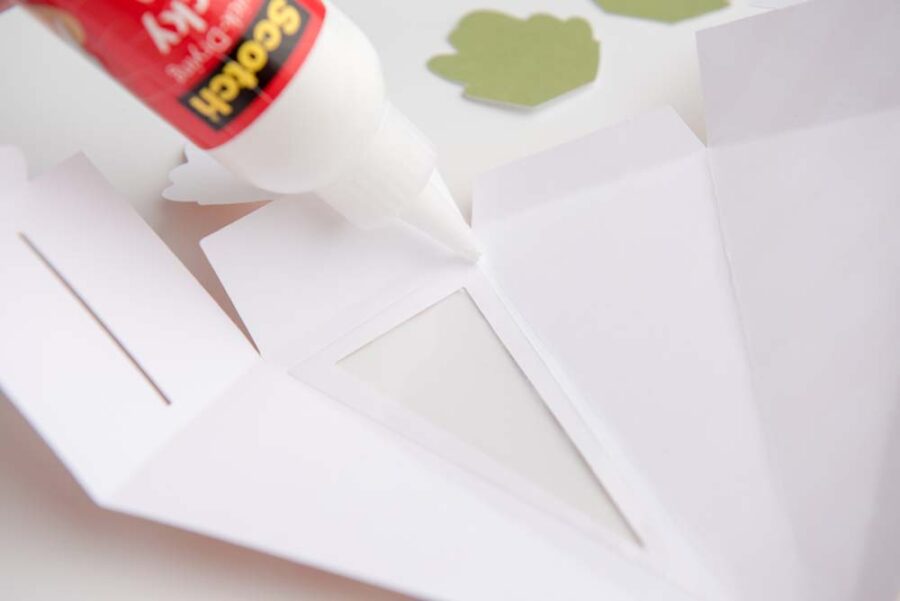
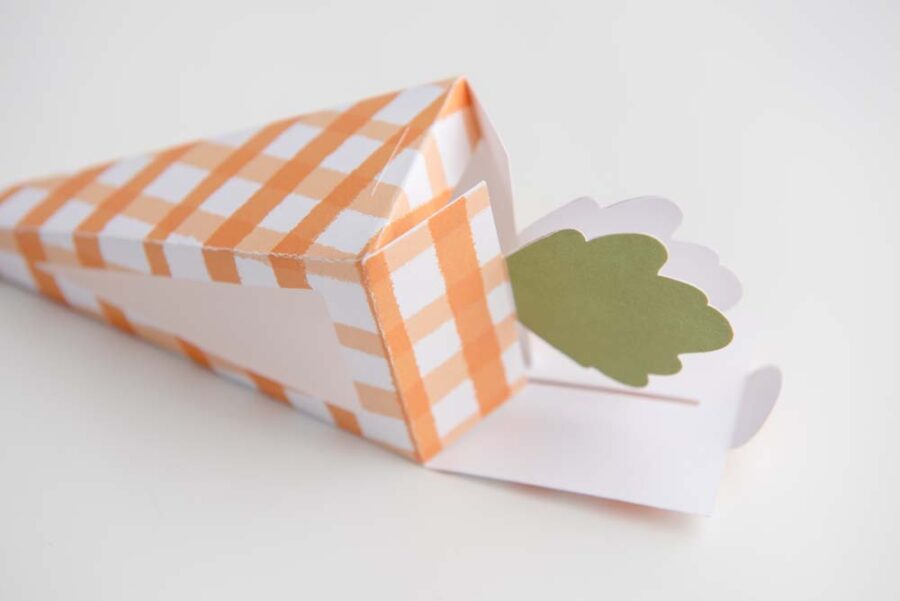
Next, glue the acetate triangle/window onto the inside of the box around the cut out triangle.
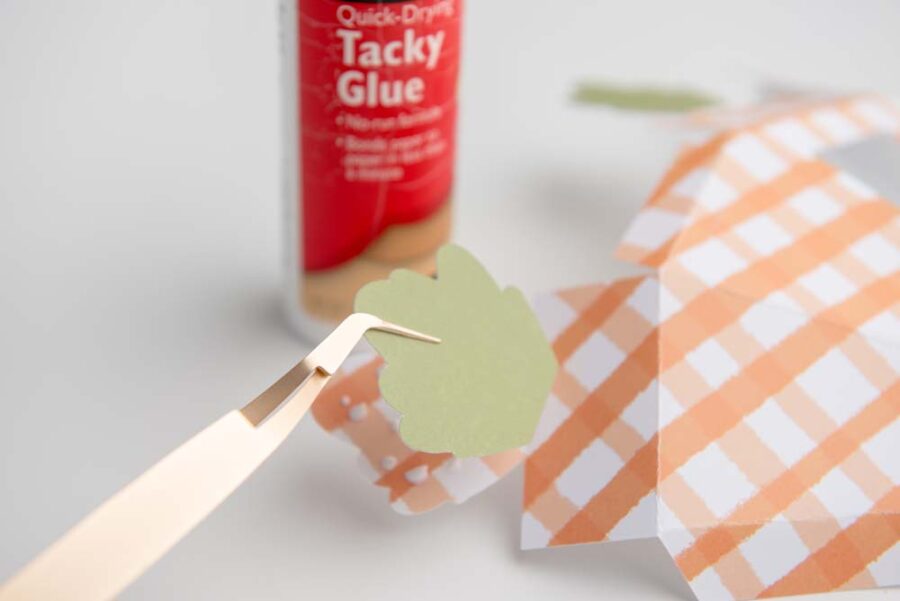
Then, glue the separate stems (our are green) onto the stems that are attached to the carrot box. Match up the shapes for each side and glue the green leaf/stem onto the box. Allow the glue to fully dry.
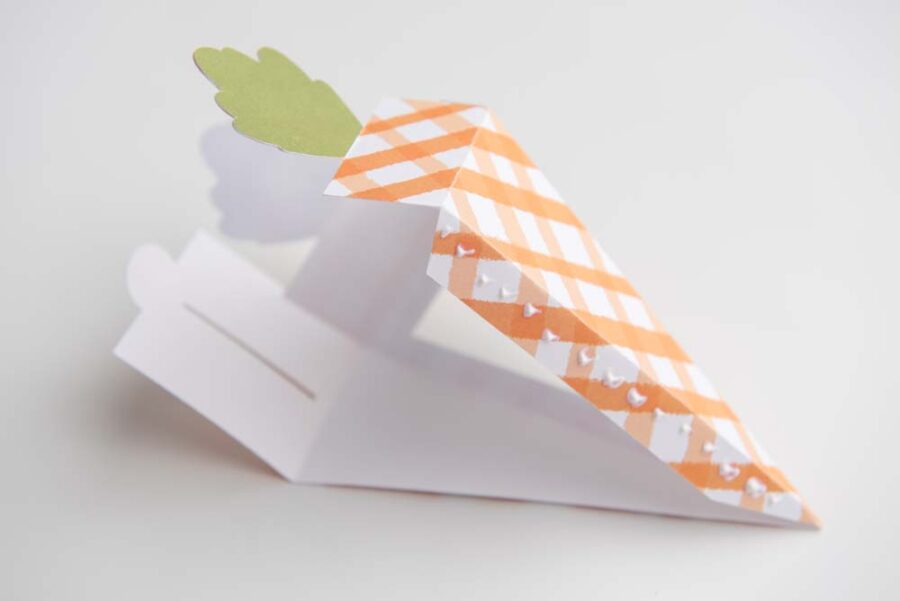
Begin to close up the box. Add glue to the outermost tab and fold it over. Use gentle pressure to fold and attach to the opposite side. Allow drying completely before proceeding.
After everything has dried, close the top of the box by folding all tabs inward. Fold the top leaves together.

Then feed the two stem tabs through the slit on the top. Fold the small circle tab down and through the small slit on the side to hold the tabs closed.
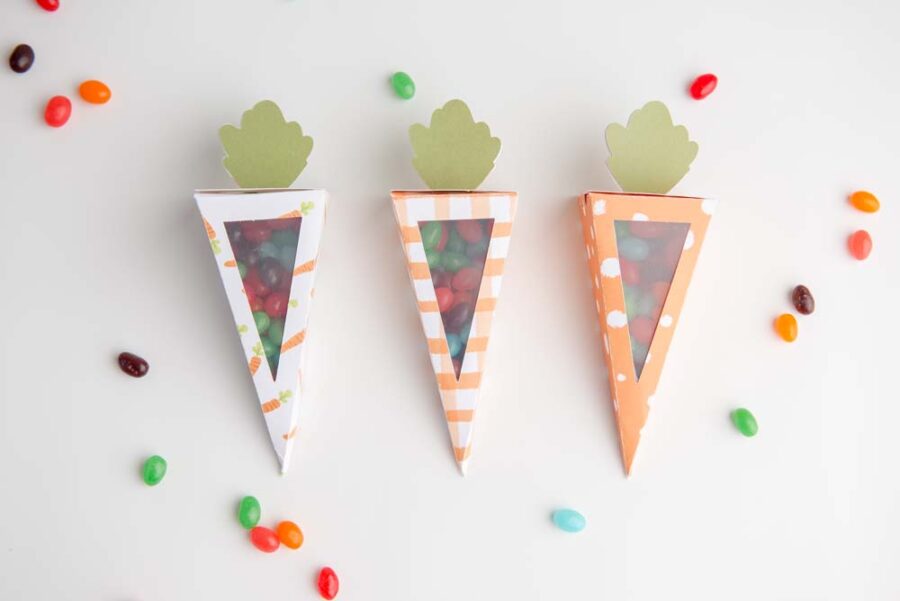
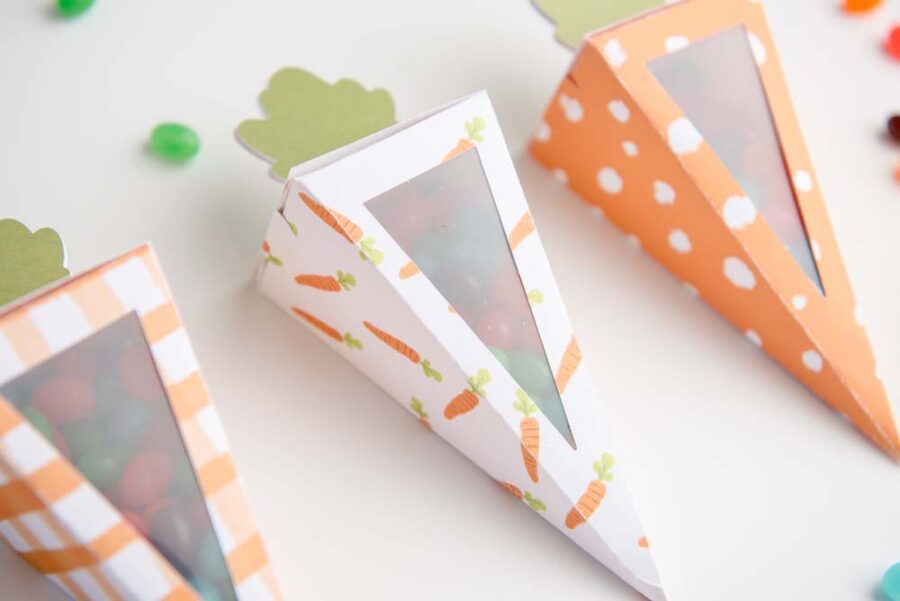
You are finished! The carrot boxes are ready to be filled with jelly beans or your favorite candy!

How to Make a Paper Carrot Box with Cricut
Equipment
- Cricut Cutting Machine
- Cricut LightGrip Blue Mat
- Craft glue
Materials
- Cardstock
- Acetate
- Carrot box svg
Instructions
- Upload carrot box SVG to Cricut DesignSpace. Add to new canvas.
- Highlight the file and click “Ungroup.”
- Select the scoring lines layer.
- Under “line type” on the top left toolbar, click the drop-down and click on “score.”
- Use the eye-icons to turn off the blue acetate window and the green stems layers.
- Highlight the entire group and attach.
- Change the size to a width of approximately 8 inches and a height of approximately 10 inches. Click "Make it."
- Hit continue and select medium card stock as the material, more pressure for cutting, and if using a scoring stylus instead of scoring wheel be sure to let your machine know under edit tools.
- Load the card stock onto a blue LightGrip mat and hit go. When finished, unload the mat and remove the box from the mat.
- Turn the acetate triangle back on in the layers panel and turn off all the other layers.
- Hit make and choose “On mat” on the next screen. Choose acetate as the material. Adjust the pressure to More pressure. Load a sheet of acetate onto a blue LightGrip mat and load it into your machine. Hit “Go” and unload the mat when the cut is finished.
- Turn the green stems back on in the layers panel and turn off all the other layers.
- Hit make and load a sheet of green or patterned card stock onto a blue LightGrip mat. Set material to medium card stock, more pressure, and hit go.
- Once all pieces are cut, assemble the boxes. Begin by folding all the score lines.
- Glue the acetate triangle/window onto the inside of the box around the cutout triangle.
- Glue the separate stems onto the stems attached to the carrot box. Match up the shapes for each side and glue the green leaf/stem onto the box. Allow the glue to dry fully.
- Add glue to the outermost tab and fold it over. Use gentle pressure to fold and attach to the opposite side. Allow drying completely before proceeding.
- After everything has dried, close the top of the box by folding all tabs inward. Fold the top leaves together.
- Feed the two stem tabs through the slit on the top. Fold the small circle tab down and through the small slit on the side to hold the tabs closed.