
Nothing is cuter than these tiny little printable Easter Bunny baskets. They can be used for parties or an Easter egg hunt. You can use them to decorate your Easter dinner table or as name-place cards. They are just 2.5″ each, perfect for small treats like homemade truffles, cookie truffles, or even cupcakes.
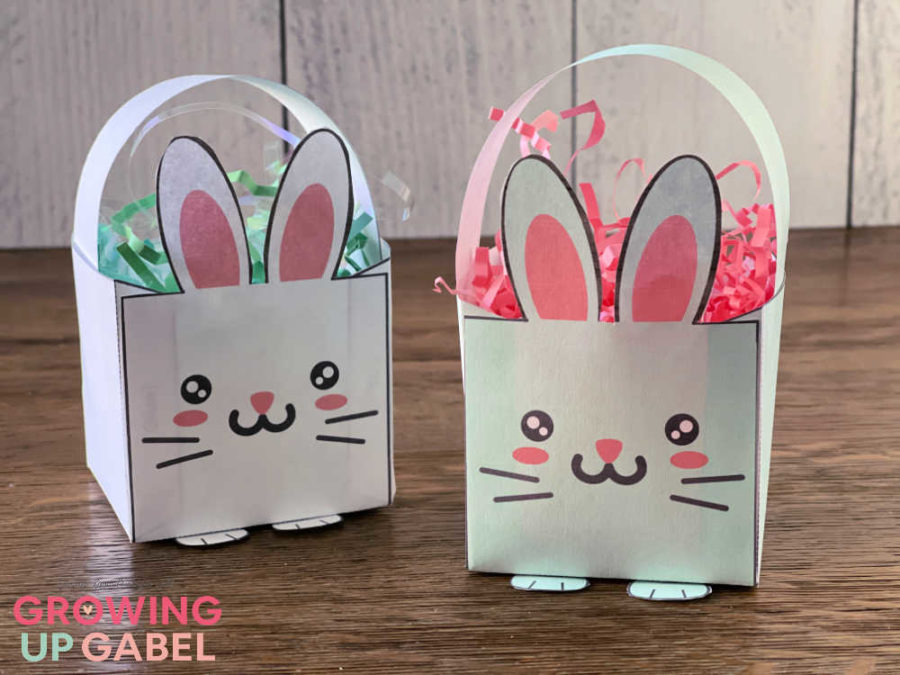
Printable Easter Bunny Baskets
Bunny Basket Supplies:
- Bunny Basket Printable
- Glue Dots
- Scissors
- Easter grass and small treats (optional)
Bunny Basket Instructions:
First, grab the template. The templates come in three colors – white, green, and gray. You can print as many as you need.
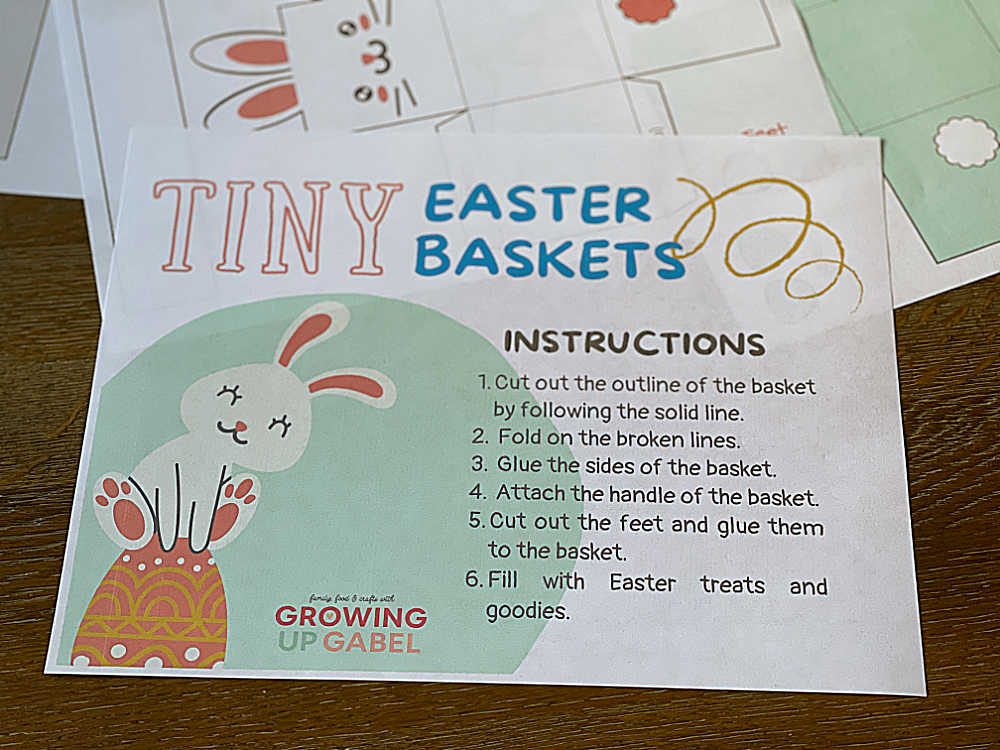
Next, download and then print out the basket templates. The first page includes instructions.
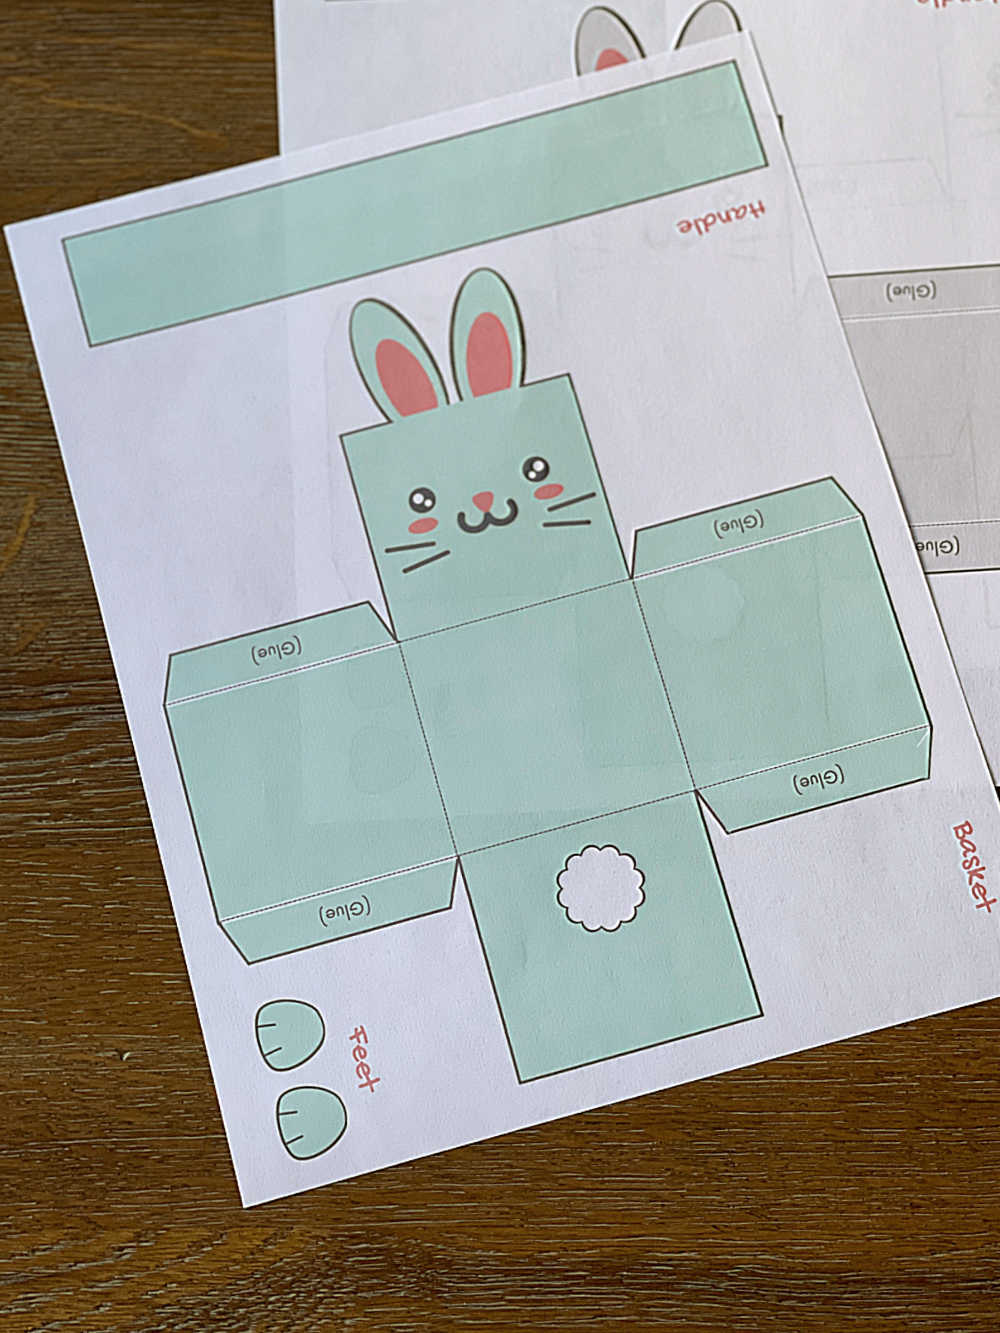
There is one bunny basket per sheet of paper. Print out as many as you need or want to make.
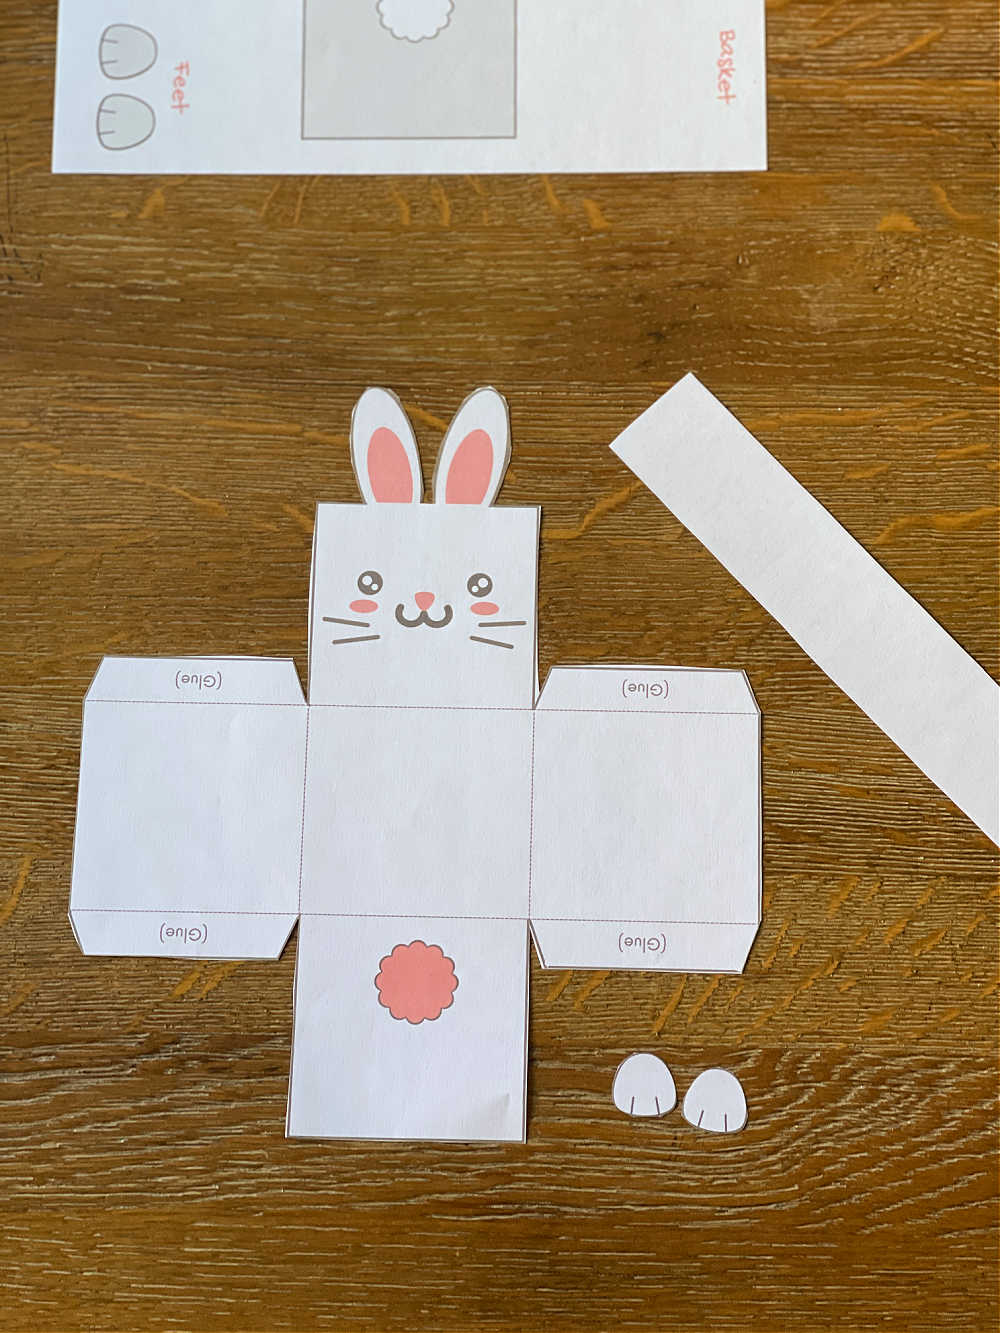
Cut out the baskets along the solid black lines. You will also need to cut out the handle and the feet. The baskets are pretty easy to cut out with scissors. If you own a Cricut cutting machine, you could also use the Print then Cut option to cut a lot of these out at once.
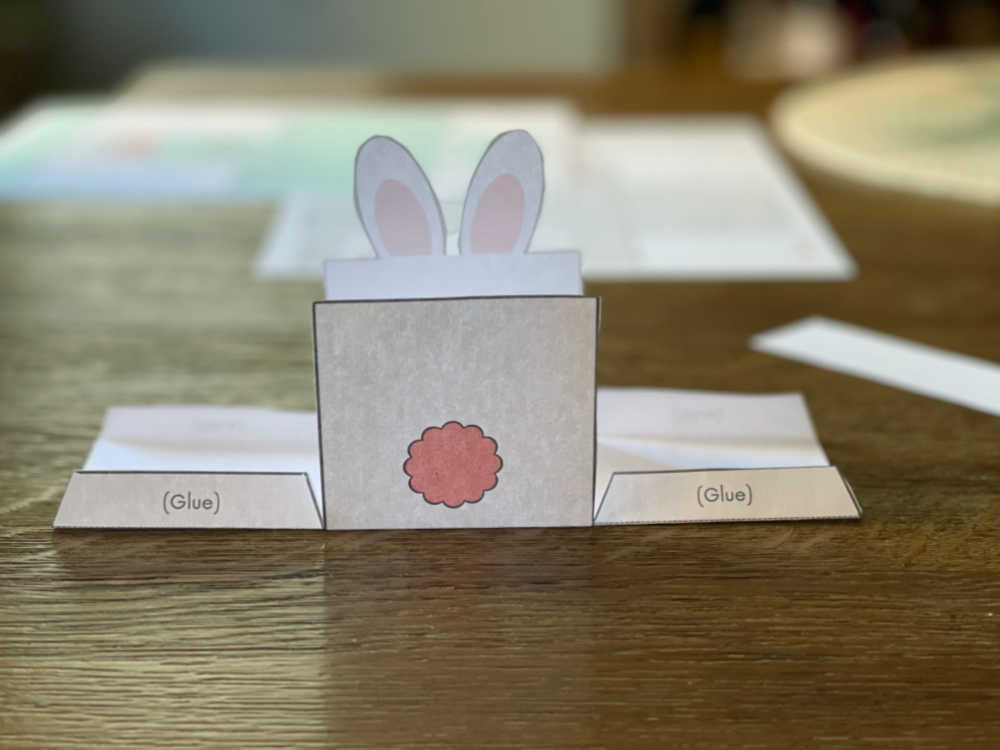
Fold the basket along the dotted lines. There are 6 folds: the 4 glue tabs, the bunny face, and the bunny tail.
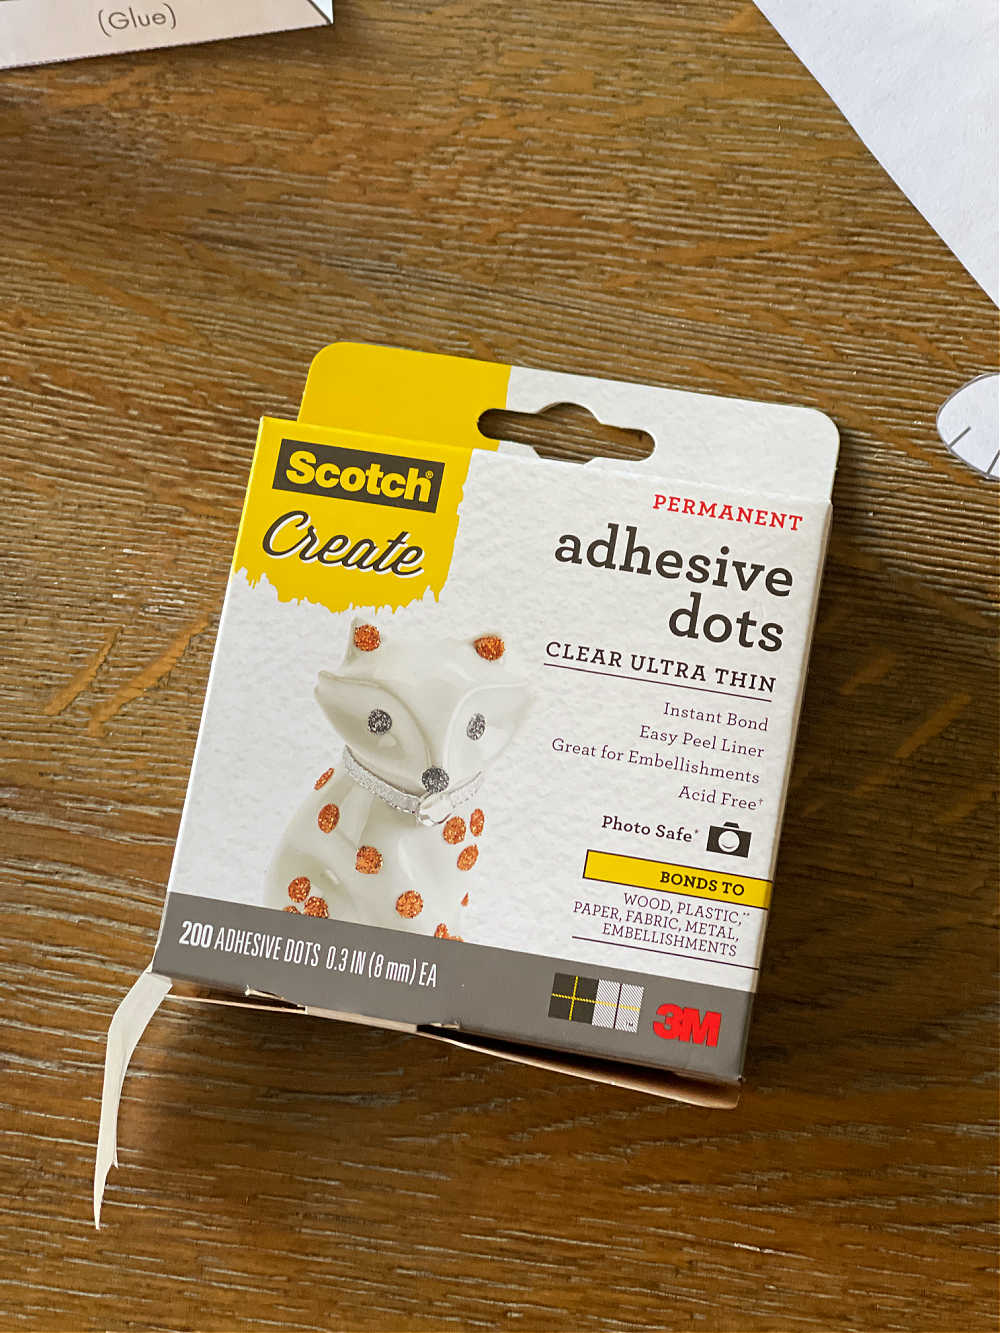
Glue together the basket. Adhesive or Glue Dots are great for this kind of small project. They come in different sizes and you will want the smaller dots for this project.

The dots come in strips. You remove the dots using the plastic applicator on the top and put that on the paper. They are super awesome for crafts, especially with kids.
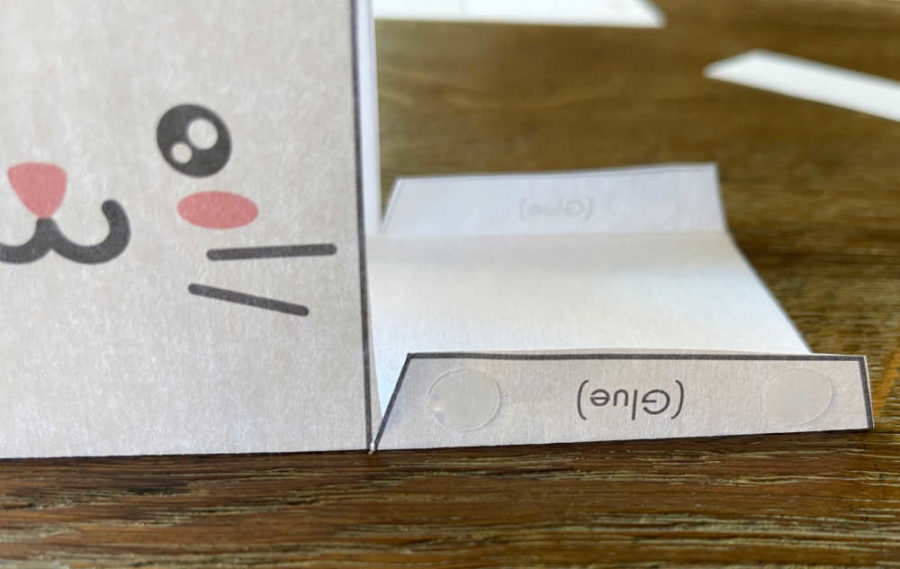
Use 1-2 dots on each of the “glue” tabs. You may be able to get away with just 1 dot, but 2 is probably better.
Fold the tabs in towards the bunny’s ears and tail. Adhere the tabs to the back of the front and back of the bunny. Do this on both sides.
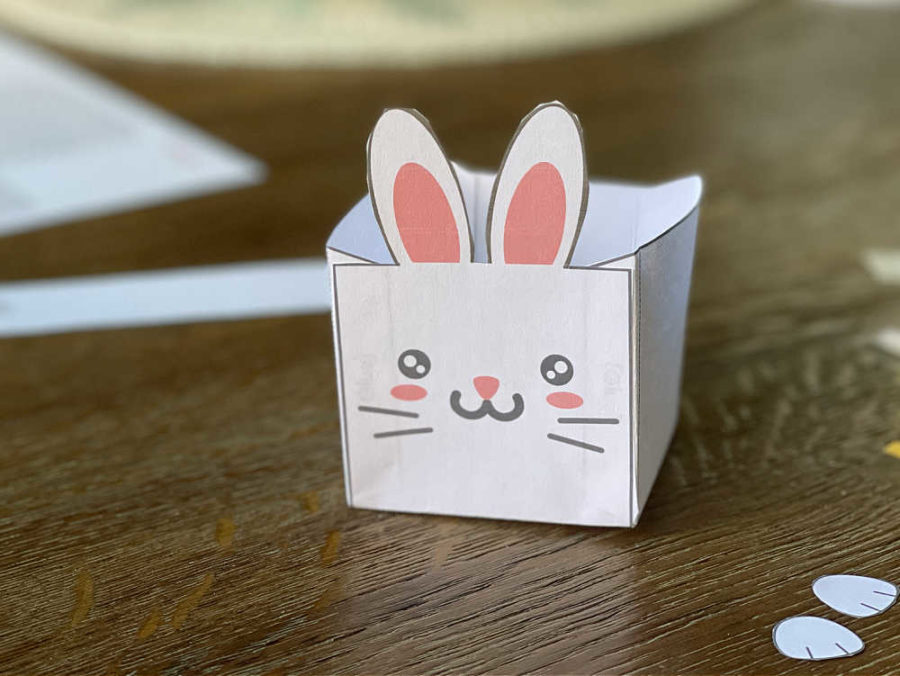
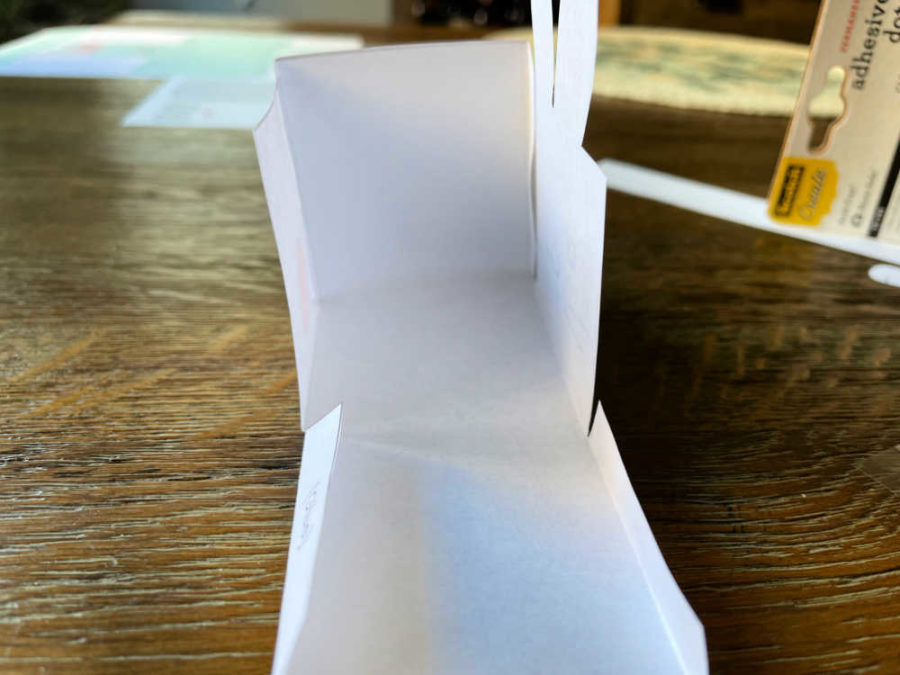
You should now have a little bunny box.
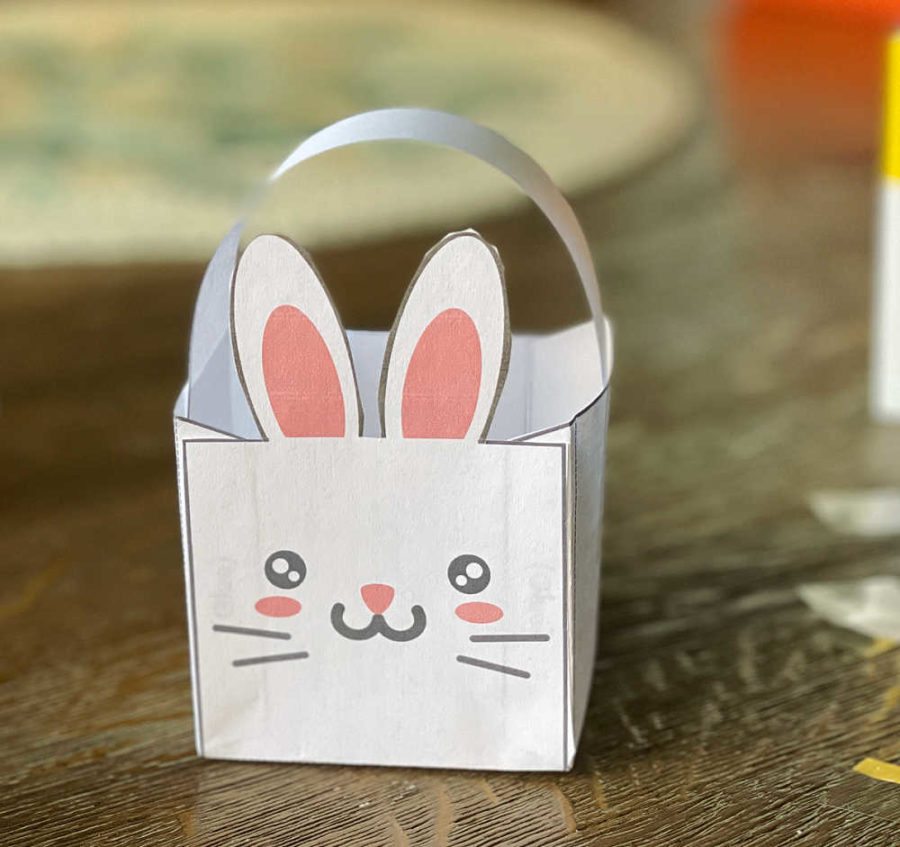
Put 1 dot on each end of the handle. Adhere that to each side of the inside of the bunny Easter basket.
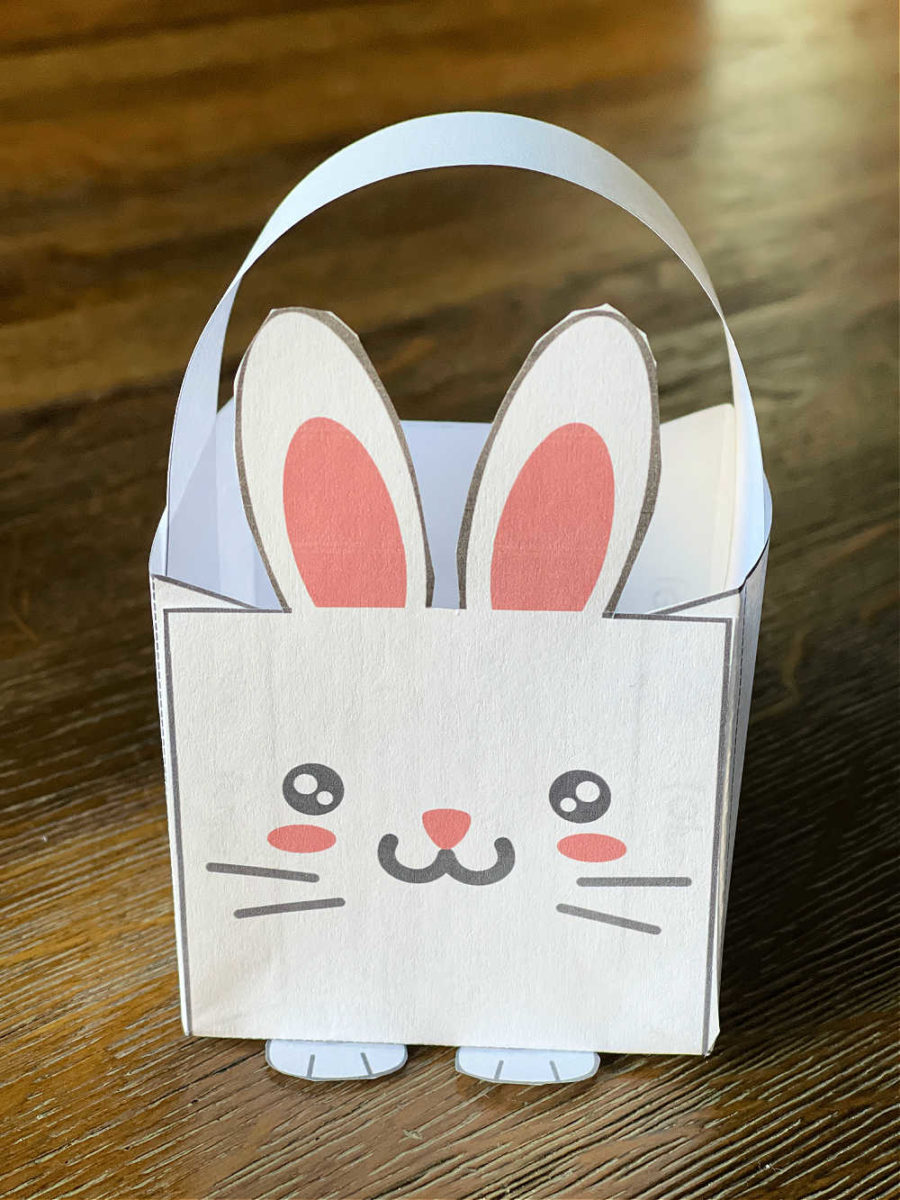
Finally, put 1 dot on the top of each foot. Adhere the feet to the bottom of the basket. It would be cute to switch up the colors of the feet on each basket.
