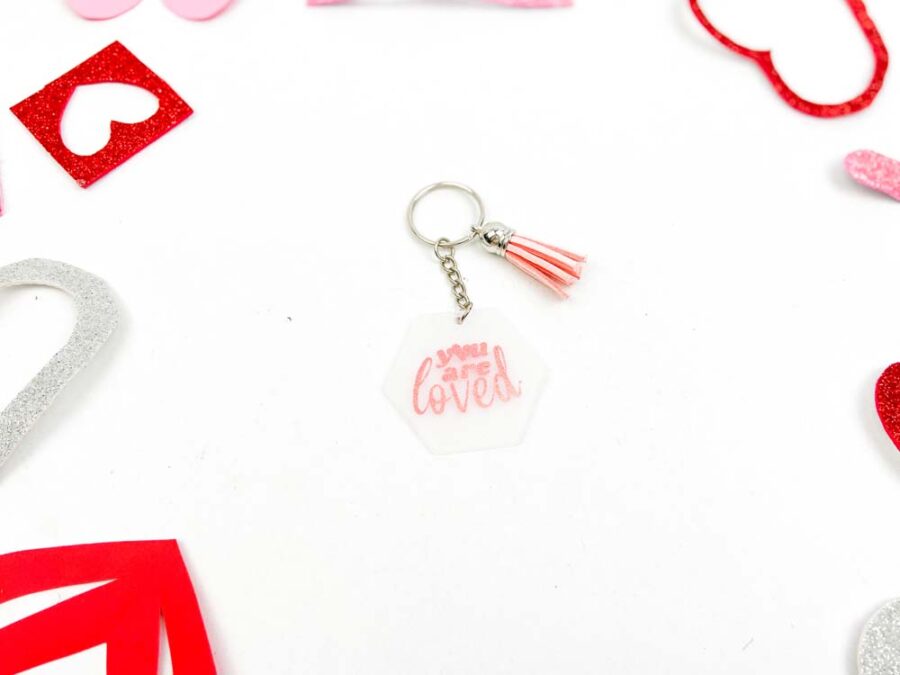
Personalizing a keychain with Cricut is an easy, fun, and creative way to express yourself, create a meaningful gift, or promote your brand or organization. Choose the keychain shape and size, the color of the vinyl, and the design to create a unique keychain. Upload or create a design in Design Space and then cut it out using adhesive vinyl and a Cricut cutting machine. Transfer the design to the keychain.
How to Make A Personalized Cricut Keychain
One of the best reasons to own a Cricut machine is to be able to make personalized things we love. Whether it’s a tee shirt to support a sibling’s sports team or a travel mug for Father’s Day, Cricut makes personalizing easy. Keychains are inexpensive to make and are perfect gifts for teachers, grandparents, or anyone in your life.
Personalized Cricut Keychain Supplies
- Cricut Cutting Machine – you can use a Joy, Explore, or Maker for this project.
- SVG Design – any design you like. Join our newsletter to get the “You Are Loved” SVG free!
- Transfer tape
- Pink vinyl or any color you like
- Acrylic keychain of your choice – make sure to check the size of the keychains. Some of them are very small at 1/2″. Pick something that is closer to at least 2″.
- Cutting Mat if not using Smart Vinyl
- Weeding tools
Custom Keychain with Cricut Vinyl
Pin For Later-
Reader’s Favorite!
DIY Teacher Beach Bag
-
Reader’s Favorite!
Is a Cricut Lamp Worth the Price?
Cricut Keychain Instructions
Upload the SVG file into Design Space.
We use Design Space on a Mac laptop. The app may be a little different for uploading.
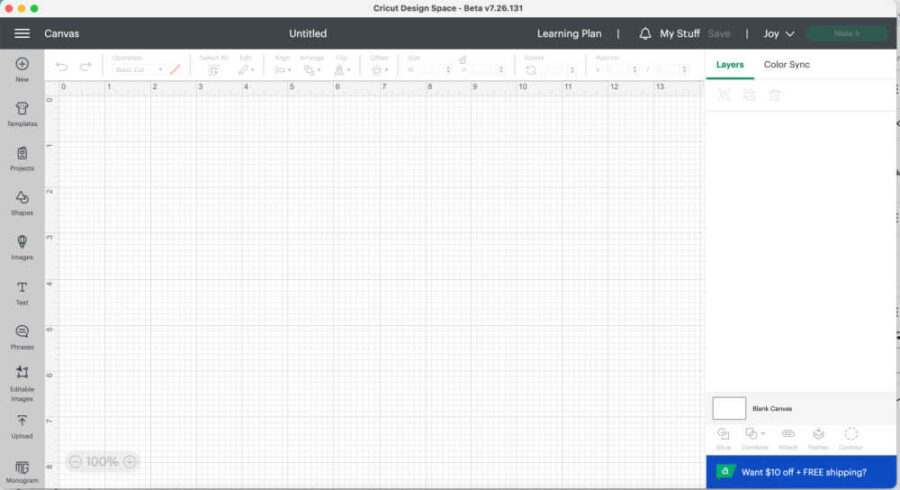
On your laptop, open Design Space and click “New Project” on the top left of the screen. This will bring you a blank canvas, as you see above.
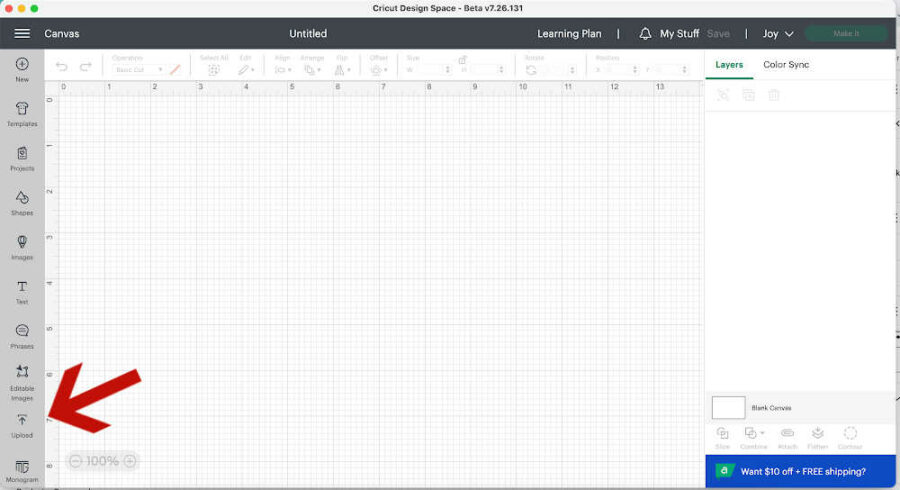
Click “Upload” on the bottom of the gray dashboard on the left side of the screen.
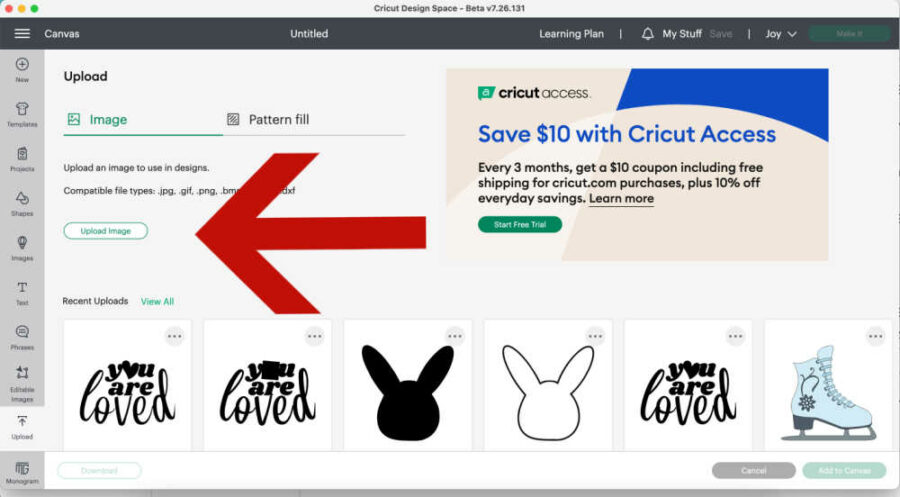
Click “Upload Image” on the next screen.
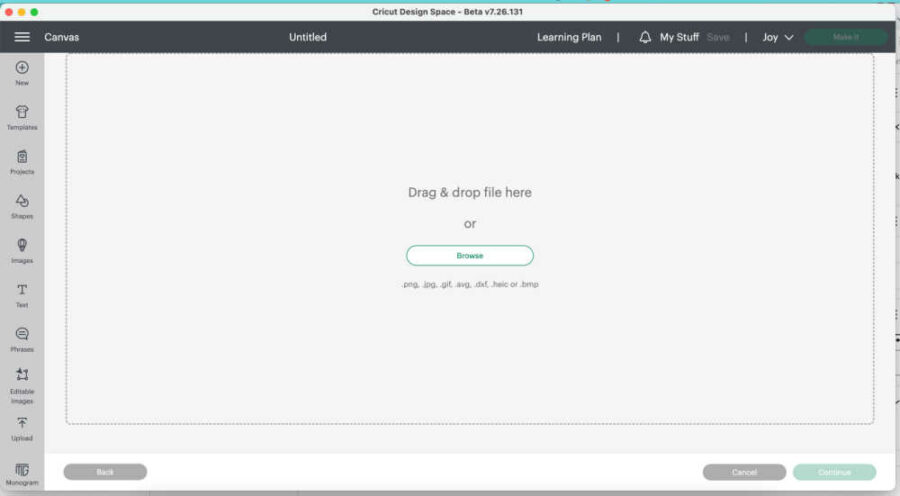
Click “Browse” and choose the SVG file you want to upload.
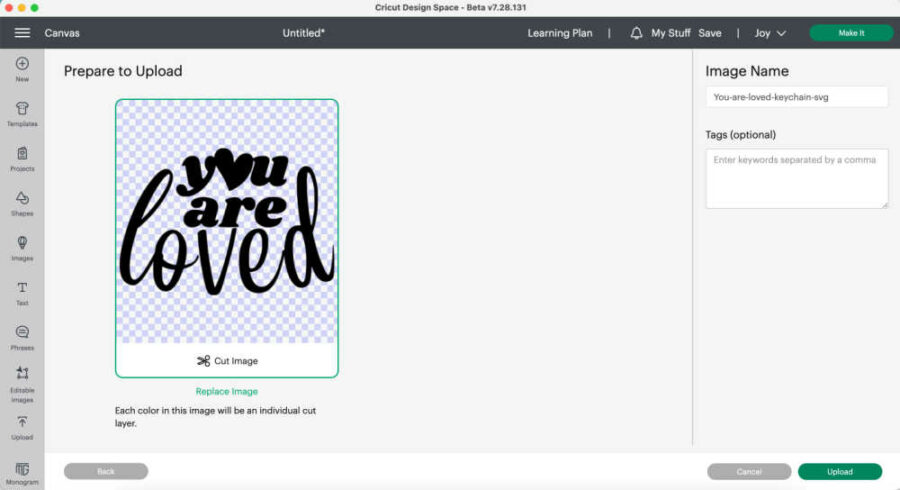
Because this is an SVG file, your only option will be to create a cut file. On the top right, name the file and then press upload on the bottom right. This will add the SVG to your Design Space account.
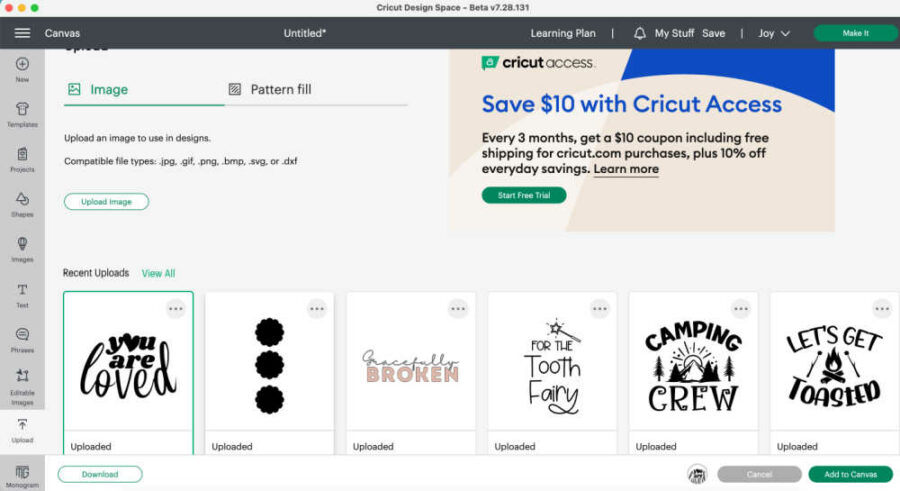
The next screen shows that the SVG has been uploaded and is ready to select. Click “Add to canvas” on the bottom right.
Your image is now on the Design Space canvas, ready to be edited and cut.
Resize the cut image to fit the blank.
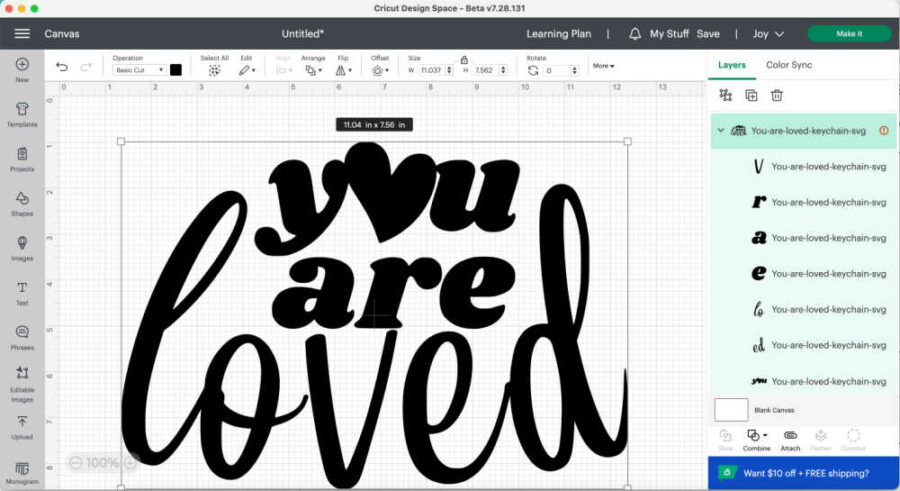
Measure the size of your keychain. Readjust the size of your image in Design Space to fit on your keychain.
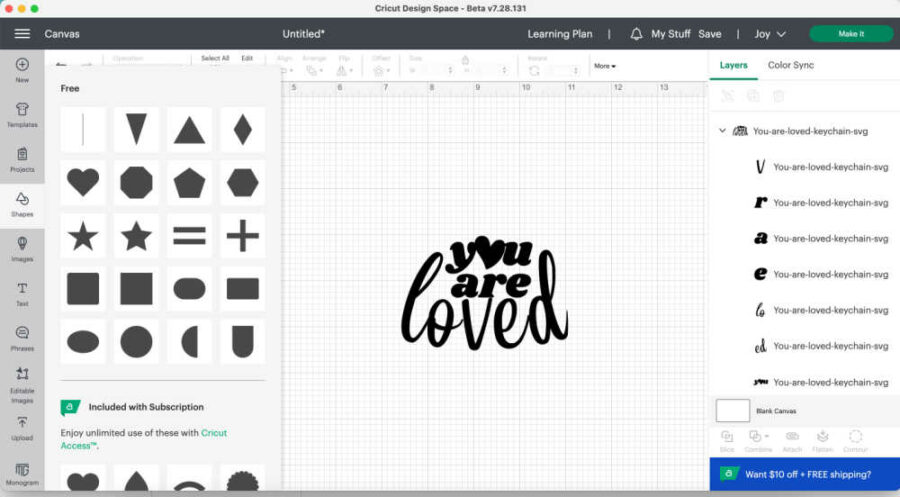
You can use a shape in Design Space to simulate your keychain to determine the correct sizing for the final cut. Add the shape of your keychain to the Canvas. You can do this by clicking “Shapes” on the left dashboard.
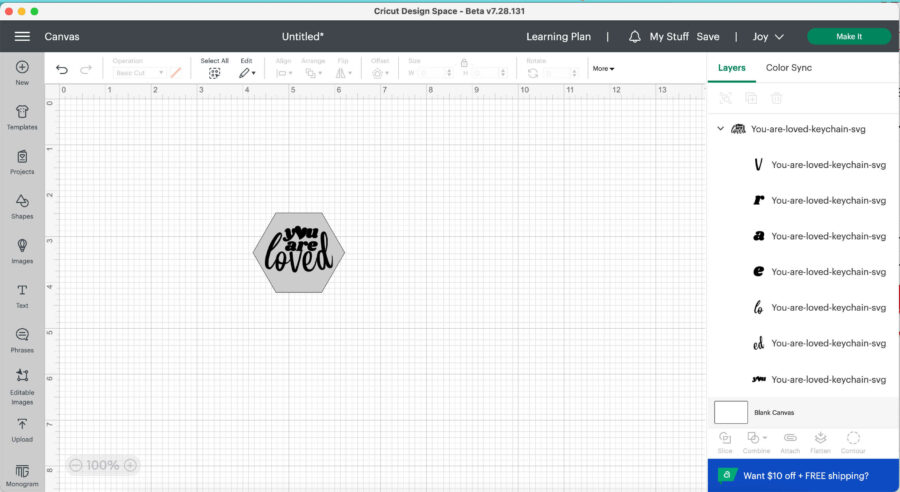
Size the shape to the same as your keychain. Click “Arrange” on the top menu and “Send to Back” so the shape will be behind the design. Change the colors of the circle and the You Are Loved design so you can tell them apart.
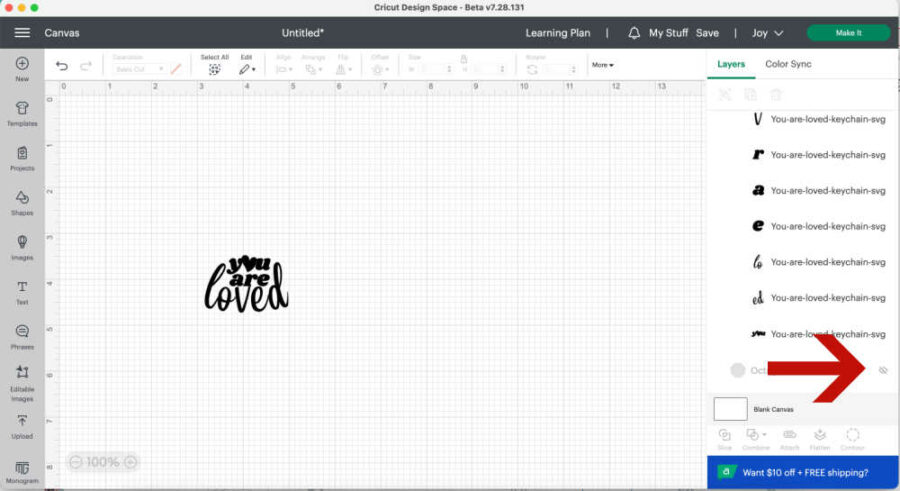
Before cutting, you need to hide the shape. Click the eye next to the Circle layer on the right dashboard. This will hide the shape, and it won’t cut.
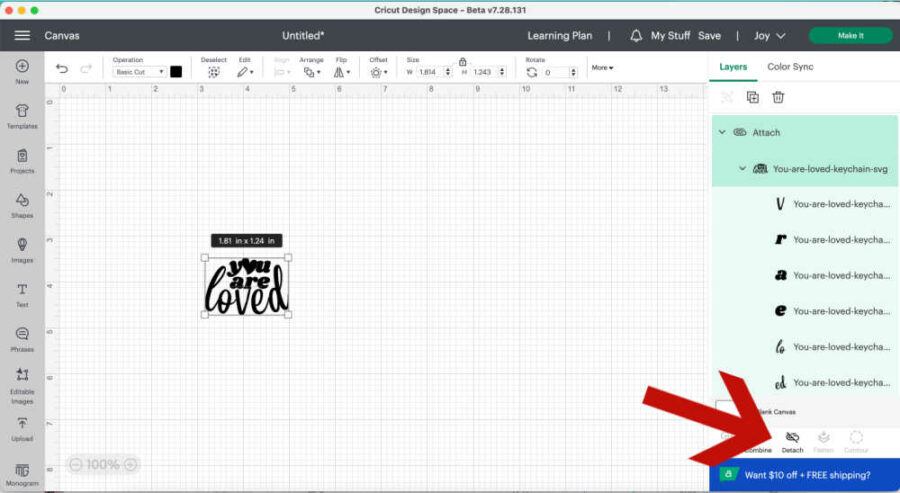
The final step before cutting is to attach it all. Highlight the design and click “Attach” on the bottom right dashboard.
Send the image to your Cricut machine to cut.
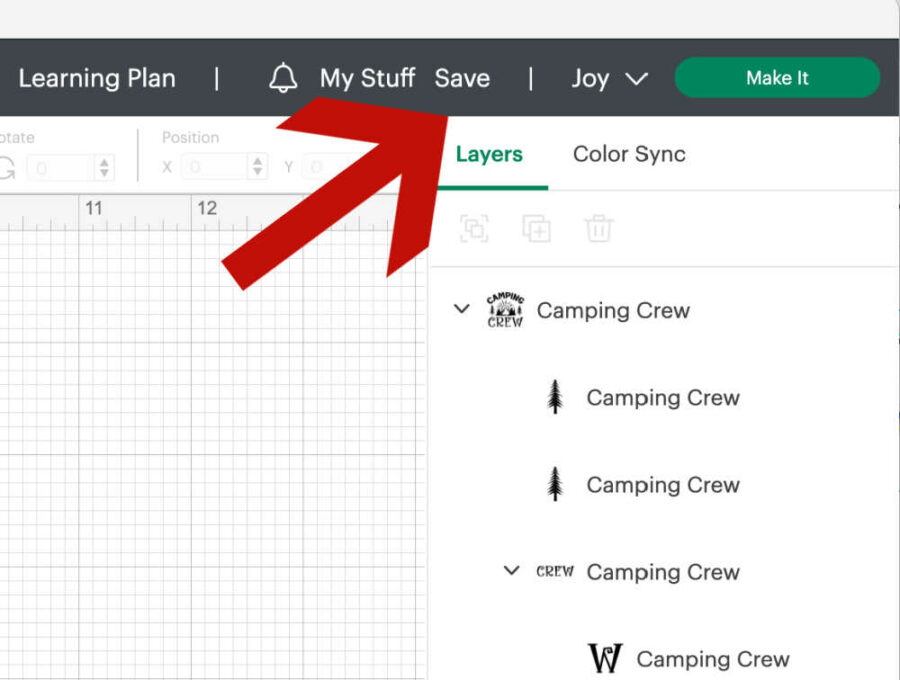
Once you are happy with the design, make sure to save it. Just click “Save” at the top of Design Space.
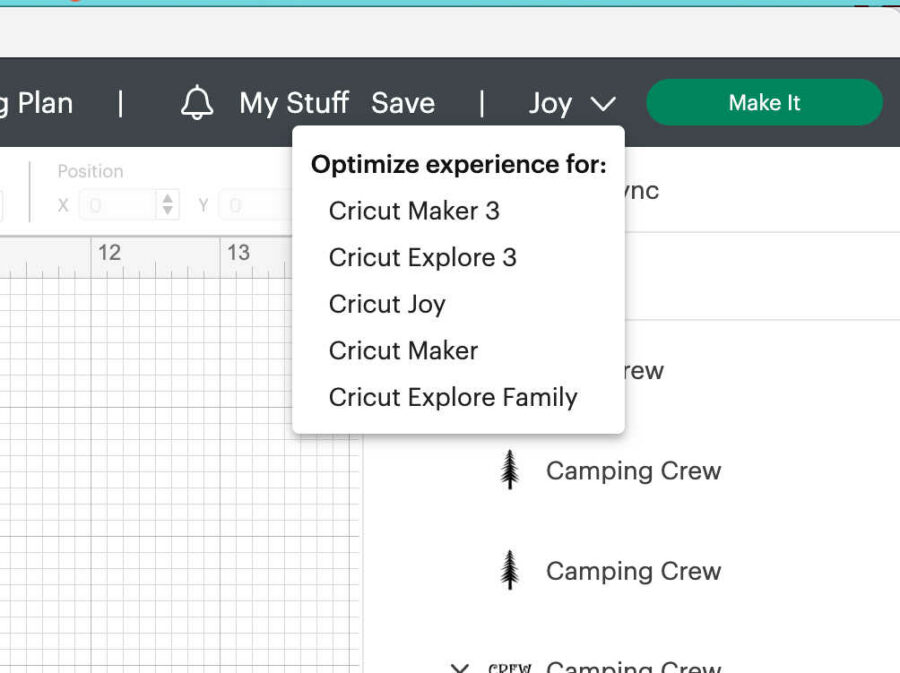
Now that it’s saved choose your machine in the drop-down box on the top right. Choose your machine.
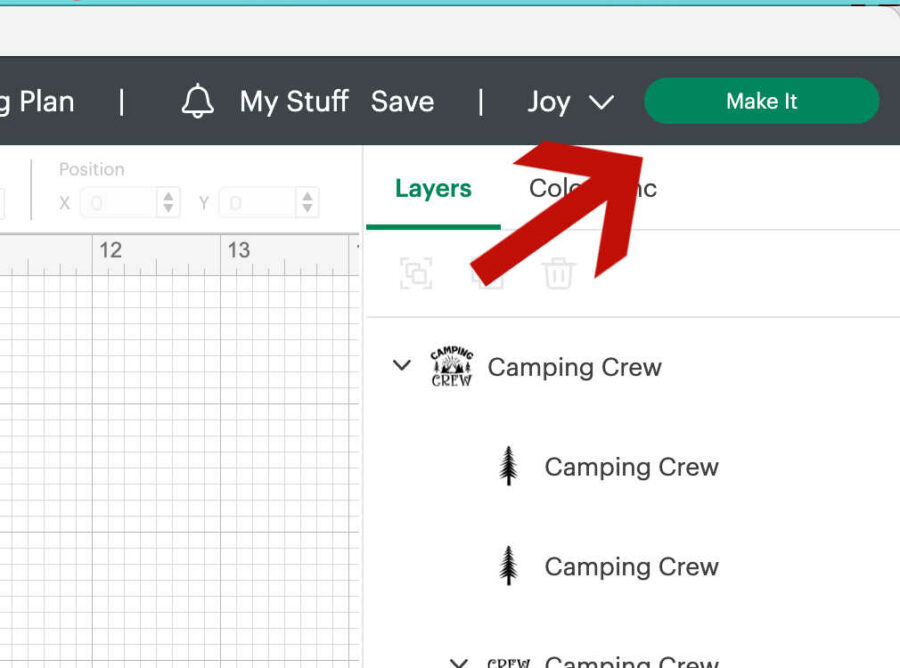
Then click “Make it” on the top right of the screen.
Choose how to load your materials into the Cricut machine.
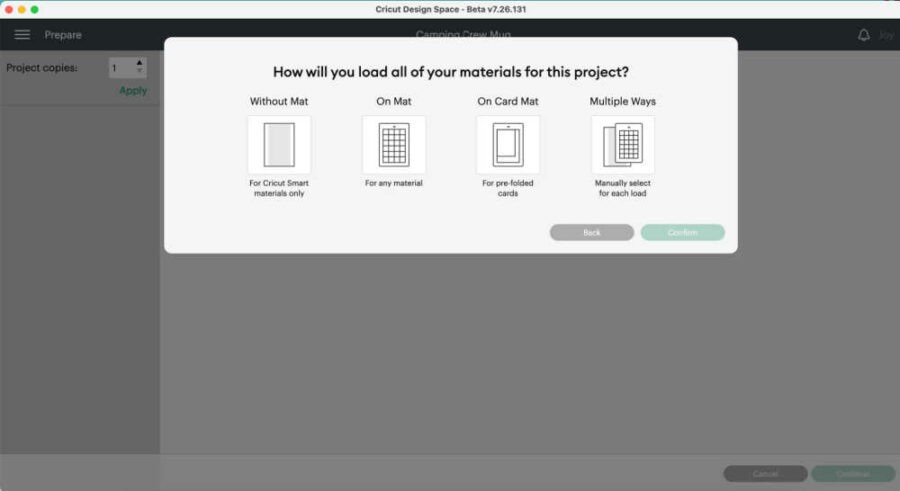
On the next screen, you will choose if you use a mat. Cricut SmartVinyl can be cut without a mat on a Cricut Explore 3, Maker 3, or the Joy. If you are not using SmartVinyl, then click the mat option. You can also cut SmartVinyl on a mat if you prefer. Pick your option, and click “Confirm” in the bottom right corner.
Review the image before cutting.
On the next screen, you will see how the Cricut will cut your image on the vinyl. It will tell you how long the SmartVinyl you will need to be. If you use a mat, it will show you where the image will be on the mat. You can move the image around as needed.
You can also adjust how many images you want the machine to cut on this screen.
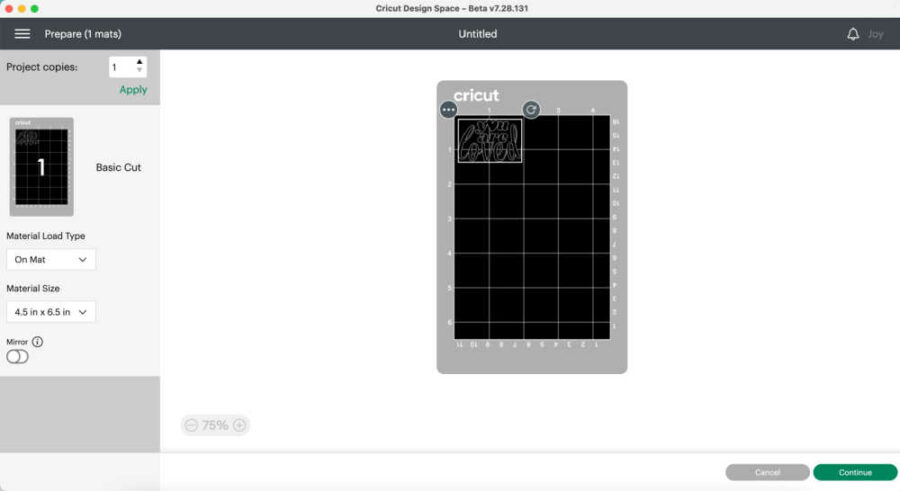
Once you are happy with how many to cut and where they are on the vinyl, turn on your machine and get it ready to cut. If you are using a mat, put the vinyl on the mat, color side facing up.
If using SmartVinyl, cut SmartVinyl to the length needed for the project. Then, click “Continue” on the bottom right of the screen.
Pick your material and load it into the Cricut.
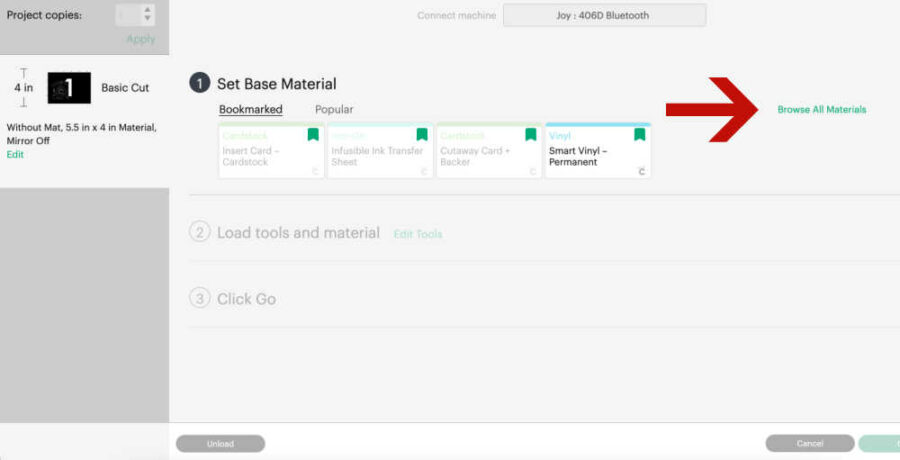
Once you click continue, Design Space will connect via BlueTooth to your machine. Once it has connected, you will choose the material you want to cut. You can click “Browse Materials” to find the vinyl you are using.
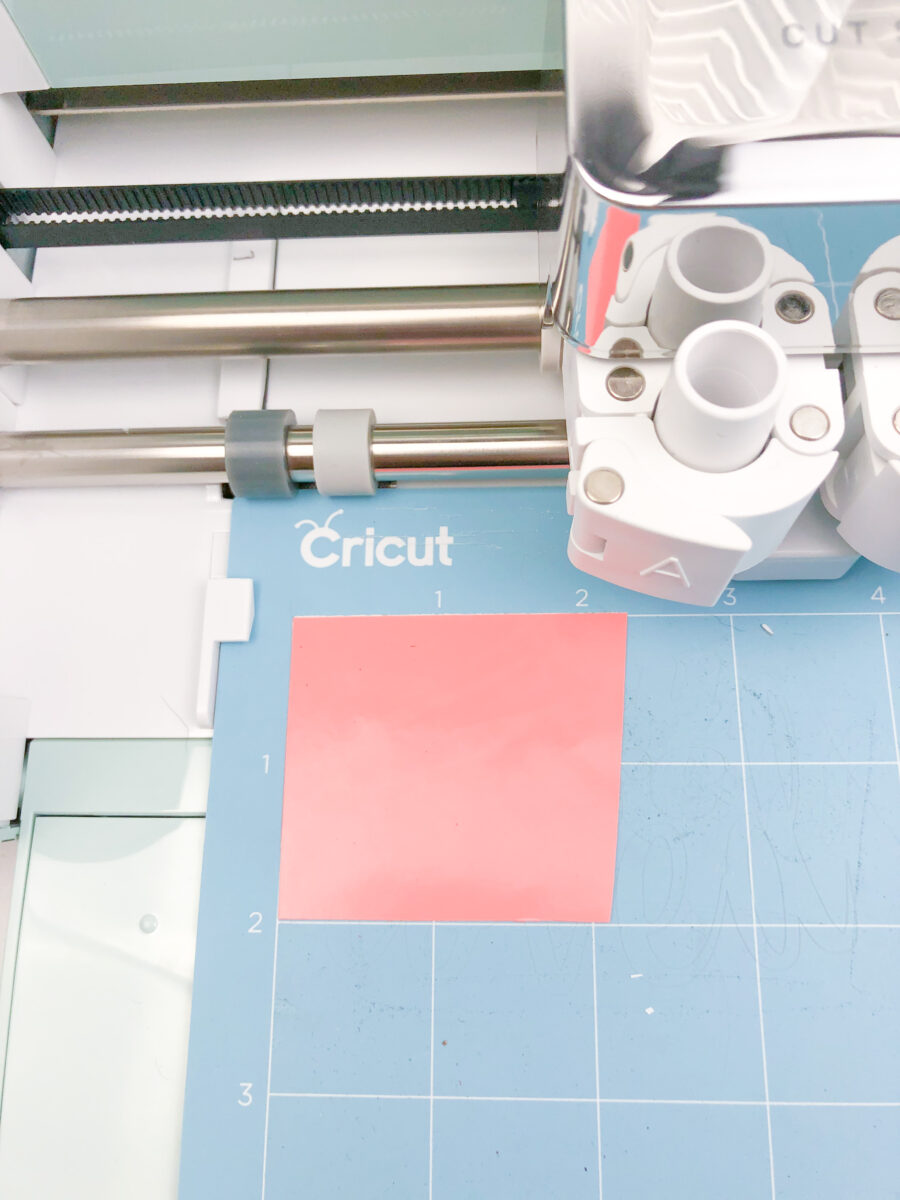
Load the SmartVinyl or the mat into the machine. It is set to default pressure. It will also tell you which blade you need to cut the vinyl. Because you are using vinyl, you will likely only need the fine-point blade.
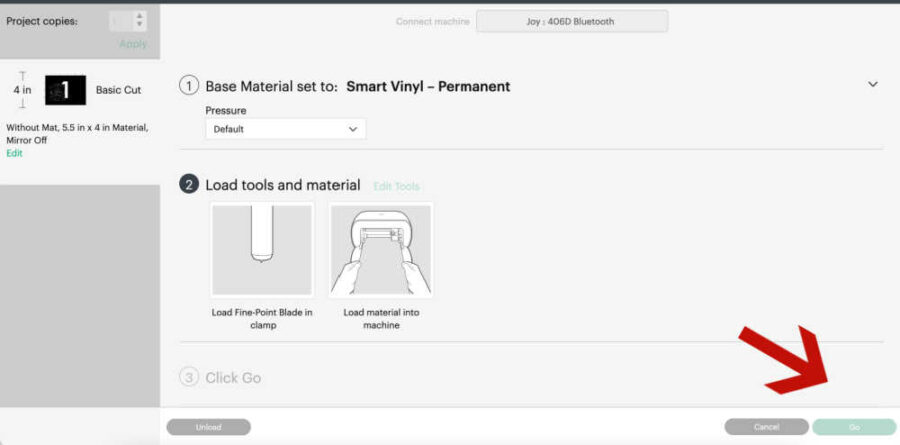
Once the SmartVinyl or mat is properly loaded into the machine, the “Go” button on the bottom right of the screen will highlight. Push that, and the machine will begin its cut.
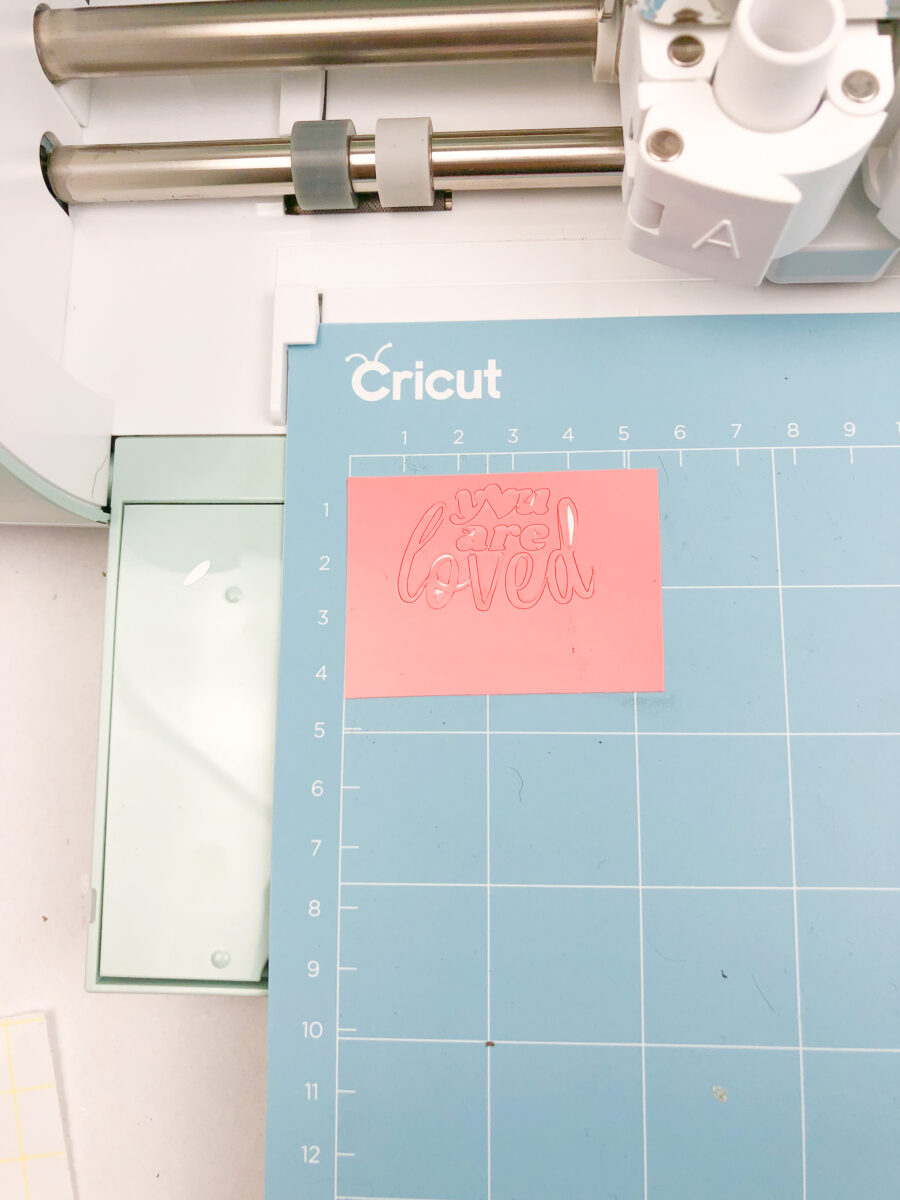
Once the cut is finished, unload the mat or SmartVinyl and click “Done” in Design Space.
Weed the design.
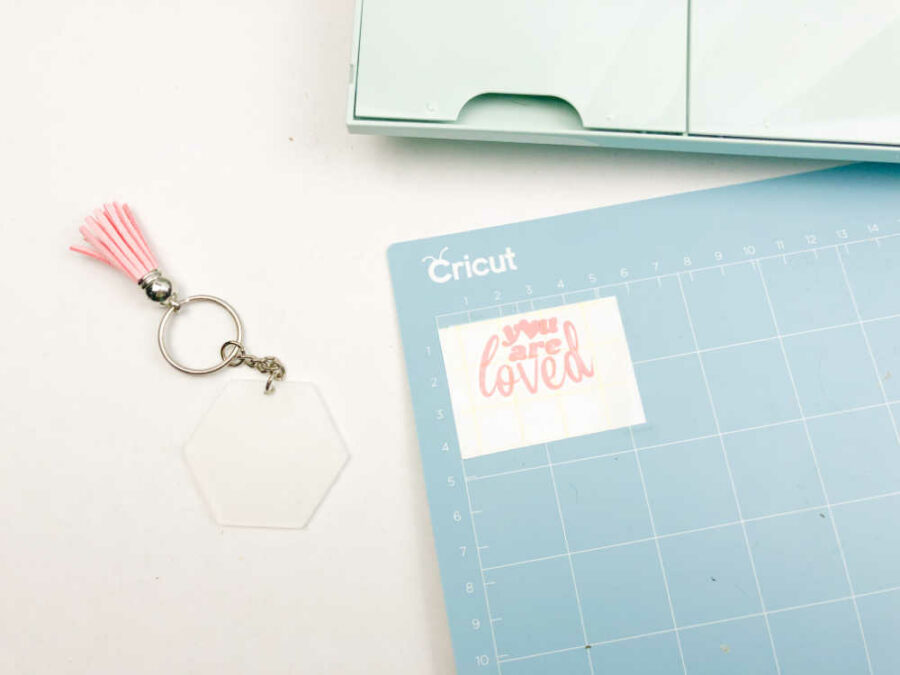
Using weeding tools, remove the unnecessary parts of the image.
Use transfer tape to adhere the design to the keychain blank.
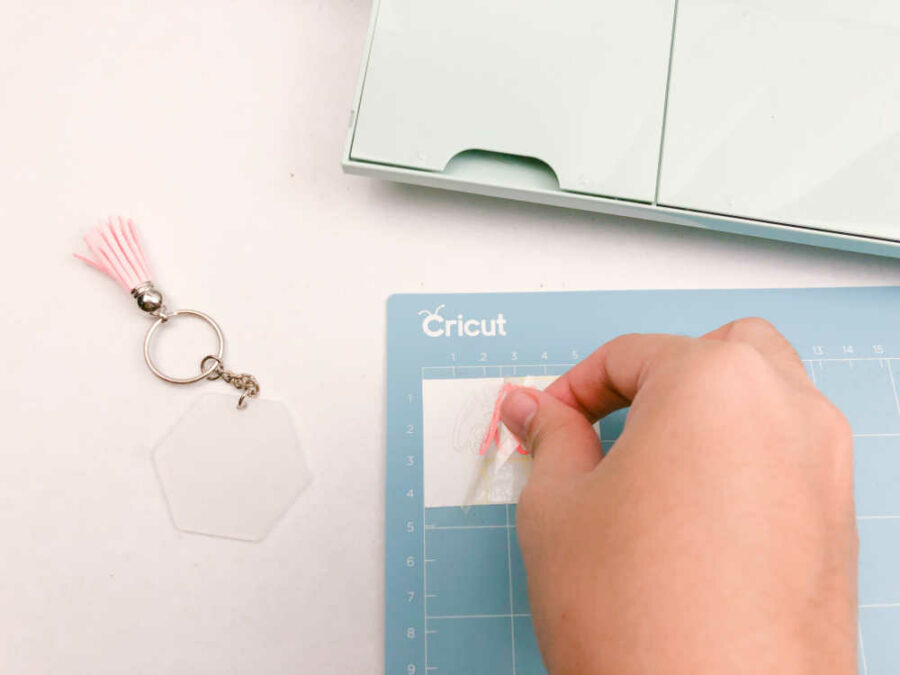
After fully weeding the design, transfer tape removes the image from the white backing and places it onto the keychain. Cut a piece of transfer tape the same size as the image. You can trim it to be as small as you like.
Remove the clear part of the transfer tape from the white backing. Place the clear tape over the top of the image. Rub the transfer tape onto the vinyl image. You want to attach the vinyl to the clear transfer tape. I like using the Cricut Scraper tool for this. Rub both the front and back.
Carefully peel the vinyl off of the white backing, making sure that the vinyl has attached to the transfer tape. The vinyl can be stubborn and want to stay put. Just be patient and keep rubbing and gently easing it onto the tape.
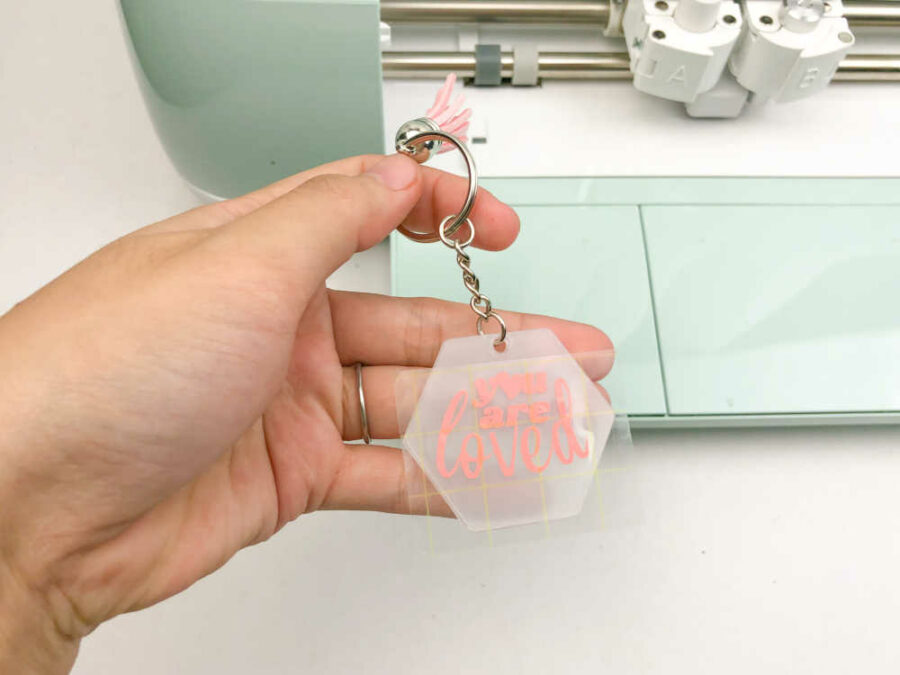
Once the vinyl is on the clear tape, adhere it to the keychain. Rub the transfer tape again to adhere it well.
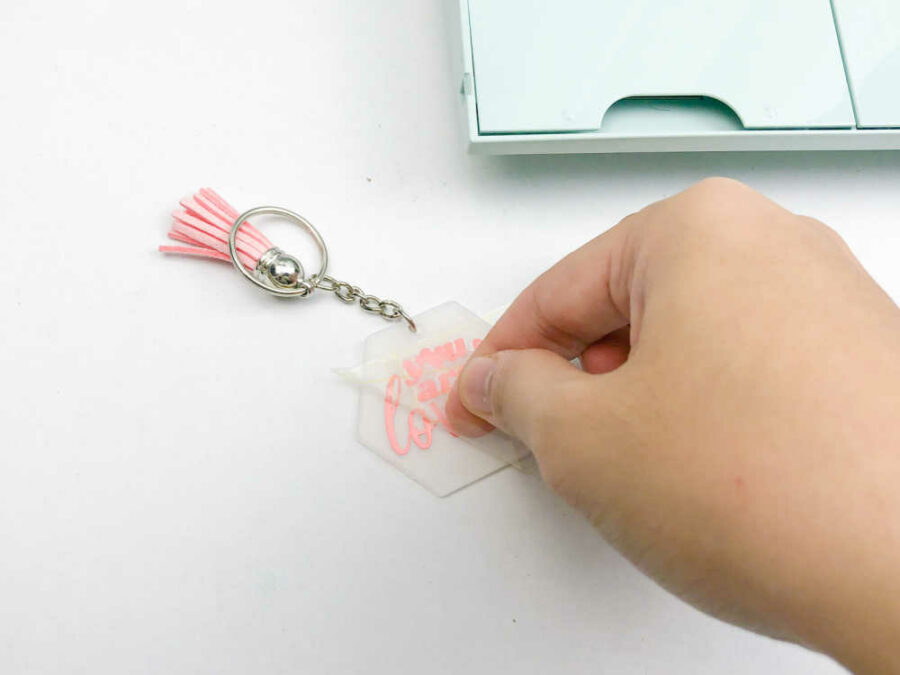
Carefully pull back the clear tape leaving the vinyl on the keychain.
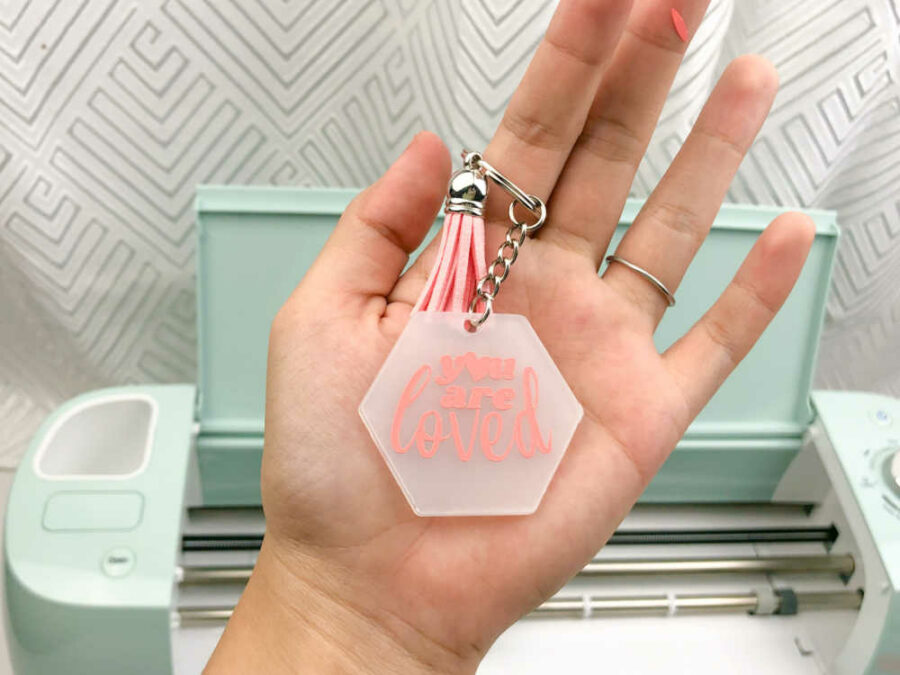
And that’s it! Your personalized keychain is ready to be used or given away.
Custom Cricut Keychain
Equipment
- Cricut Cutting Machine
- Cutting mat
- Weeding tools
Materials
- Cricut Permanent vinyl
- Keychain blank
- Transfer tape
Instructions
- Upload SVG to Design Space.
- Measure the size of your keychain. Readjust the size of your image in Design Space to fit on your keychain.
- Highlight the design and click “Attach” on the bottom right dashboard.
- Choose the cutting machine you are using in the dropdown box of the top right corner of Design Space.
- Then click “Make it” on the top right of the screen.
- On the next screen, you will choose if you use a mat. Pick your option, and click “Confirm” in the bottom right corner.
- Turn on your machine. If you are using a mat, put the vinyl on the mat, color side facing up. If using SmartVinyl, cut SmartVinyl to the length needed for the project.
- Click “Continue” on the bottom right of the screen.
- Once you click continue, Design Space will connect via BlueTooth to your machine. Once it has connected, you will choose the material you want to cut. You can click “Browse Materials” to find the vinyl you are using.
- Load the SmartVinyl or the mat into the machine.
- Once the SmartVinyl or mat is properly loaded into the machine, the “Go” button on the bottom right of the screen will highlight. Push that, and the machine will begin its cut.
- Once the cut is finished, unload the mat or SmartVinyl and click “Done” in Design Space.
- Using weeding tools, remove the unnecessary parts of the image.
- Cut a piece of transfer tape the same size as the image.
- Remove the clear part of the transfer tape from the white backing. Place the clear tape over the top of the image. Rub the transfer tape onto the vinyl image.
- Carefully peel the vinyl off of the white backing, making sure that the vinyl has attached to the transfer tape.
- Once the vinyl is on the clear tape, adhere it to the keychain. Rub the transfer tape again to adhere it well. Carefully pull back the clear tape leaving the vinyl on the keychain.

