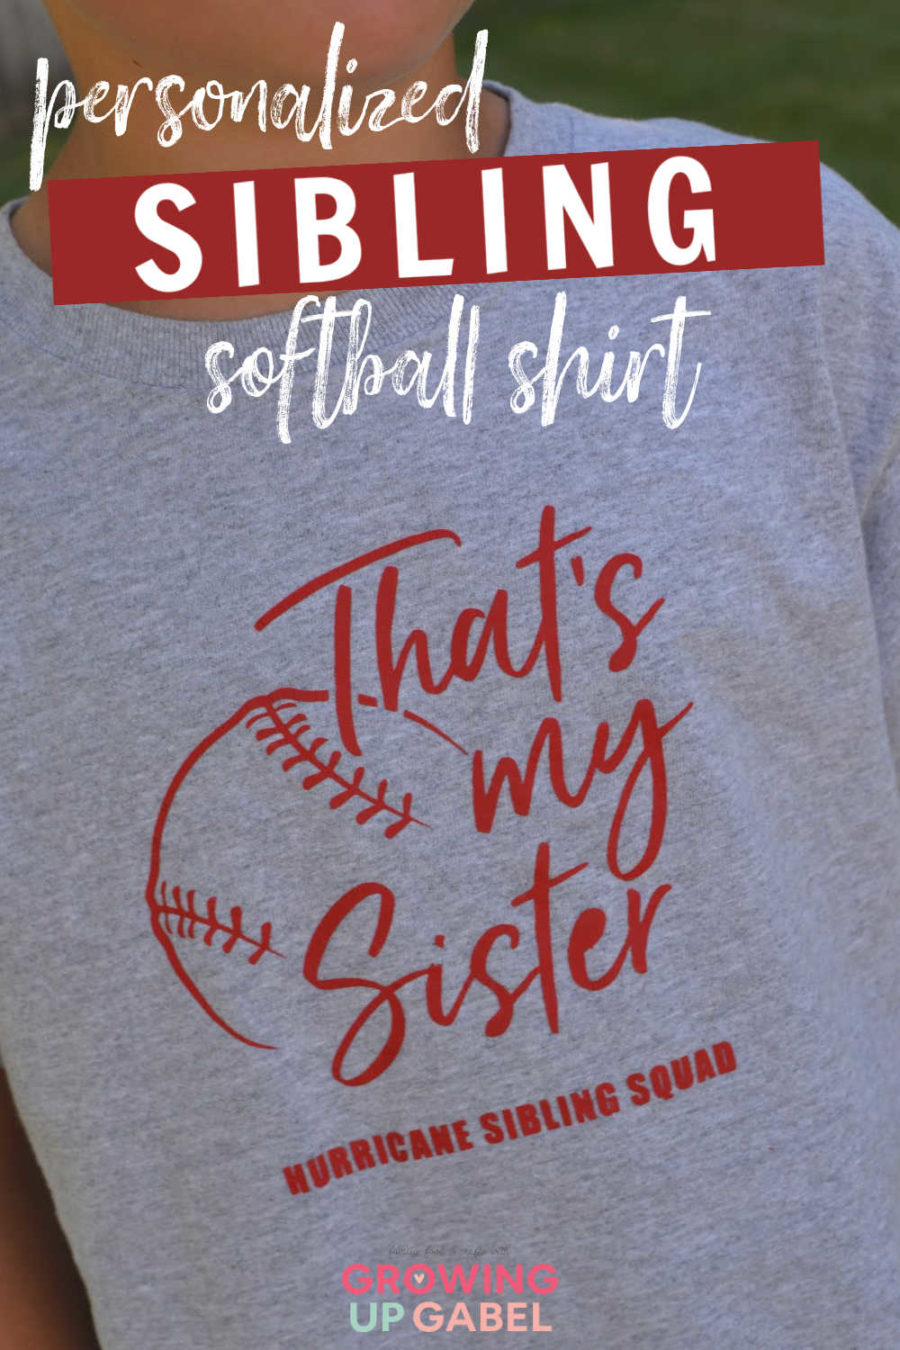
Make a softball sibling shirt using iron-on vinyl, a tee-shirt, and a Cricut cutting machine personalized with team name and colors.
Your kids are their sibling’s biggest fans. They can show their support to a softball playing sibling with this personalized softball sibling shirt. Cut out the design using a Cricut cutting machine and Everyday Iron-On vinyl. Heat press the design onto any plain shirt with Cricut EasyPress. You can even add the team name and “Sibling Squad” so everyone knows who you are rooting for.
DIY Softball Sibling Shirt
Softball Sibling Shirt Supplies
- Cricut smart cutting machine – we used a Cricut Explore 2
- Cricut Design Space on computer or mobile device
- StandardGrip Machine Mat
- Fine Point or Premium Fine Point blade
- Cricut Everyday Iron-On in your choice of team colors
- Weeding tools
- Cricut EasyPress 2
- Iron-On Protective Sheet (optional)
- Tee shirt in your preferred color
Softball Sibling Shirt Instructions
It is a good idea to pre-wash the shirt without fabric softener to pre-shrink and remove any chemicals that may prohibit strong adhesion.
Cut the Design
Open Design Space on your computer or phone. Sign up for our newsletter below to receive the link to the design in Design Space. Size the design so that it will fit on your shirt. For a 6-8 shirt, we made the design just over 5.5″.
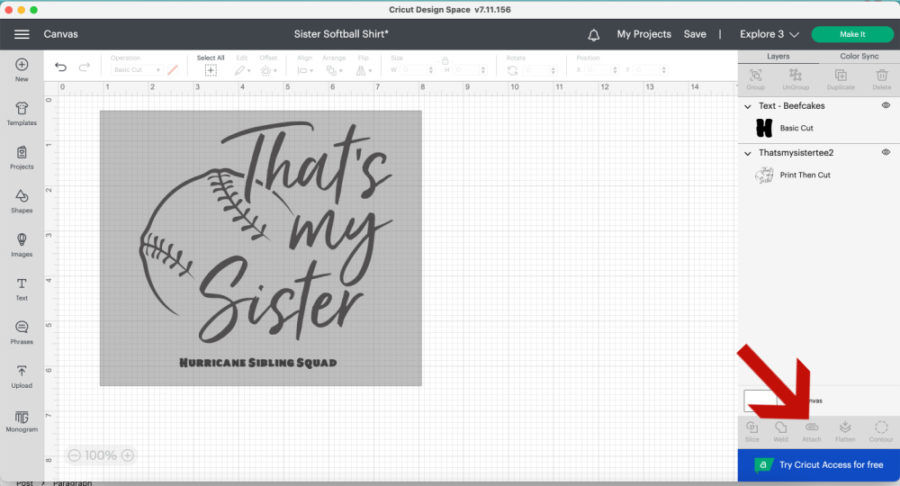
You can add the team name where it says “Hurricane Sibling Squad” or you can hide that when cutting. If adding the name, make sure to highlight both the name and the design together with your mouse. Then attach them so they cut as the same design.
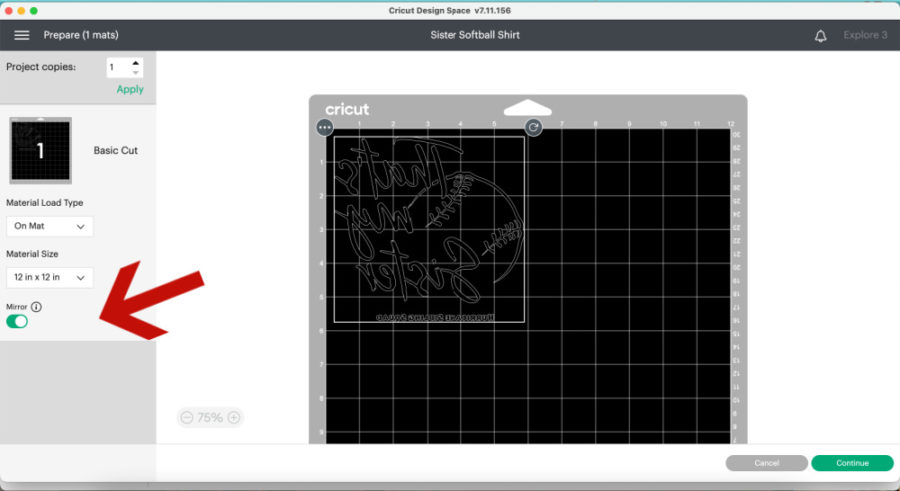
Click “Make it” in the top right corner of Design Space. On the next screen, make sure to mirror the image before cutting. Click “Continue” and select Everyday Iron-On from the list of materials.
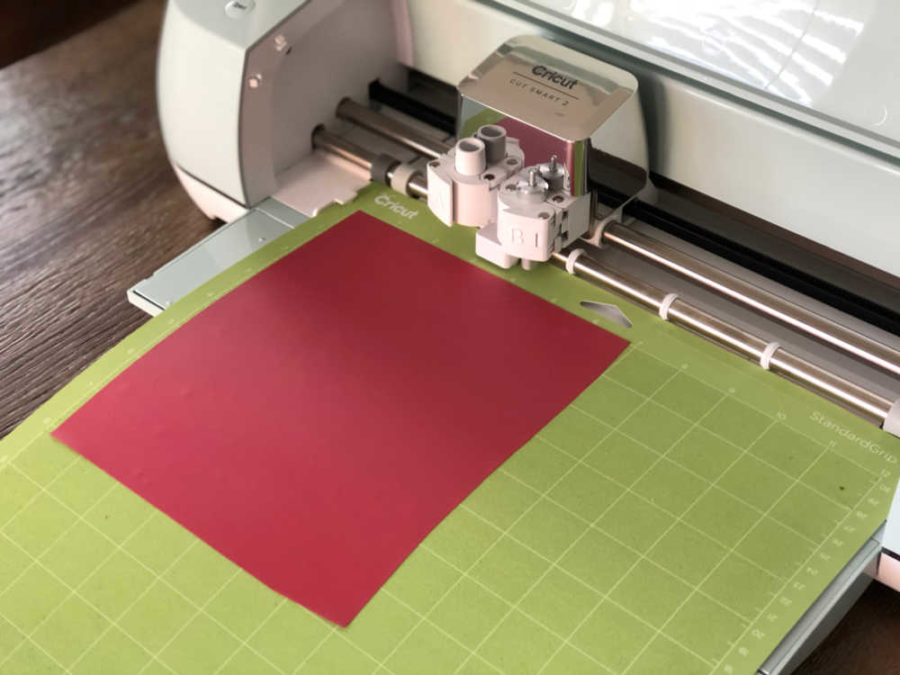
Place Iron-on sheet, liner side down, onto Cricut StandardGrip cutting mat. If you are using SmartMaterial you can skip the mat. Load the mat or material into your machine and press “Go”. The machine will cut your design. Unload the design when finished.
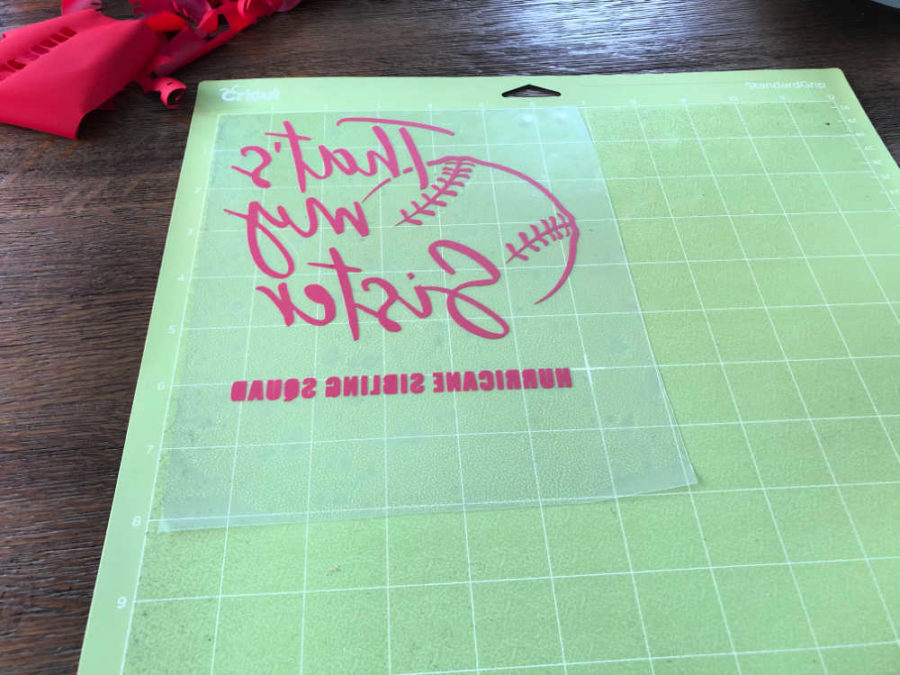
Using your fingers or weeding tools, weed the design. Remove from the mat.
Apply the Design to the Shirt
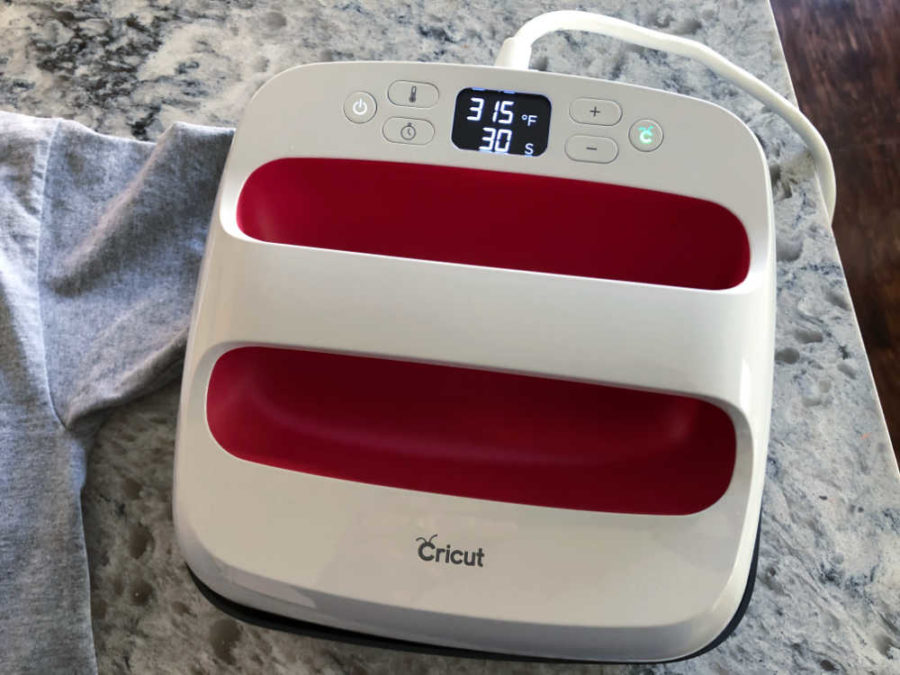
Turn on your heat-press to the correct temperate and time settings as found in the Cricut Heat Guide. We used Everyday Iron-On and a 100% cotton shirt and used an EasyPress 2 at 315 degrees. Preheat the shirt as instructed. Ours was 5 seconds.
Place the cut design on the shirt with the shiny liner side up. As a guide, use 1-2 finger spaces between the collar and the top of the design. Apply heat as instructed in the heat guide. We did 30 seconds on the front then flipped and did 15 seconds on the back.
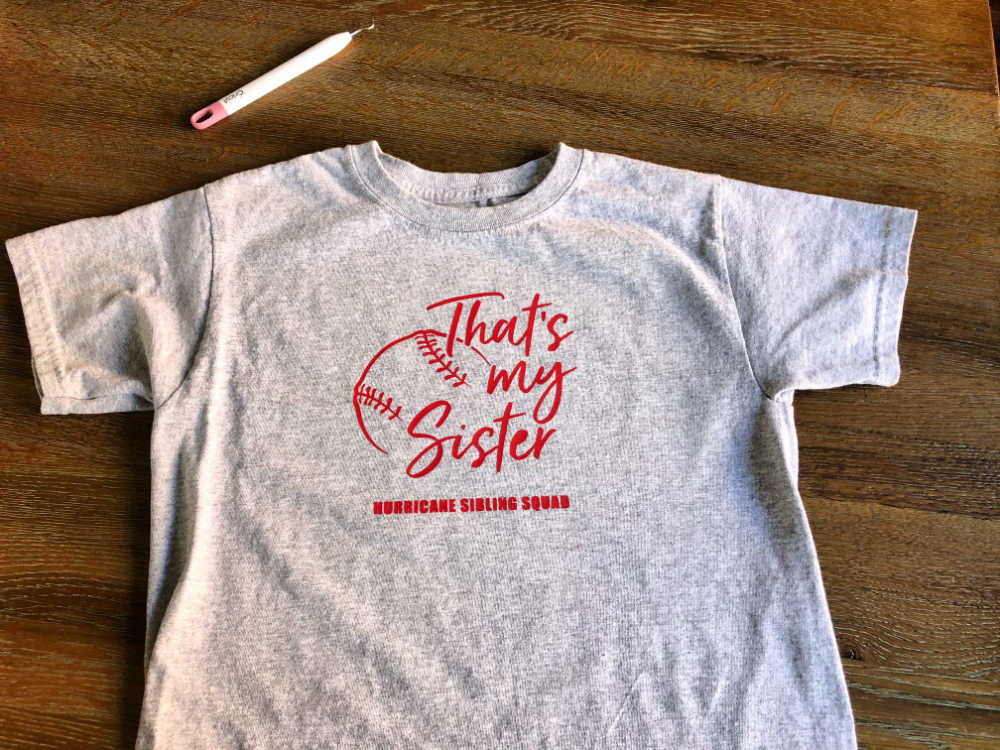
Slowly and carefully remove the liner when cool to touch. If the design is not sticking to the shirt, let it cool some more. Wait 24 hours before washing the shirt and always wash it inside out to keep the vinyl on.

