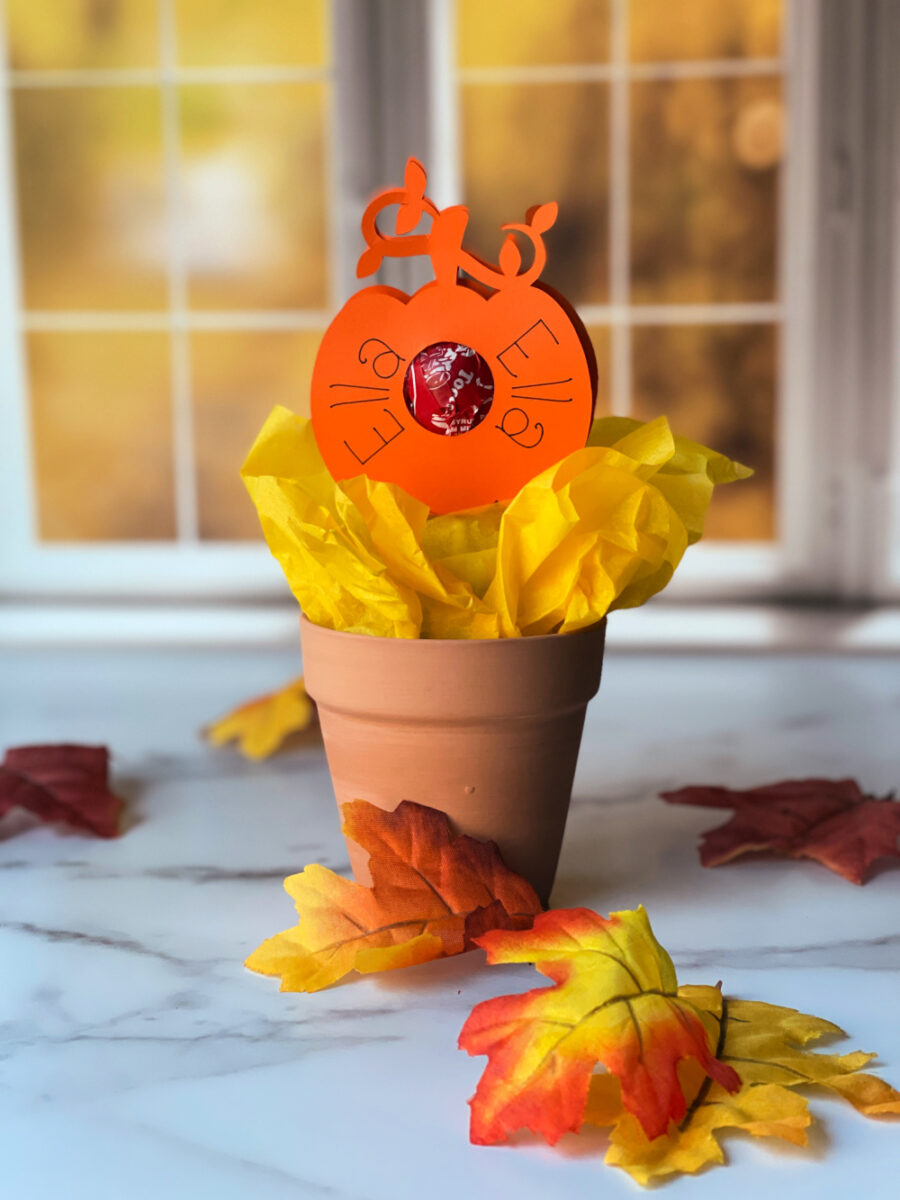
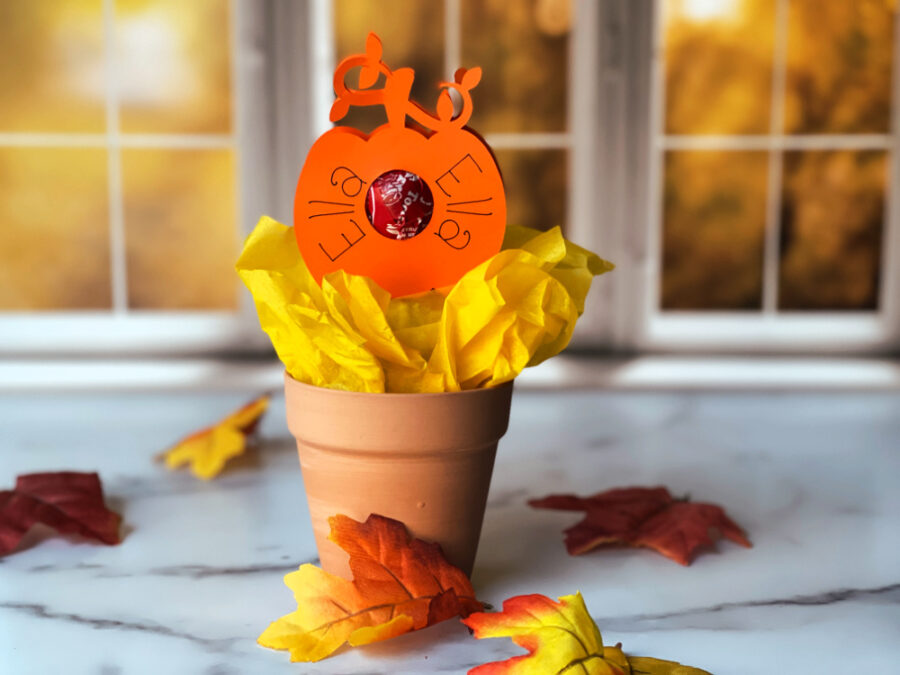
Pumpkin Thanksgiving place cards made from card stock and lollipops in dollar store planters are adorable for kids and adults.
Make your Thanksgiving table fun with Pumpkin Thanksgiving place cards. Pumpkin place cards are easy to make with lightweight card stock, Tootsie pops, and dollar store terra cotta planters. Cut out the pumpkin on a Cricut cutting machine. Let the machine also write the names on the cards. Super easy! Pumpkin lollipop place cards are fun for both the kid’s table and the adults.
Easy Pumpkin Thanksgiving Place Cards
Thanksgiving Place Cards with Cricut
Pin For Later-
Reader’s Favorite!
Free Printable Thanksgiving Coloring Pages
-
Reader’s Favorite!
Thanksgiving Dinner Printables
Pumpkin Thanksgiving Place Cards Supplies:
- Halloween Lollipop Holder SVG from DesignBundles.net
- Lightweight orange card stock
- Tootsie Roll lollipops – we tried several different brands, and these worked best
- Glue dots, tape, or glue
- Cricut cutting machine
- Cricut Light Grip cutting mat
- Small terra cotta pot
- Floral foam
- Fall colored tissue paper
How to Make Pumpkin Thanksgiving Place Cards
Upload the Pumpkins to Cricut Design Space
The pumpkin design for the place cards comes from DesignBundles.net. They are a great resource for all kinds of crafts. This design was made for Halloween and comes with a pumpkin, cat, spider, and bat. For the place cards, you will use the pumpkin. Purchase the set and download and unzip it to your computer.
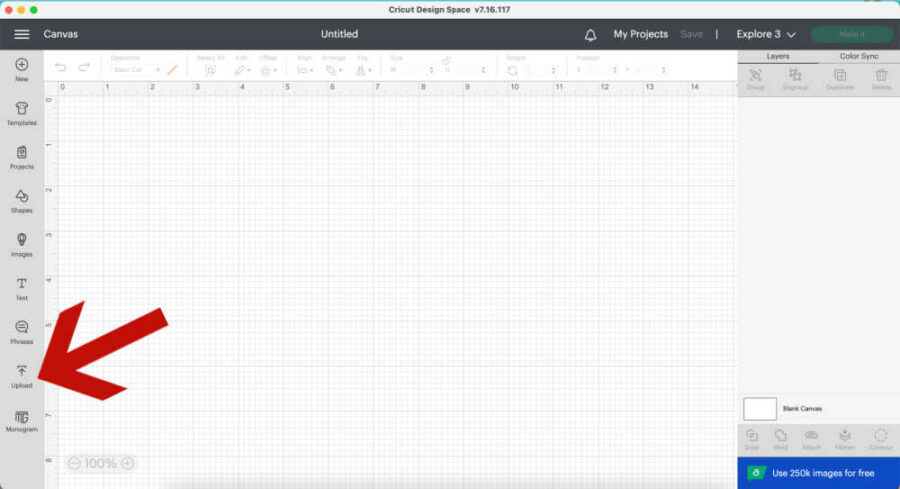
Open Cricut’s Design Space on your computer and open a new canvas. On the bottom left of the screen, click “Upload.”
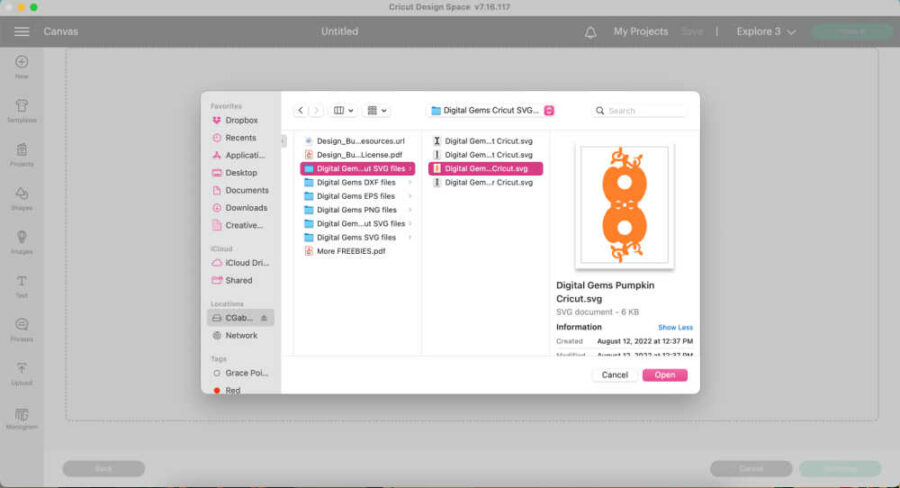
The files from DesignBundles.net come in several different types of files. Choose the pumpkin SVG file you already downloaded to your computer. Click Open or Upload.
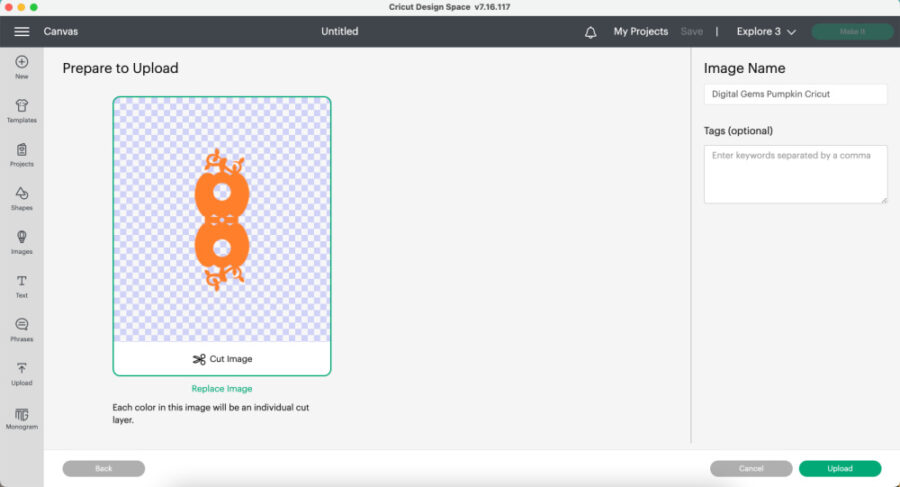
You can change the file’s name at the top if you like. Click Upload on the bottom right.
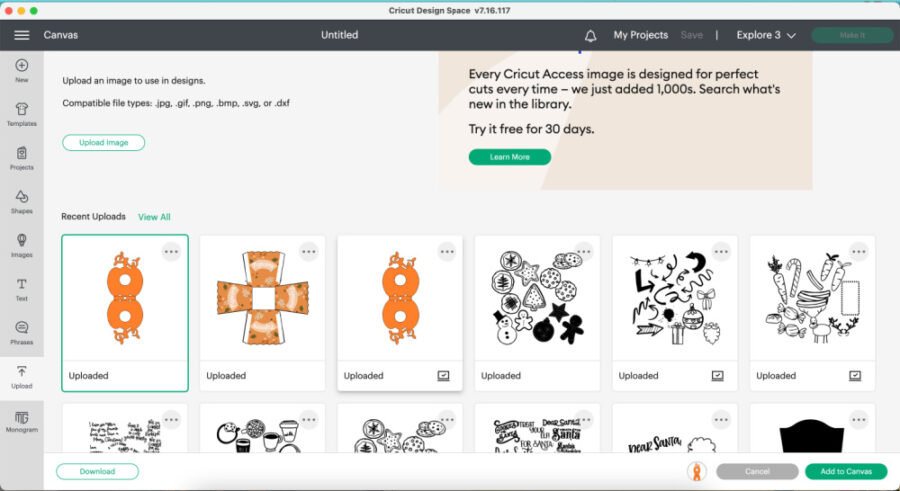
Click on the pumpkin. Click “Add to Canvas” on the bottom right to add the pumpkin to the project. The pumpkin will be added to the Design Space canvas.
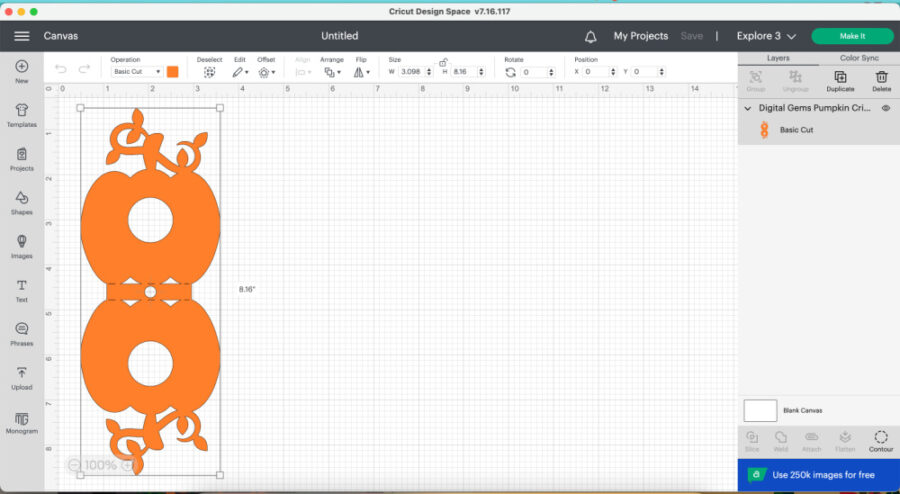
You don’t need to change the size.
Add Names to the Pumpkins in Design Space
You can handwrite the names on the pumpkins, or you can do it on the Cricut.
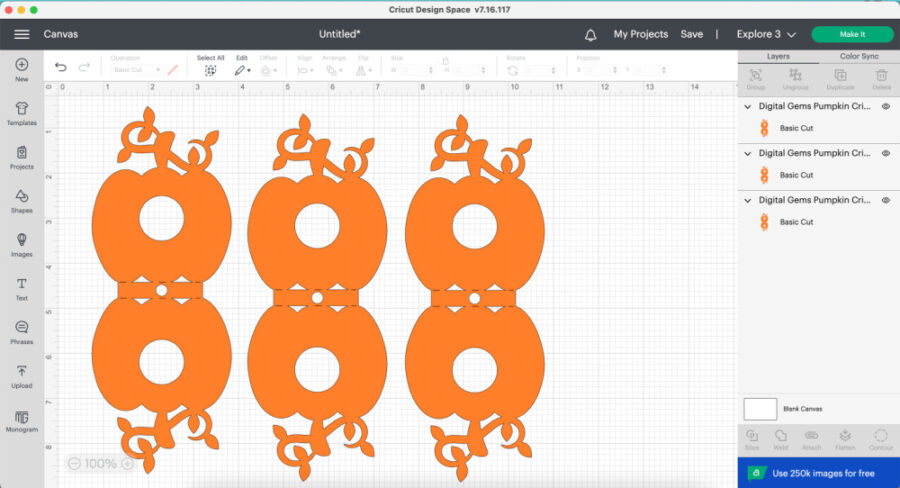
If you are using an Explore or Maker, you can copy and paste more pumpkins if you want to make several of them at once. We just made 1 using the Cricut Joy. You can fit 4 pumpkins on 1cutting mat for the Maker or Explore.
To have Design Space write your names, click “Text” on the left side of the Design Space dashboard. A text box will appear on the canvas. Type in the name you want to add to a pumpkin.
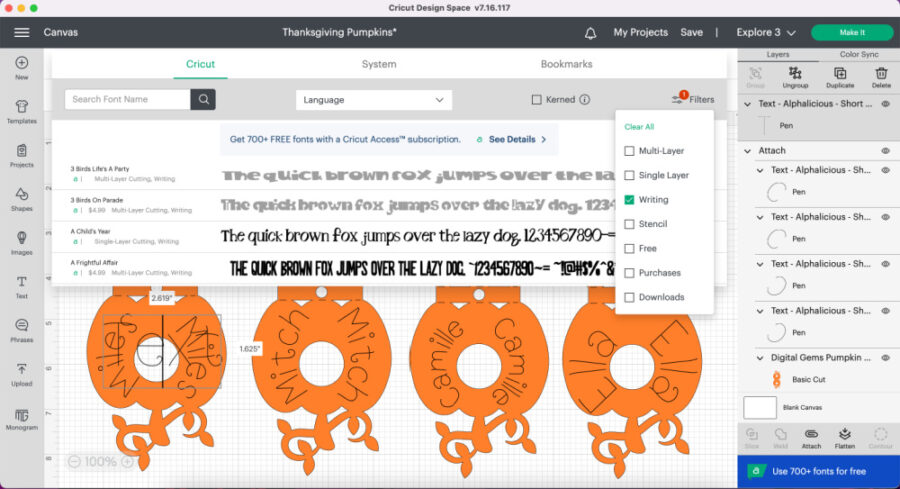
You want to ensure that your font is written and not cut out of the pumpkin. Pick a font you want to use that is writable and ensure the “Operation” is set to “Pen.” You can search under the filters in the fonts and choose “writing” to easily find fonts that write well. We used the font “Alphalicious – Short Stack,” which is available for purchase or with a Cricut Access Membership. When choosing a font, uncheck the box at the top that says “kerned” to see more options.
Rotate the name, so it is sideways by grabbing the corner of the textbox. Then, use the curve tool on the top toolbar to curve the name if you want it that way. You can also leave the name straight. Watch the video above to see how we rotated the names and added them to both sides of the pumpkin.
Once the names are where you want them, highlight and select the single pumpkin and all the names on that pumpkin. Select “Attach” at the bottom right of Design Space. Repeat for all names and pumpkins.
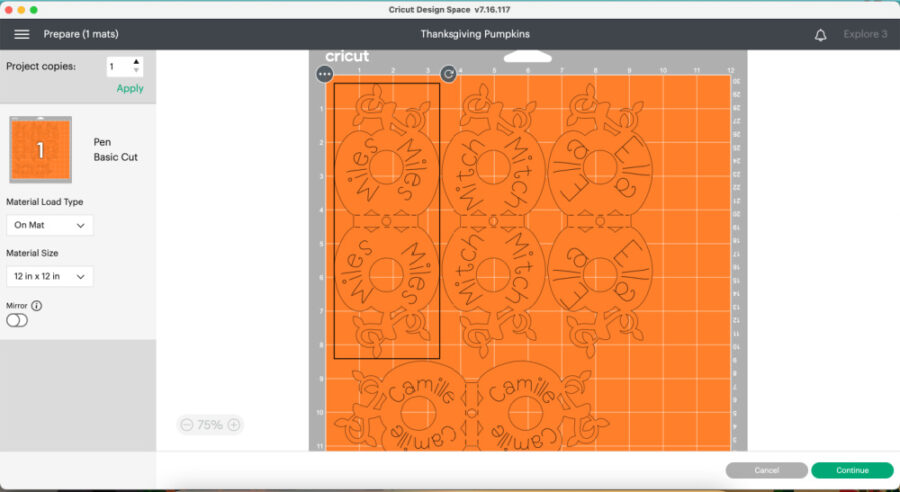
Click “Make it” on the top right of Design Space. The program will automatically fit the designs for you on the mat. Click “Continue” and connect your machine to Design Space. Choose lightweight cardstock as the material.
Cut Out the Pumpkins
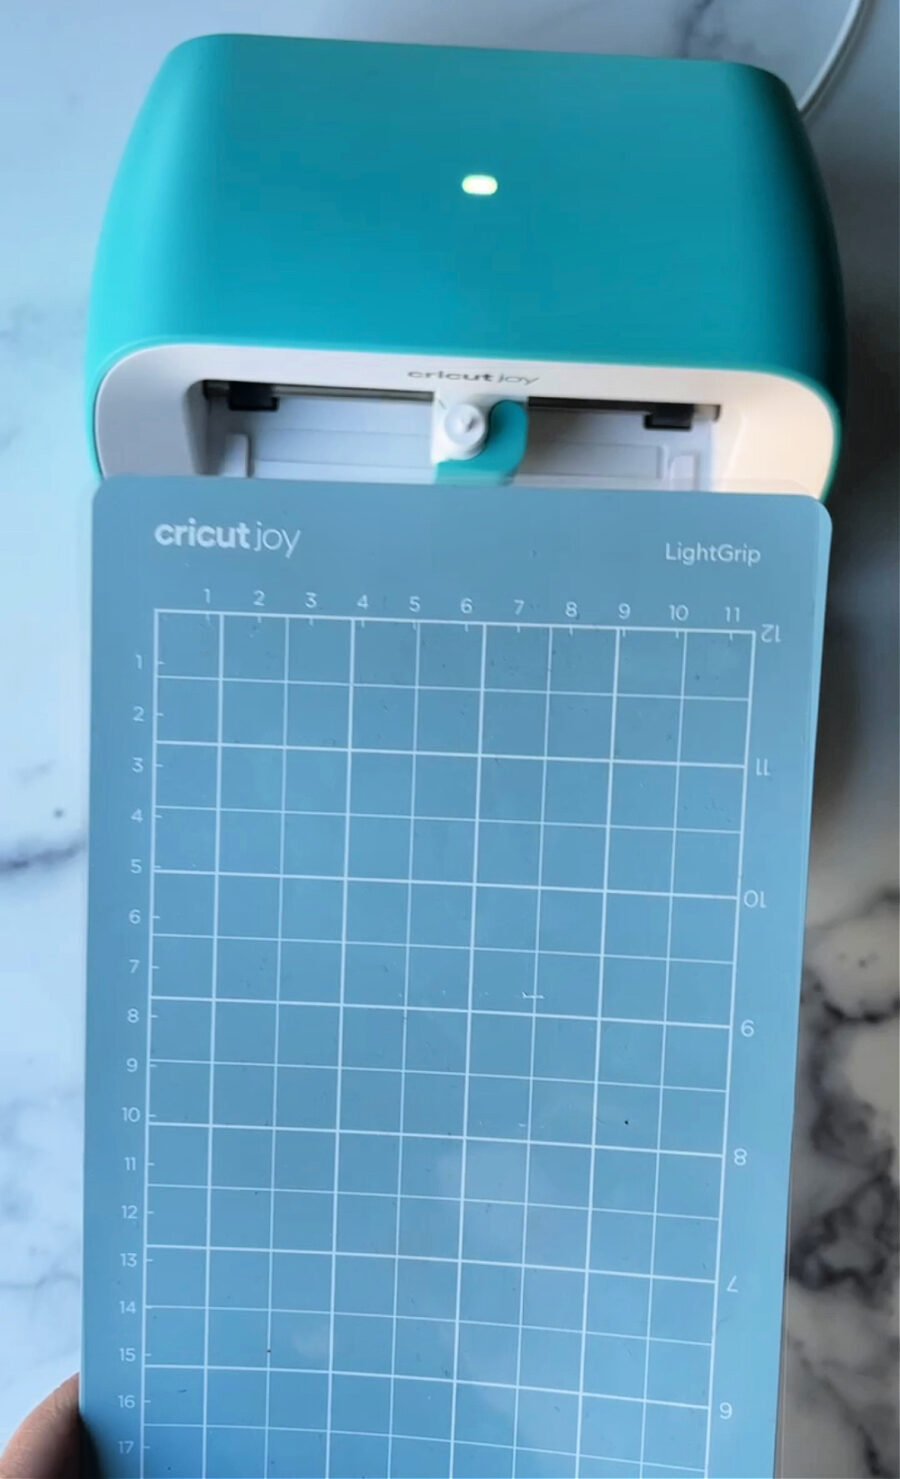
Make sure to use a blue Cricut Light Grip cutting mat for the card stock. You may need to trim the paper down to fit the mat using the Cricut Joy.
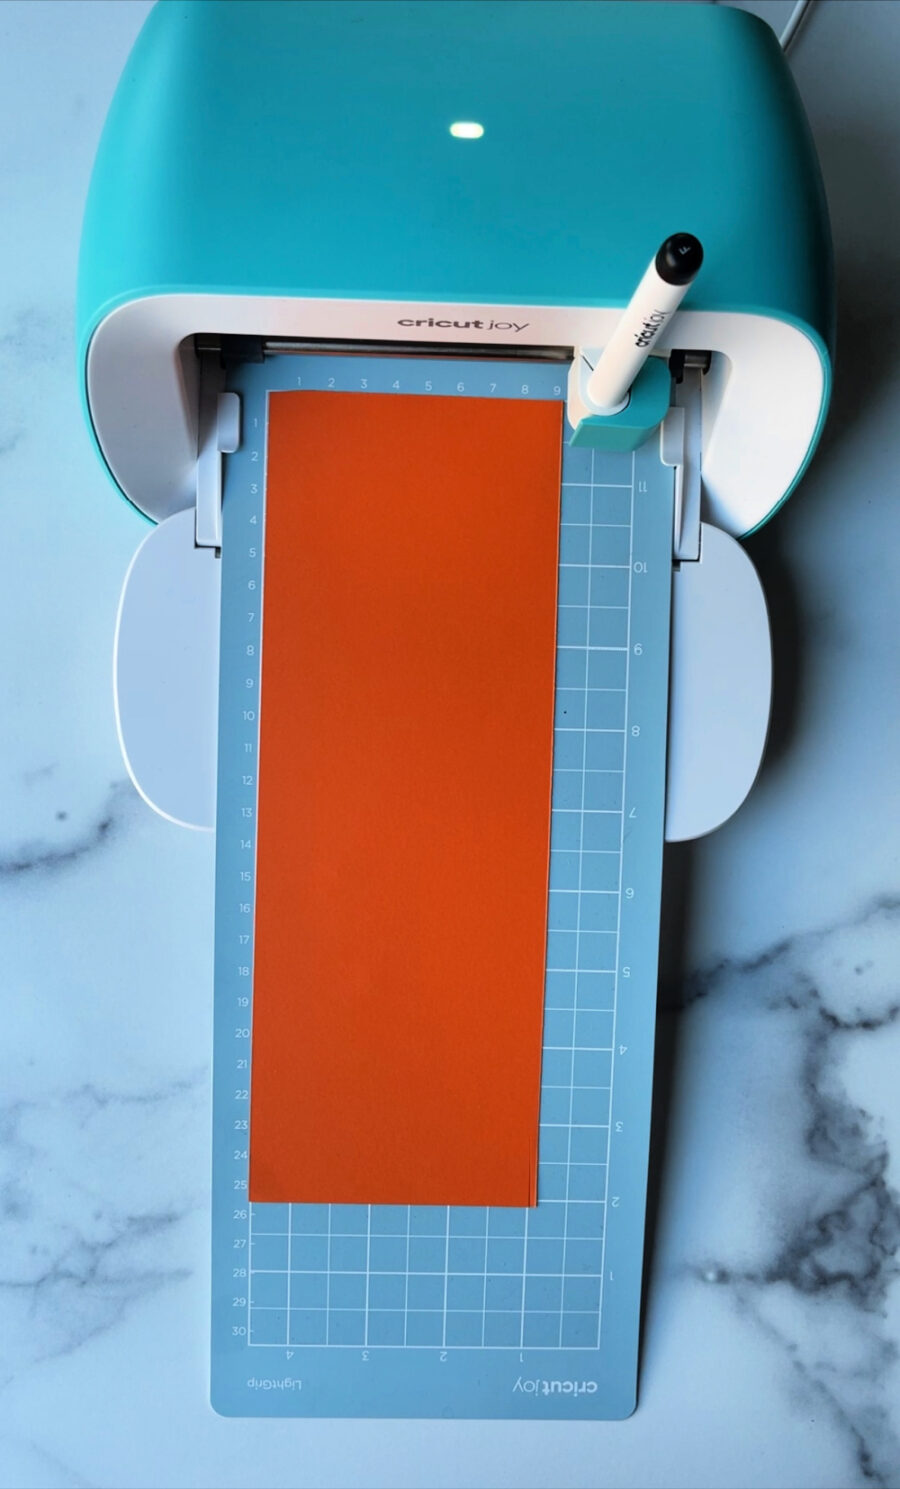
Put the card stock on the cutting mat. Choose Lightweight Card Stock as the material. Follow the prompts in Design Space to write and cut the pumpkins.
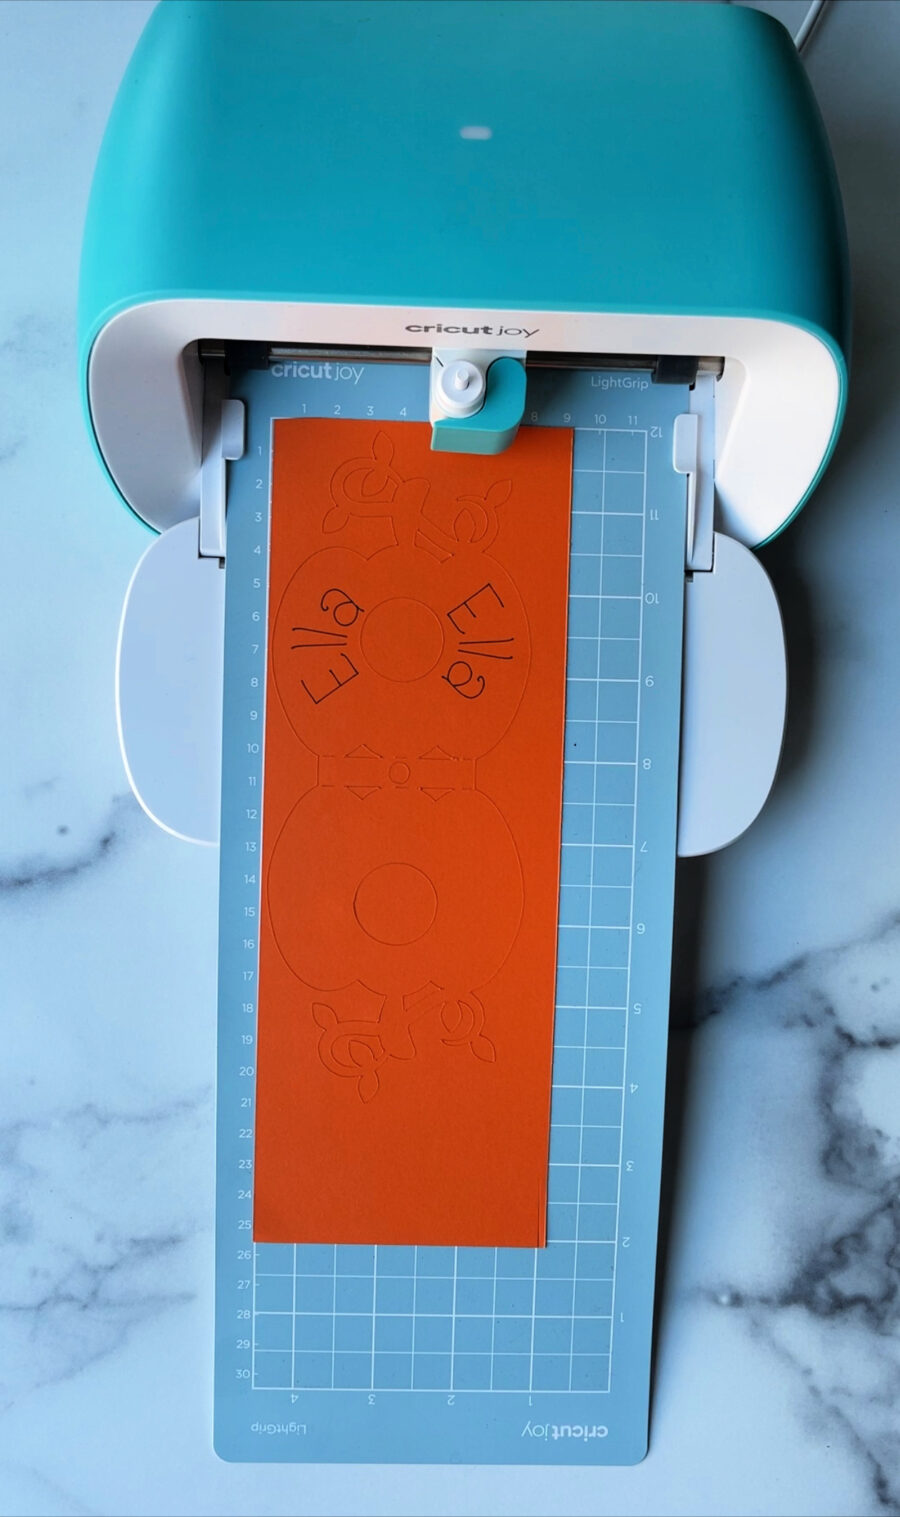
Cricut will always write and then cut. Desing Space will prompt you when to load the pen or the cutting blade. Once finished, unload the mat from the machine.
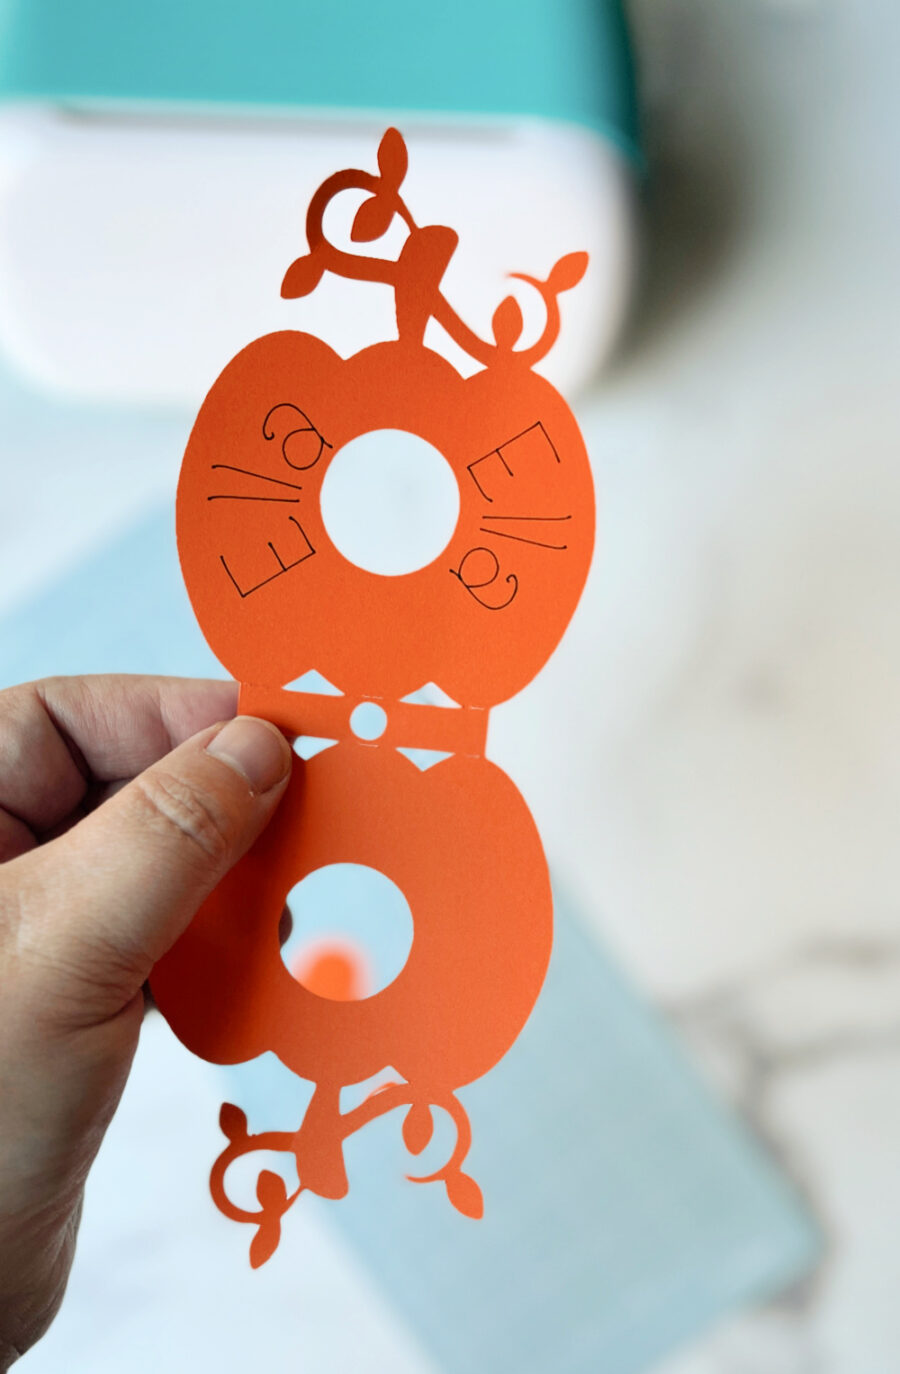
Flip the mat over and very very gently, pull the mat away from the card stock. Go slow so the paper does not tear.
Make the Pumpkin Lollipop Name Cards
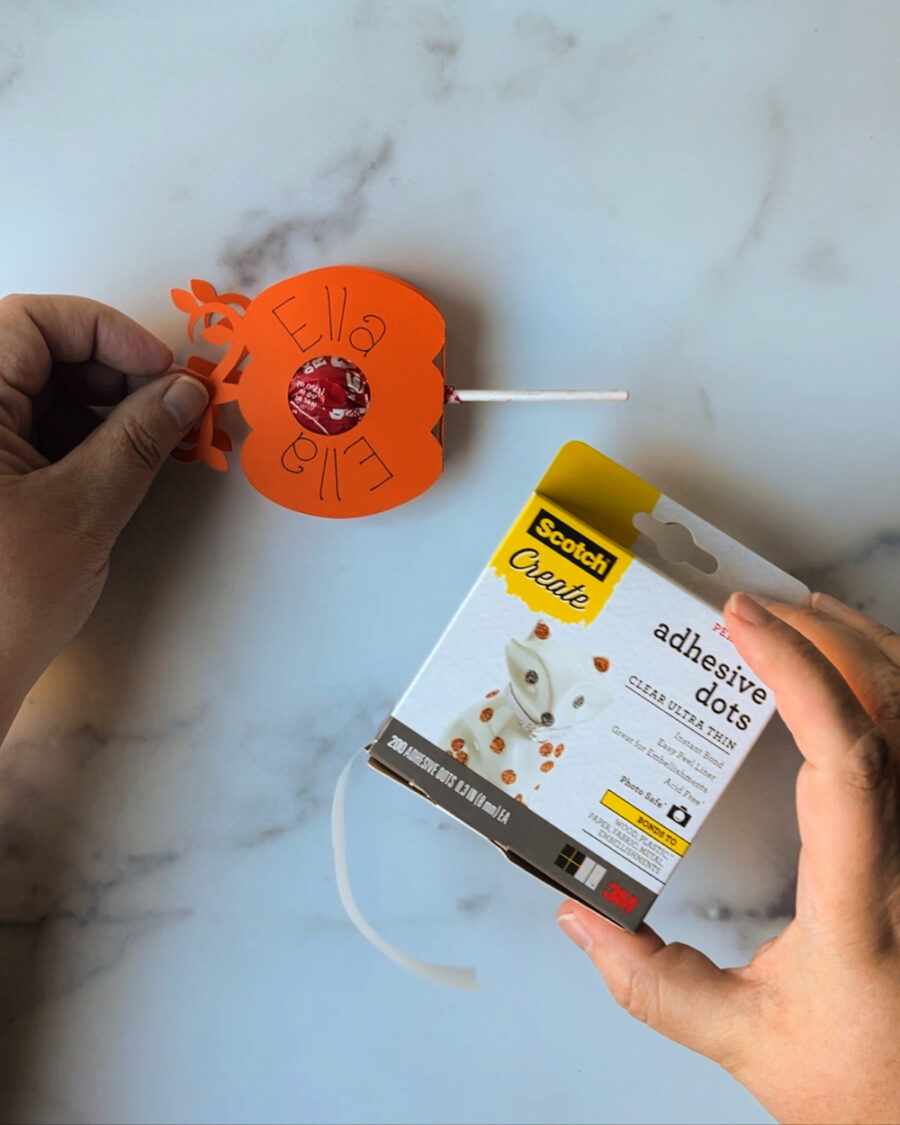
Now that the pumpkin is cut out, put the lollipop stick in the small hole. The pumpkin will easily fold up on either side of the lollipop.
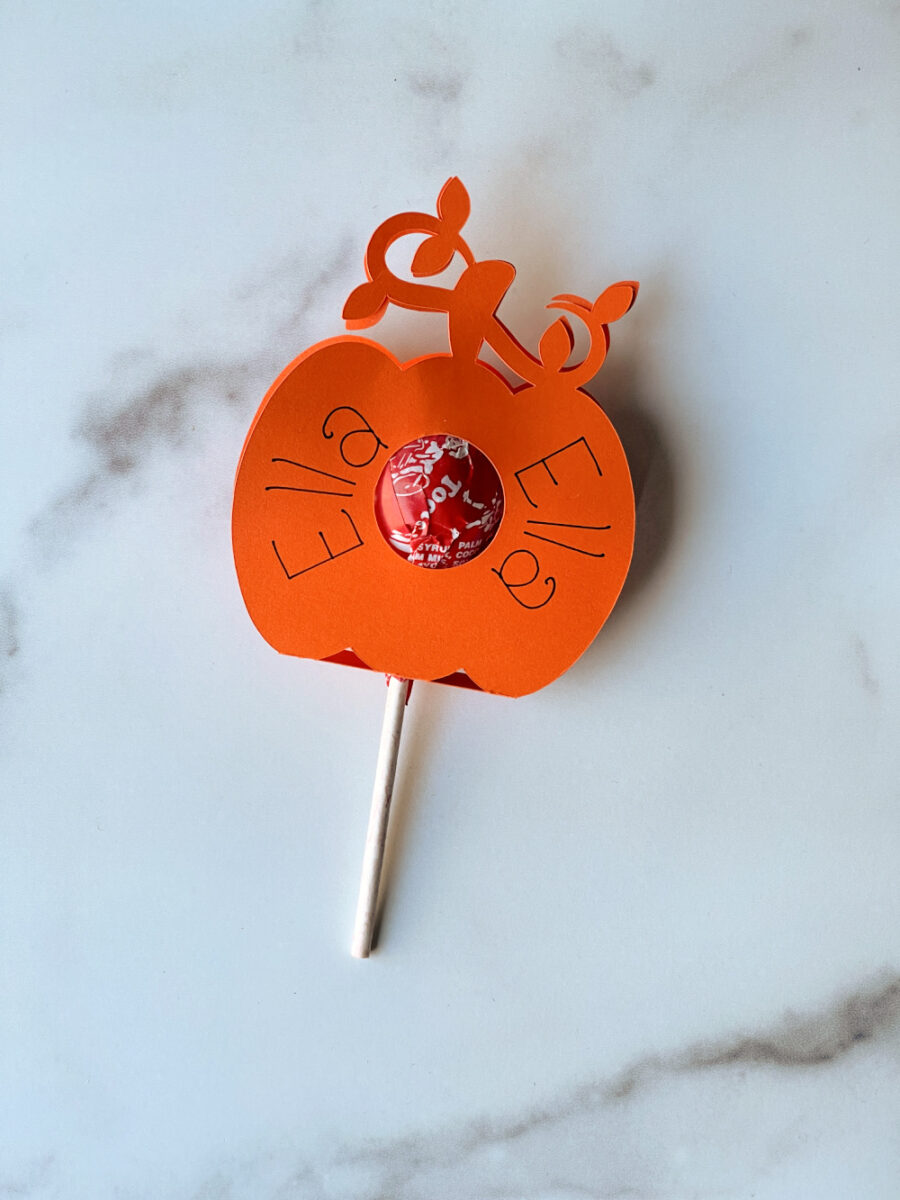
Use tape, glue, or adhesive dots on the top stem to keep the pumpkin closed around the lollipop. You only need adhesive on the stem. This also helps the lollipop fit best.
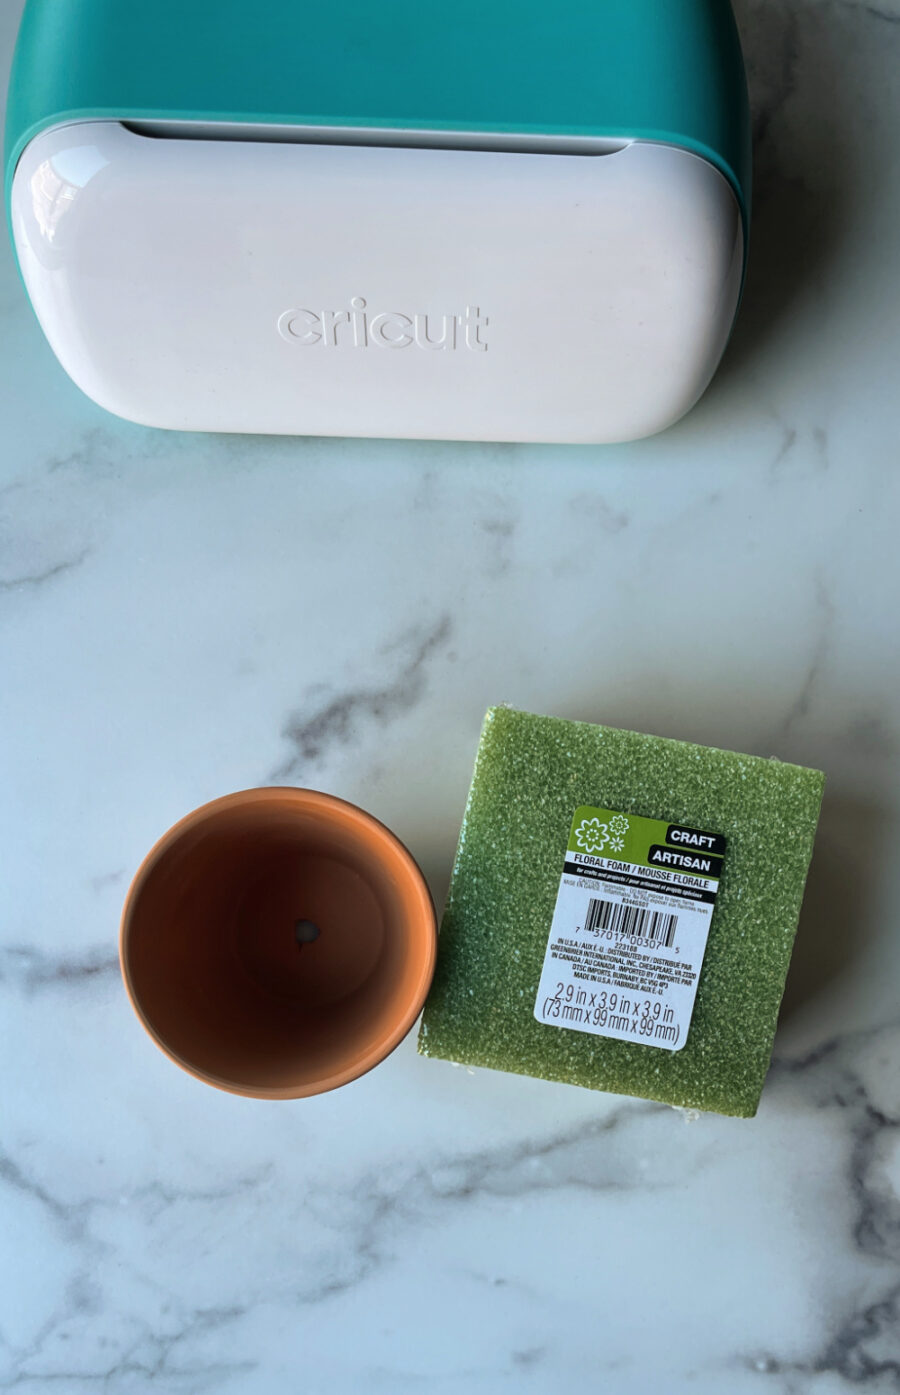
Once the lollipop is done, cut a small piece of floral foam to fit inside the terra cotta pot. It doesn’t have to be perfect, just snug. We used a serrated knife to cut off a small chunk.
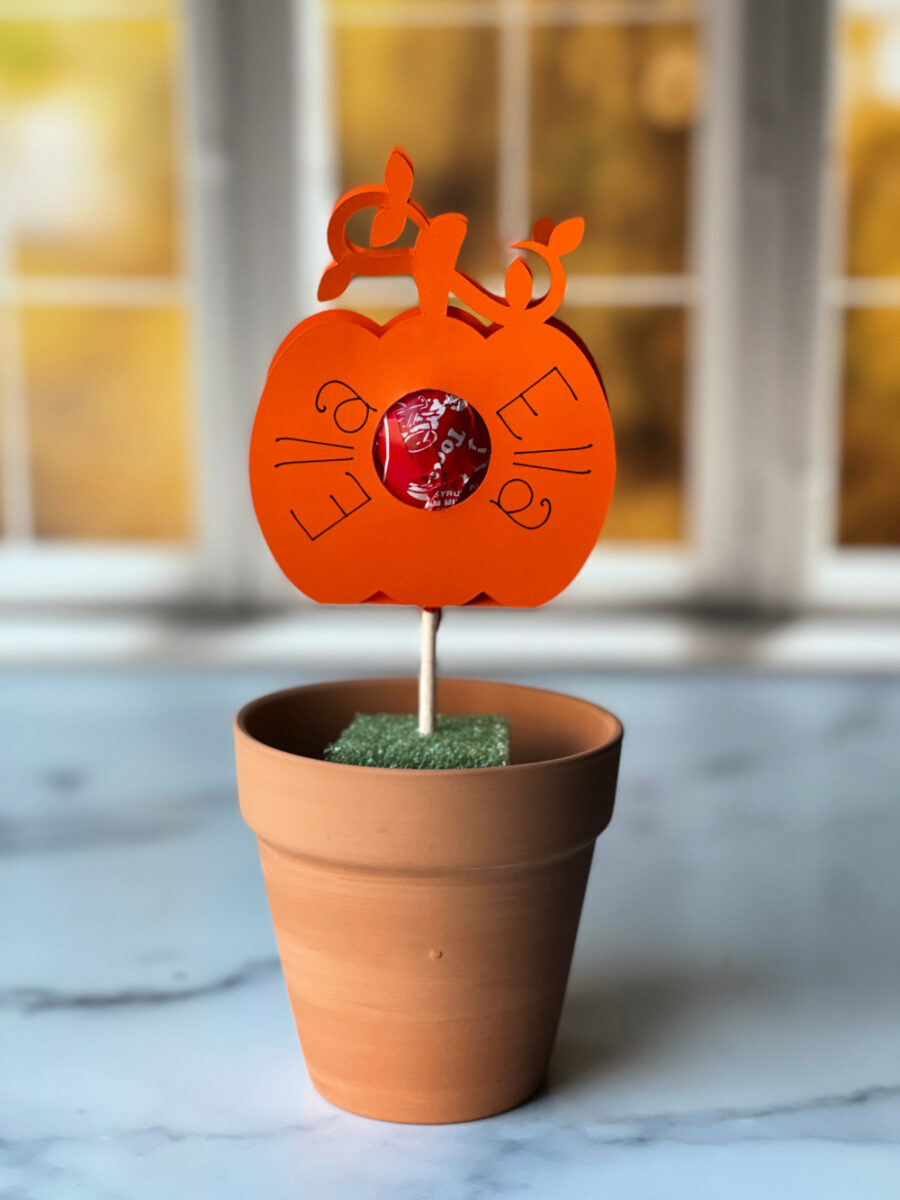
Gently push the lollipop sticks into the foam. Cover the foam with tissue paper and tuck it all into the small terra cotta pots. You may need to trim the tissue paper if it’s too long.
