
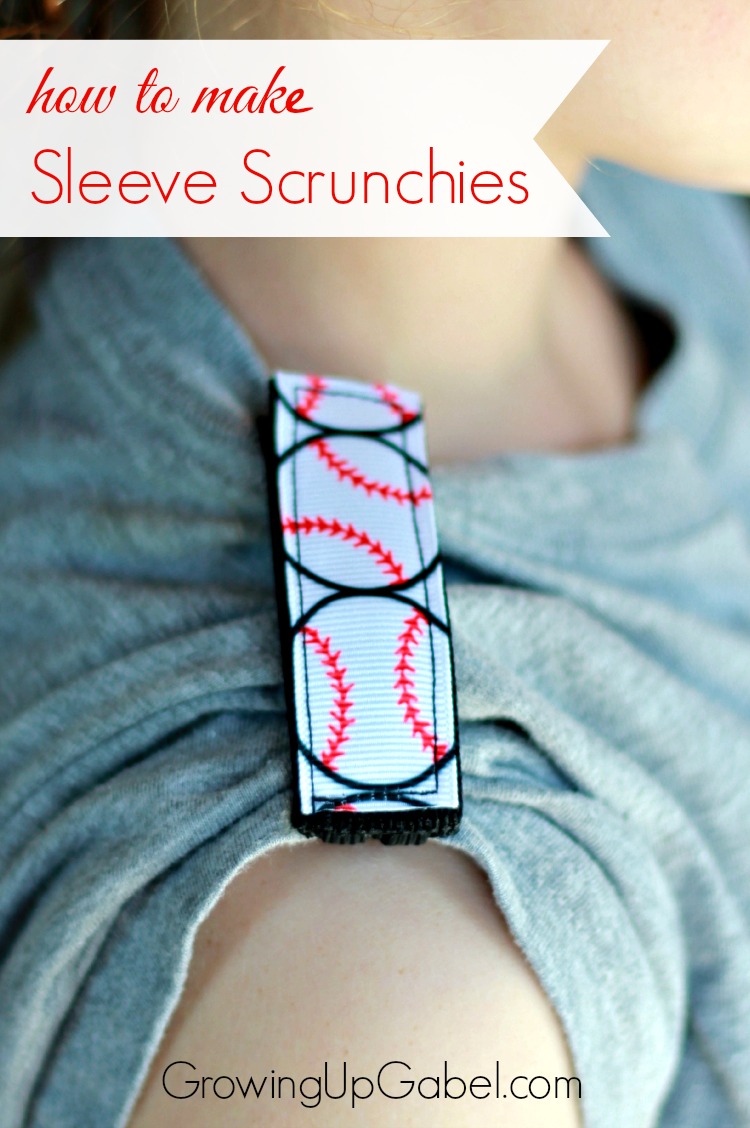
Learn how to make sleeve scrunchies to keep your child’s sleeves up while they play sports. This easy-to-sew tutorial can be personalized to make a sleeve scrunchie with your favorite sport or team.
Back when I was kid when the days got hot and we were busy running around, we’d roll up our short sleeve shirts and hope they stayed put. Now in the day of organized sports for even the littlest athletes, sleeve scrunchies help keep those pesky sleeves from falling down.
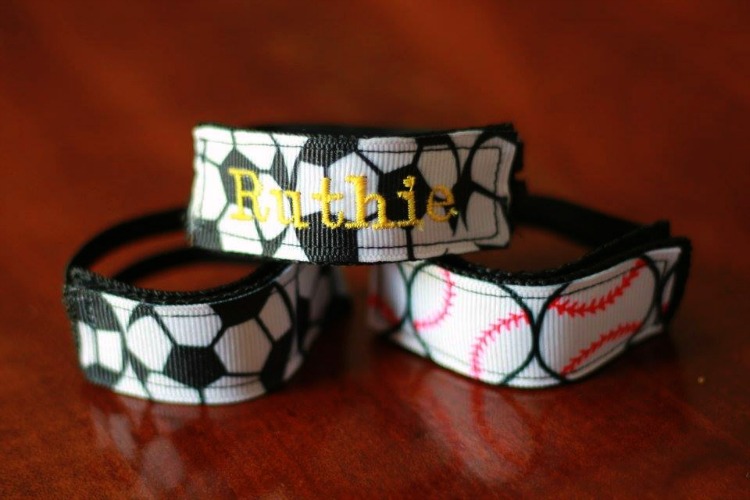
Now you can sew sleeve scrunchies using decorative ribbon, elastic, velcro, and webbing. Personalize them with your favorite sport or colors.
I’m thrilled to introduce you to Alison, the newest contributor to Growing Up Gabel. Alison is a homeschooling mom who is (obviously) very crafty and talented. You are going to love the fun projects Alison will be sharing. I love how quick, easy, and personalized Alison’s sleeve scrunchies are to make.
How to Make Sleeve Scrunchies

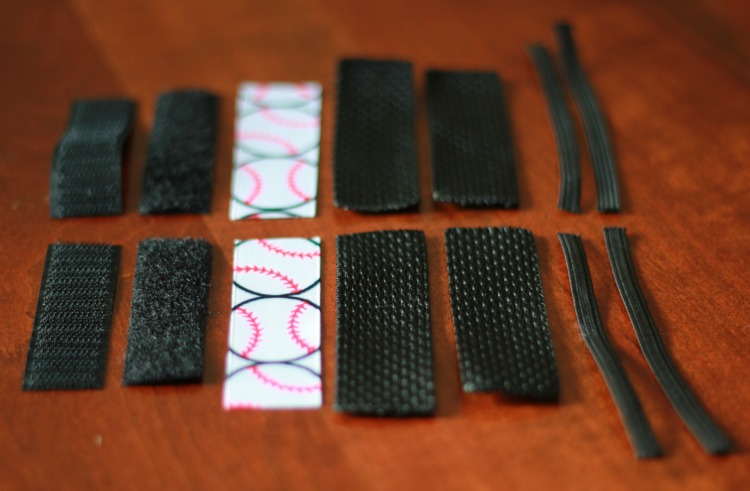
Sleeve Scrunchies Supplies:
- 20” of 1/4” elastic
- 12” of 1” nylon webbing in your preferred color
- 6” velcro
- 6” of decorative ribbon
Sleeve Scrunchies Directions
Start by cutting the elastic, webbing, velcro and ribbon:
- Cut elastic into 4 – 5” pieces
- Cut the webbing into 2 – 3” pieces and 2 – 2 1/2” pieces
- Cut rough velcro into 2 – 2 1/2” pieces
- Cut soft velcro into 2 – 3” pieces
- Cut ribbon into 2 – 3” pieces
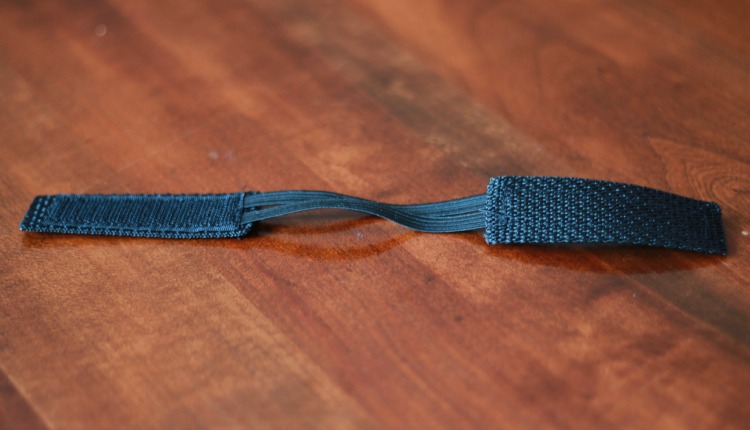
Lightly burn the edges of each piece of webbing and ribbon with a lighter to prevent fraying.

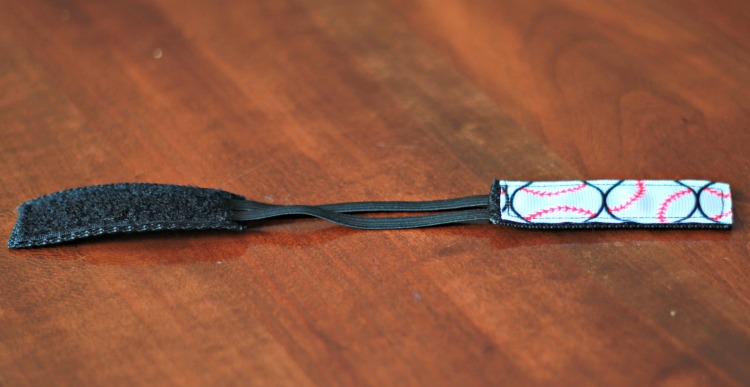
Take one 2 1/2” piece of webbing and a 2 1/2” piece of rough elastic.
Sandwich the ends of two pieces of elastic between the webbing and velcro, with 1/2” of elastic under the velcro, and stitch around the edge of the velcro.
Make sure to go over the end with the elastic twice to ensure a secure hold. Repeat for the other sleeve.
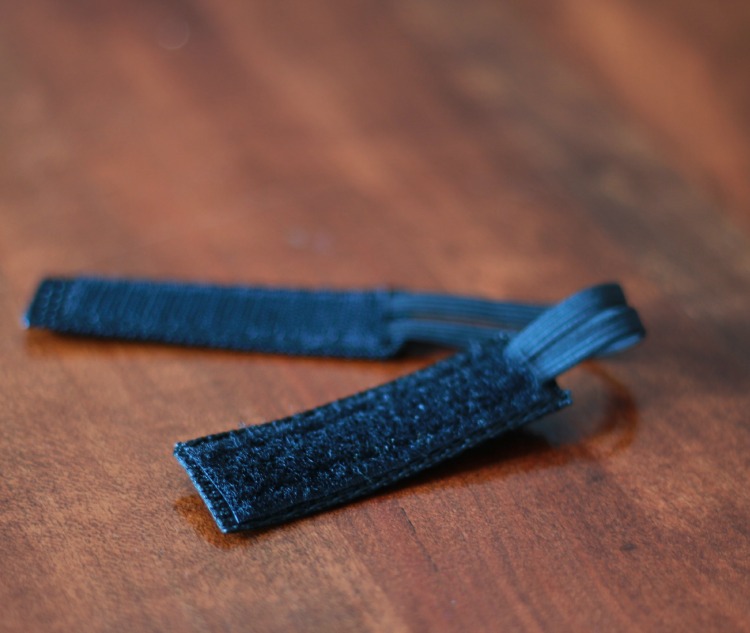
Next, take the 3” piece of webbing and 3” piece of smooth velcro and sandwich the exposed elastic ends between the two, also placing 1/2” of the elastic under the velcro.
MAKE SURE the two pieces of velcro are not on the same sides of the webbing.
When you lay the completed project on a flat surface only one piece of velcro will be seen. The other will be touching the flat surface.
Repeat for the other sleeve.
Finally, take the decorative ribbon and place it on the 3” piece of webbing, opposite the smooth velcro, and stitch around the edge of the ribbon.
Repeat for the other sleeve.
If you have an embroidery machine, you can even embroider names onto the sleeve scrunchies.

How to Make Sleeve Scrunchies
Equipment
- Scissors
- Sewing Machine
- Lighter
Materials
- 1 20” of 1/4” elastic
- 1 12” of 1” nylon webbing in your preferred color
- 1 piece 6” velcro
- 1 piece 6” decorative ribbon
Instructions
- Cut elastic into 4 – 5” pieces
- Cut the webbing into 2 – 3” pieces and 2 – 2 1/2” pieces
- Cut rough velcro into 2 – 2 1/2” pieces
- Cut soft velcro into 2 – 3” pieces
- Cut ribbon into 2 – 3” pieces
- Lightly burn the edges of each piece of webbing and ribbon with a lighter to prevent fraying.
- Take one 2 1/2” piece of webbing and a 2 1/2” piece of rough elastic.
- Sandwich the ends of two pieces of elastic between the webbing and velcro, with 1/2” of elastic under the velcro, and stitch around the edge of the velcro.
- Make sure to go over the end with the elastic twice to ensure a secure hold. Repeat for the other sleeve.
- Next, take the 3” piece of webbing and 3” piece of smooth velcro and sandwich the exposed elastic ends between the two, also placing 1/2” of the elastic under the velcro. MAKE SURE the two pieces of velcro are not on the same sides of the webbing.
- When you lay the completed project on a flat surface only one piece of velcro will be seen. The other will be touching the flat surface.
- Repeat for the other sleeve.
- Finally, take the decorative ribbon and place it on the 3” piece of webbing, opposite the smooth velcro, and stitch around the edge of the ribbon.
- Repeat for the other sleeve.