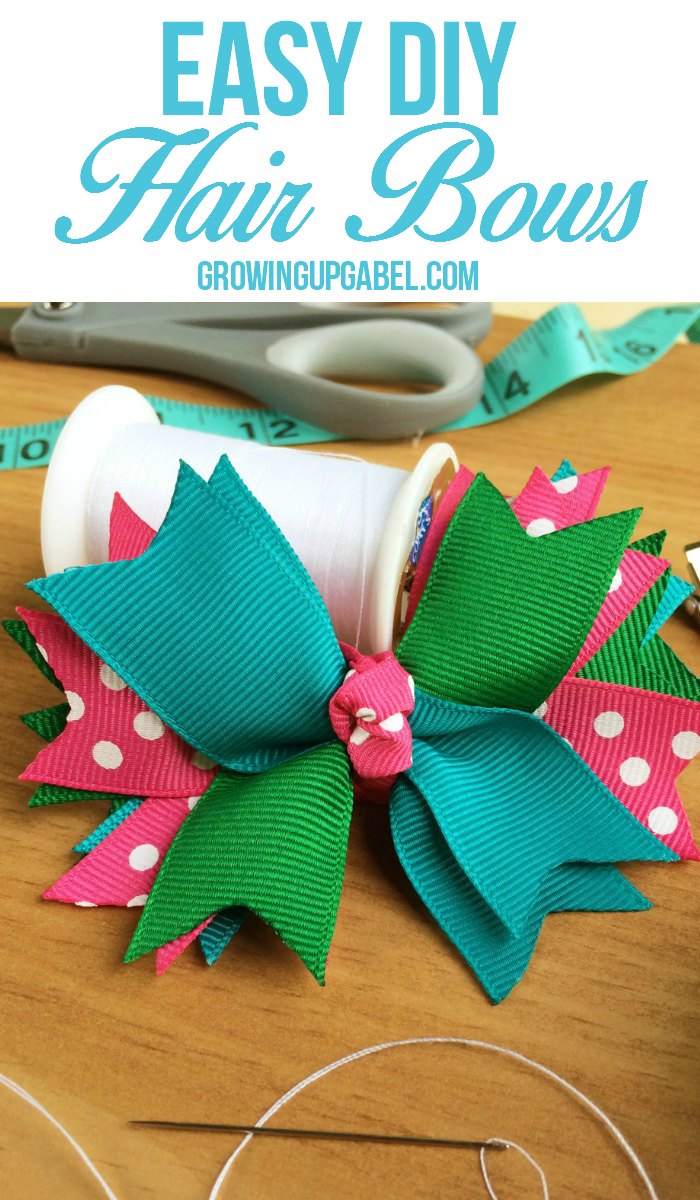
Love hair bows but not the price? Follow this easy DIY tutorial and learn how to make hair bows out of ribbon in any color pattern you love!
Like most mothers of daughters, we have gone through many hair bows over the years. Mostly my daughter wears the hair bow for about 10 minutes and then it ends up at the bottom of my purse or her school bag.
Yet I find myself continuing to buy hair bows at every farmers market we go to in hopes that one day she’ll actually wear one.
I decided it was probably time to learn how to make hair bows out of ribbon. I’ve always got bits and pieces – or entire spools – of ribbon around the house. I seem to be really good at buying ribbon but not so great at using it up.
Instead of buying hair bows, I can now make them. I’m really excited to make a few hair bows this fall that match our school uniforms.
Supplies to Make Hair Bows:
1″ Ribbon, 3 different prints
Measuring tape
Alligator clip
Threaded needle
Scissors
Hot glue gun/glue
Directions:
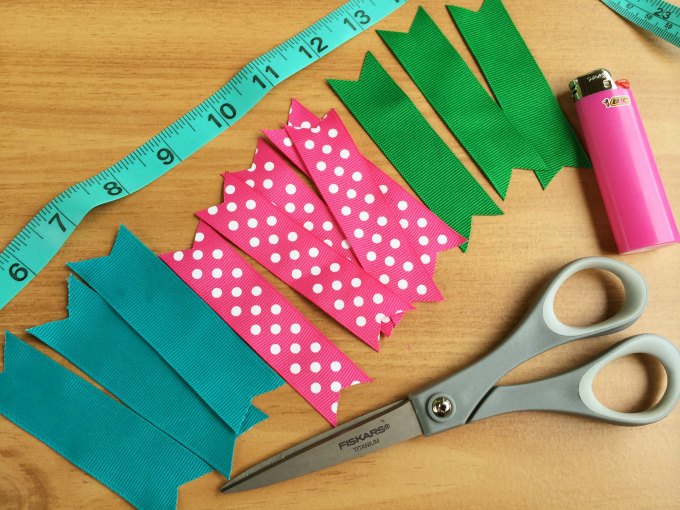
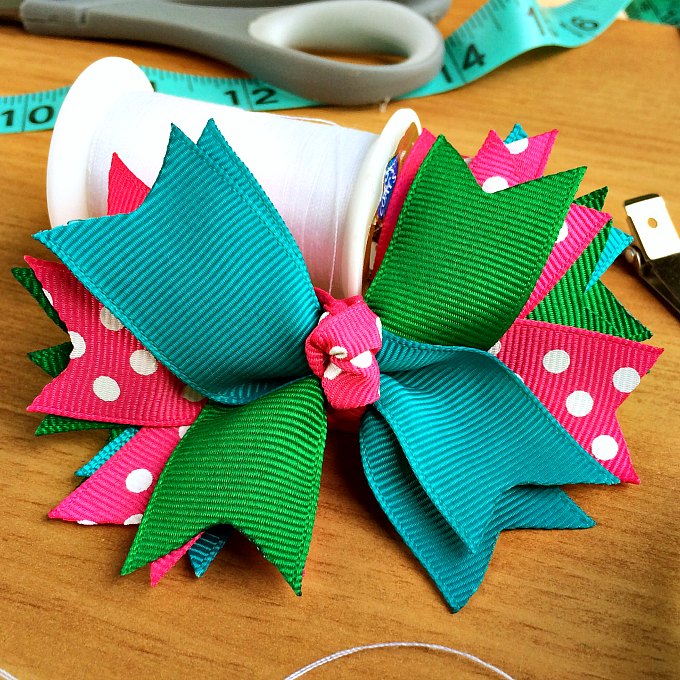
Begin by cutting the ribbon. Cut the first color of ribbon into three, 3.5″ pieces. Then cut the second color ribbon into five, 3.5″ pieces. The pink polka dot was our second ribbon. Finally, cut the third ribbon into three, 3.5″ pieces.
You can add the decorative little point in like pictured, cut the ribbon straight across or even pointed out.
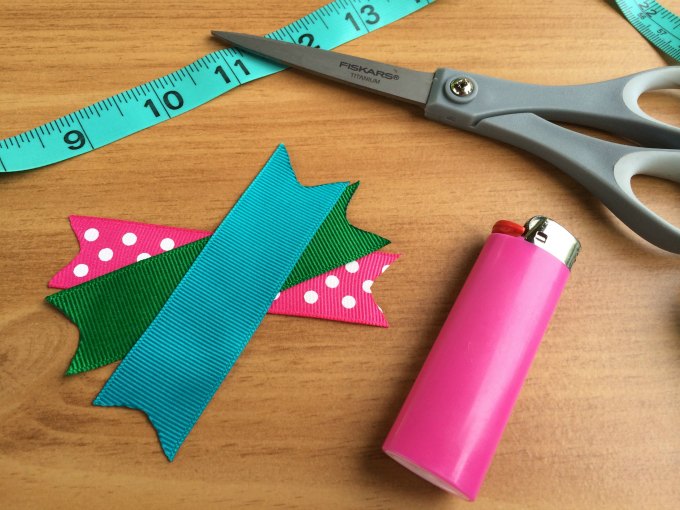
To make the bow, start layering the ribbons in a criss-cross type pattern on the table. Once you have a few layers, use the threaded needle to sew in the center of all ribbons to hold them together.
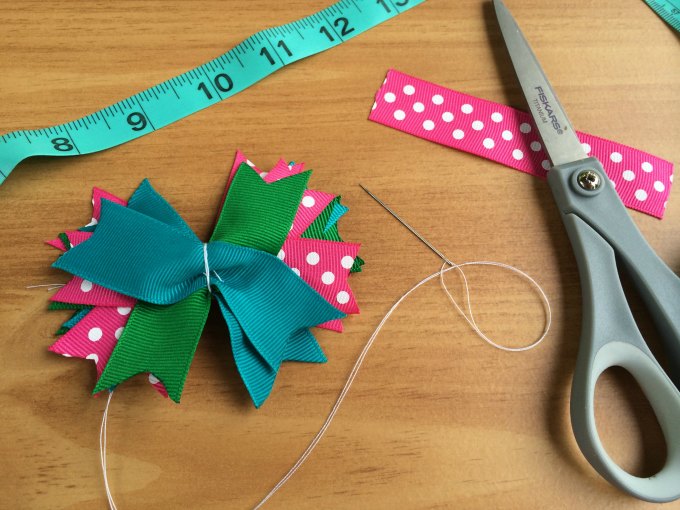
When all the ribbons are laid out like you want, use the threaded needle to sew in and out the middle of the ribbon pile twice. Then, wrap the thread around center about 4 times and tie off tightly.
Cut a piece of ribbon of any color around 5″ long. Tie it around the thread in the middle of the bow to hide it. Knot the ribbon in the center.
Now put a dot of hot glue on the underside of knot and stick it in the middle of your bow
Take each side of your knotted strand and wrap tightly in back and hot glue down
Hot glue the alligator clip on the back of bow. This works best with ribbon lined alligator clips.
Enjoy your beautiful bow!
Thank you for sharing this easy way to keeping our little darlings looking even cuter than they already are. Such an easy and inexpensive way to make any colors we’d want.
Do You have a youtube for this bow?
Love your bow….in the process of making one (first time to make hair bow) ..do you the the knot on the front side of now and then take ribbon to bsck…??I don’t understand “ribbon lined alligator clips”….can you but ribbon longer to make bigger bow? Do you have to use all fridges in ribbon??
What is the lighter for?
Just to lightly burn the ends of the ribbon to keep it from raveling.
The lighter is for burning the ends of the ribbon so it doesn’t fray.
I love this tutorial, thank you for posting. Did you use wired ribbon for this?
Nope! Just regular ribbon.
No – just regular ribbon.
Love this easy quick and cute here in the south every little girl loves a hair bow and my granddaughter loves this one
I bet! I love how versatile they are to make with any color and patterns.
This is super cute. Question. Why do you need 5 of the polka dot ribbon instead of just 4? I see that you need 1 to tie around all the stacks, but I don’t understand where the 5th one goes. Thanks in advance for your help. I’m new to bows, but a little obsessed right now. =)
Did you ever find out what to do with the two extra pieces of ribbon
They are used to tie the middle of the ribbon.
You have brought up a very good details , thankyou for the post.
Thanks for sharing. I have been looking for something like this for a while. I too am a ribbon hoarder.lol I have a 3 year old great granddaughter, sometimes she will leave them in some times not. If she takes them home i never see them again. So I think it would be much cheaper to make.
really great ! thanks !
audrey from paris ( france)
Thanks for sharing your tutorial at the Inspiration Spotlight party. Pinned & shared. Hope to see you again soon.
I’m loving this! Pinned and tweeted! I always love your creations, thanks for sharing this with us at our party! I hope to see you tonight at 7 pm, we love seeing what you have been working on! Lou Lou Girls
How pretty and what a great tutorial! Thanks for sharing on Snickerdoodle Sunday.