Paper Easter Basket with Cricut
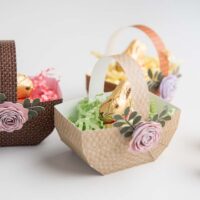
These paper Easter baskets are a fun and versatile addition to any Easter celebration, perfect for holding candy, small gifts, or even as table decorations.
Yield: 1 basket
Equipment
- Cricut Cutting Machine or scissors
- LightGrip Cutting Mat
- Paper Easter basket design
- Scoring stylus or scoring wheel
- Weeding tools
Materials
- Card stock – 8.5 x11” 65-80 lb in three different colors or patterns
- Craft Glue
Instructions
- Upload the SVG file into Design Space.
- Find the layer on the right side containing all the scoring lines. Click on that layer so it is selected. Under “line type” on the top left toolbar, click the drop-down and click on “score.”
- Use the eye icon on the layers panel to turn off the rolled flower and leaves files.
- Next, highlight the entire group that will be cut (the basket, handle, and score lines) and attach it.
- Choose your machine in the drop-down box on the top right.
- Click “Make it” on the top right of the screen.
- On the next screen, choose the option to cut on a mat. Click “Confirm” in the bottom right corner.
- Turn on your machine and get it ready to cut. If you are using a mat, put the cardstock on the mat.
- Once you click continue, Design Space will connect via BlueTooth to your machine. Once it has connected, you will choose the material you want to cut. You can click “Browse Materials” and choose “Medium Cardstock.”
- Change the pressure to More Pressure.
- Click “Edit tools” and let the machine know you are using a scoring stylus.
- Load the mat into the machine. Push "Go." When finished cutting unload the mat.
- Turn the rolled flower back on in the layers panel and turn off all the other layers. Follow the same steps above to cut it out. Repeat again for the leaves remembering to hide all other layers.
- Once all pieces are cut, begin folding all the score lines before creating the basket.
- To create the basket shape, start with the tabs on the inside, closest to the triangle middle, and work left to right. The triangle middle will eventually be the main support of the basket, where each tab will be glued, and layers will build up to create the side of the basket.
- Line up the circle top of the left tab to the circle top of the middle triangle support and glue it down.
- Repeat for the right tab and work your way to the outermost tabs.
- Continue to line up the circle top of each tab to the circle top of the triangle middle, layering each tab.
- Once you reach the last layer, it should be the outermost tabs repeating the above steps. However, the outer tab’s circle top will still line up with the triangle, but this layer will lie straight across horizontally vs. at a diagonal. This creates a straight edge to the side of the basket.
- Glue the basket handle on the inside of the basket from side to side.
- Glue the leaves around the center of all layering tabs.
- Begin to roll the flower file, starting on the outside. Use tweezers or a toothpick to help get the flower started. Once completely rolled, use glue to hold it together on the inner circle tab.
- Glue the entire flower on top of the leaves and help hide the layering tabs meeting point.
Notes
The paper Easter basket pattern includes a PDF so you don’t need a cutting machine to make the basket.