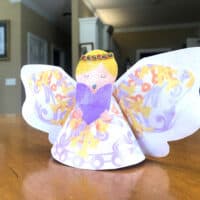
Paper Angel Tree Topper
Yield: 1 angel
Equipment
- Scissors
- Stapler and staples
- Small Paint Brush
Materials
- Paper angel printable
- White craft glue
- Mod Podge Sparkle
- Braid or Ribbon
Instructions
- Download the angel topper printable.
- Cut around the outline, wings, and head of the angel. Stop at the two white dots around the neck. Leave the head attached to the body. Fold the head forward a little bit to create a very light crease.
- Cut out the inner wings and songbook.
- Cut the white slits in each wing. You can see them just to the right and left of the angel’s head on the pattern.
- Curve the angel around and slide the two slits together to form the angel wings.
- Staple the angel at the back so that the wings are evenly placed on each side. Firmly curve the wings back. Slightly flatten the cone body shape so that everything is balanced.
- Glue the smaller, inner wings on the blank side of the angel wings.
- Glue the songbook with the hands to the front side of the body. For a 3D effect, allow the top part of the songbook to remain unattached.
- Paint your angle with Mod Pod Sparkle, if desired.
- Use a small craft paintbrush to add a light coat of the Mod Podge. The Mod Podge will dry clear. Allow to dry completely before moving on.
- Add a halo to your angel using a braid or ribbon. You can use any kind of thin ribbon or braid you like.
- Wrap the ribbon around the forehead and attach it with craft glue at the front and back of the head.
- You can add a string or ornament hanger if you wish to hang the angel from the tree. Or carefully place her at the top of your Christmas tree.
