
DIY rainbow layered soap is an easy soap recipe made with melt and pour soap base is easy to make with a few craft supplies.

Soap making is a super fun and easy craft for both kids and adults with a block of melt and pour soap base, soap dye and fun molds. You can make soap for any occasion like little bunny soaps for Easter or Star Wars soap for May 4th (using Jell-O molds!).
These rainbow soaps look complicated to make, but are very easy. They make great gifts or are just fun to let the kids make and then use in the bathtub.
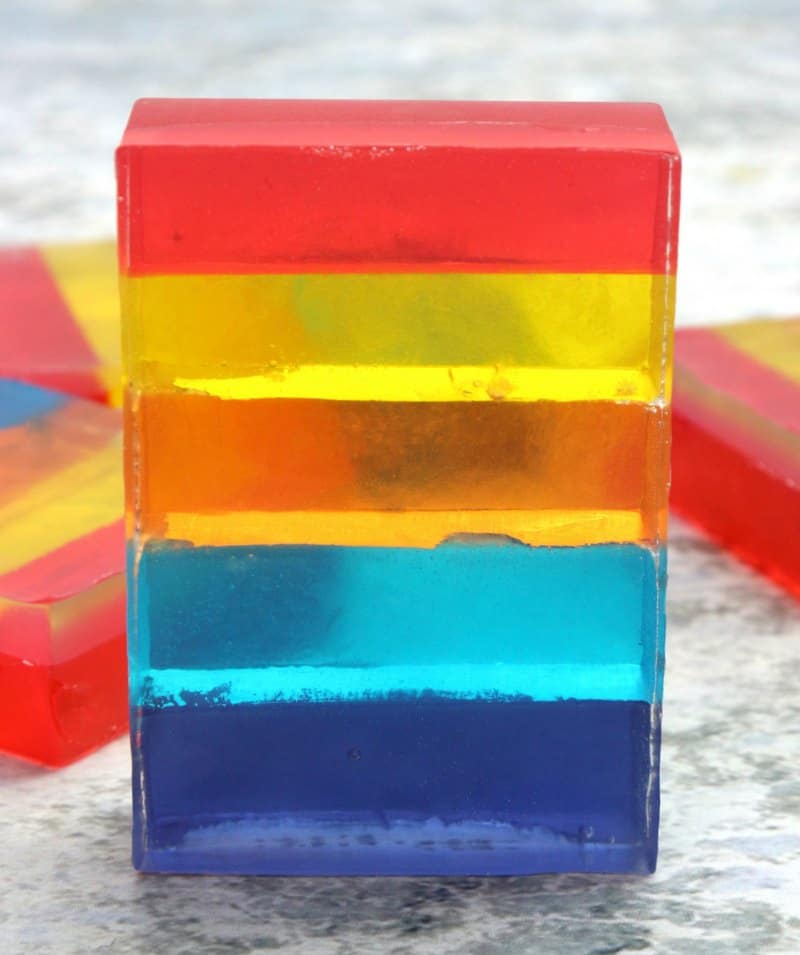
Rainbow Soap
Supplies
You can purchase soap making supplies inexpensively online or in a craft store.
Clear Melt and Pour Soap
Fragrance Oil of Choice (we love Plant Therapy essential oils for soap and candles!)
Silicone Mold
Soap Colorant in Red, Orange, Yellow, Blue, and Purple
5 Microwave Safe Containers OR a Small Pot and 5 paper cups
Rubbing Alcohol in a spray bottle
Directions
Start by cutting 10 oz of the clear melt and pour soap. You will need 2 ounces of the soap for each color layer. There are two ways to melt the soap – on the stove top or in the microwave.
Microwave Melting instructions:
Cut the 10 ounce piece of soap into 5, 2 ounce pieces. Put each chunk of soap into a microwave safe container like a paper cup (5 total). Melt the soap in the microwave in 20 second bursts, stirring well in between.
Stove Top Melting Instructions:
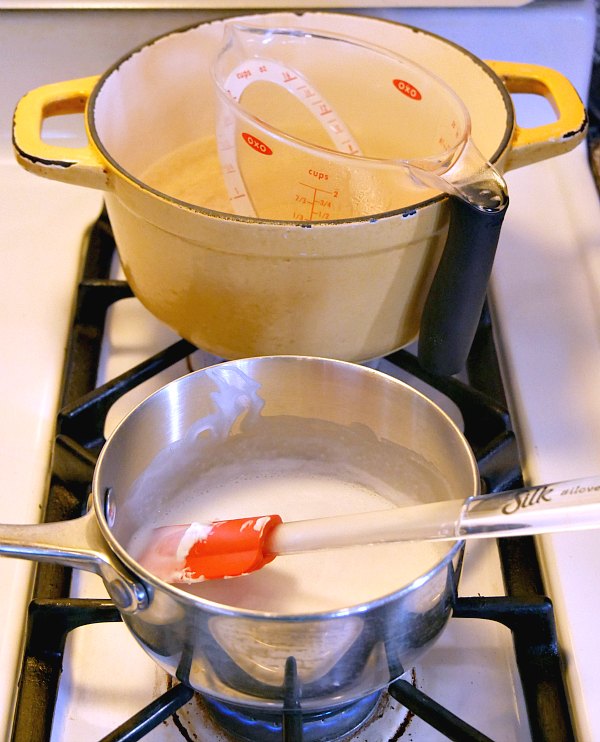
Place all 10 ounces of the soap into a small pot. Heat the soap on low heat until it melts. Stir as needed to keep the soap melting.
Once the soap is completely melted, equally divide the melted soap into 5 different containers like paper cups. Ideally you want 2 oz in each container. A liquid measuring cup can help keep the soap even.
You may to work with 1 colored layer at a time so the soap doesn’t set in the paper cups. You can just re-heat it but the fragrance will be diminished.
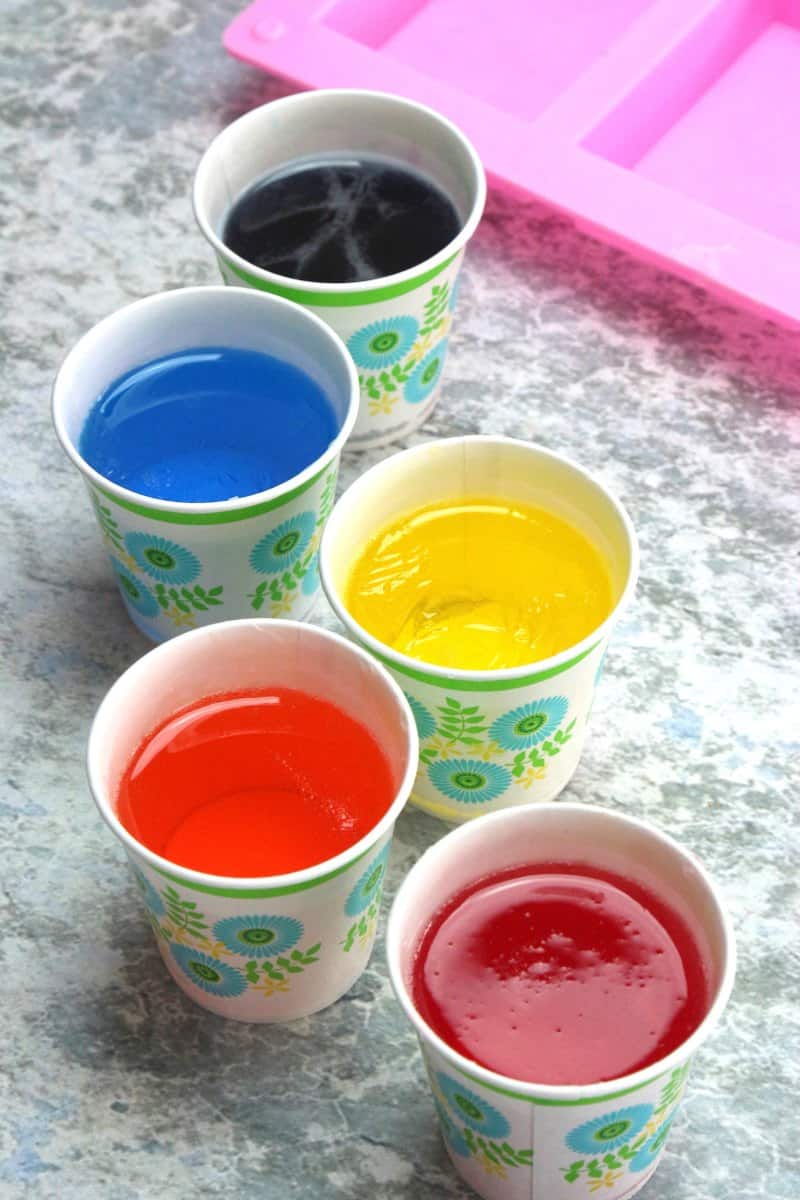
Add one color (Red, Orange, Yellow, Blue, and Purple) and 3-4 drops of fragrance oil into each cup; stir until well mixed. A popsicle stick works great for stirring.
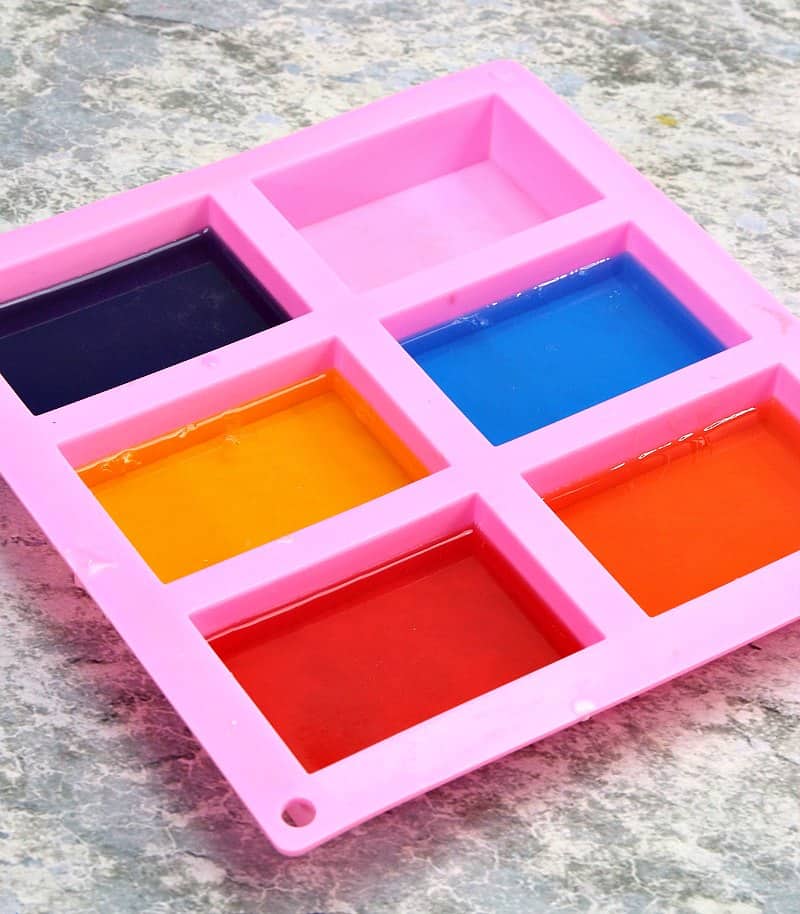
5. Pour the first color into one mold cavity and spritz with rubbing alcohol. Allow the layer to set for about 30-40 seconds. Repeat this process for each color and allow to set for 30-40 minutes to harden.
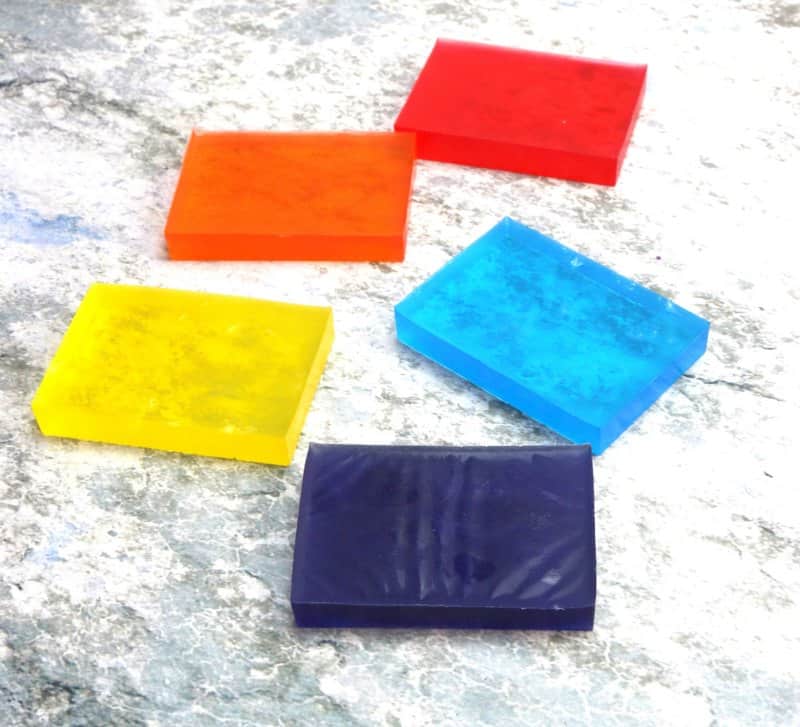
Once each color is hardened, remove from the mold.
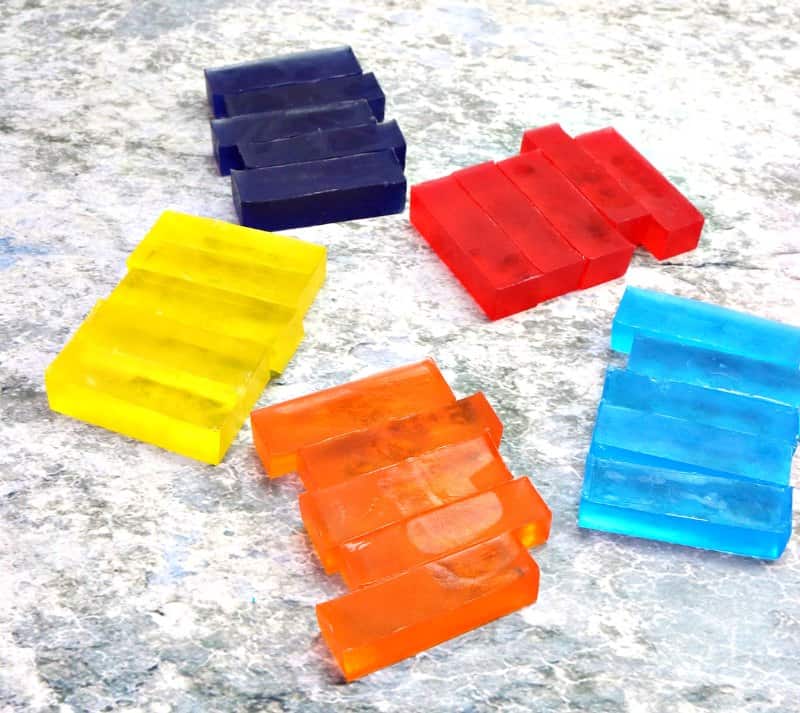
Cut each brick of color into 5 equal portions. A ruler can help make the cuts even.
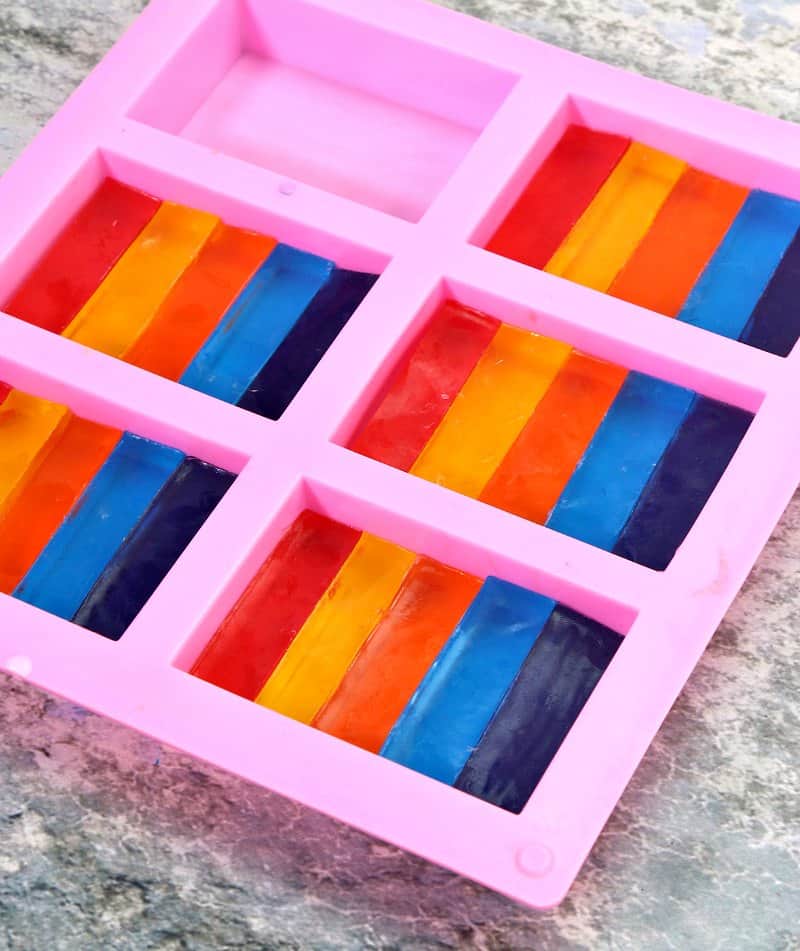
Line up your pieces into the mold in the color order you choose.
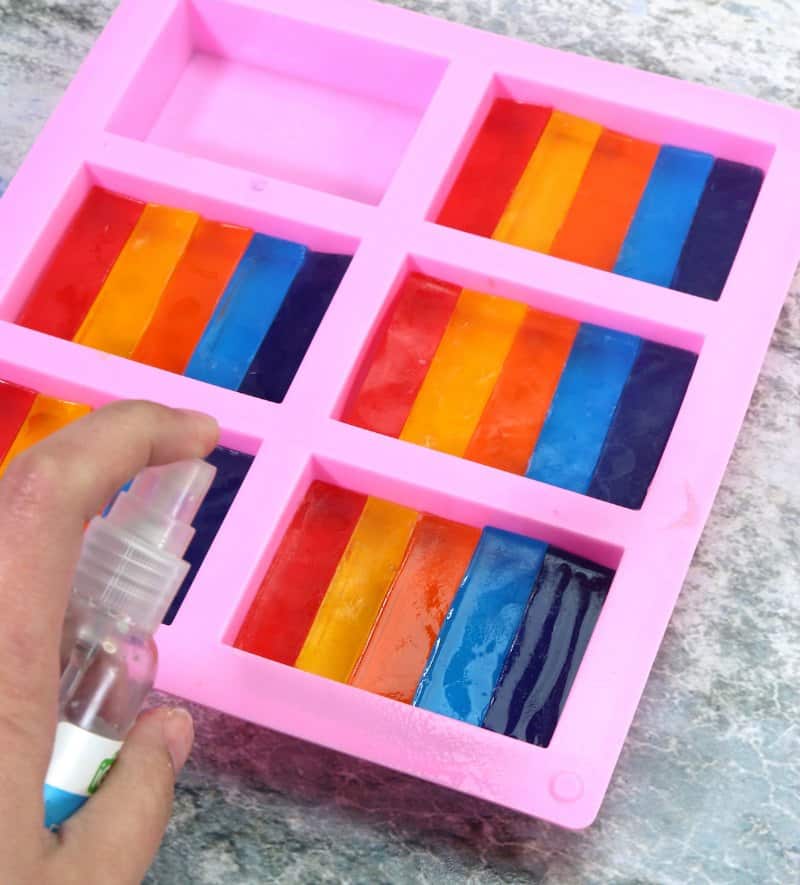
Spritz liberally with rubbing alcohol.
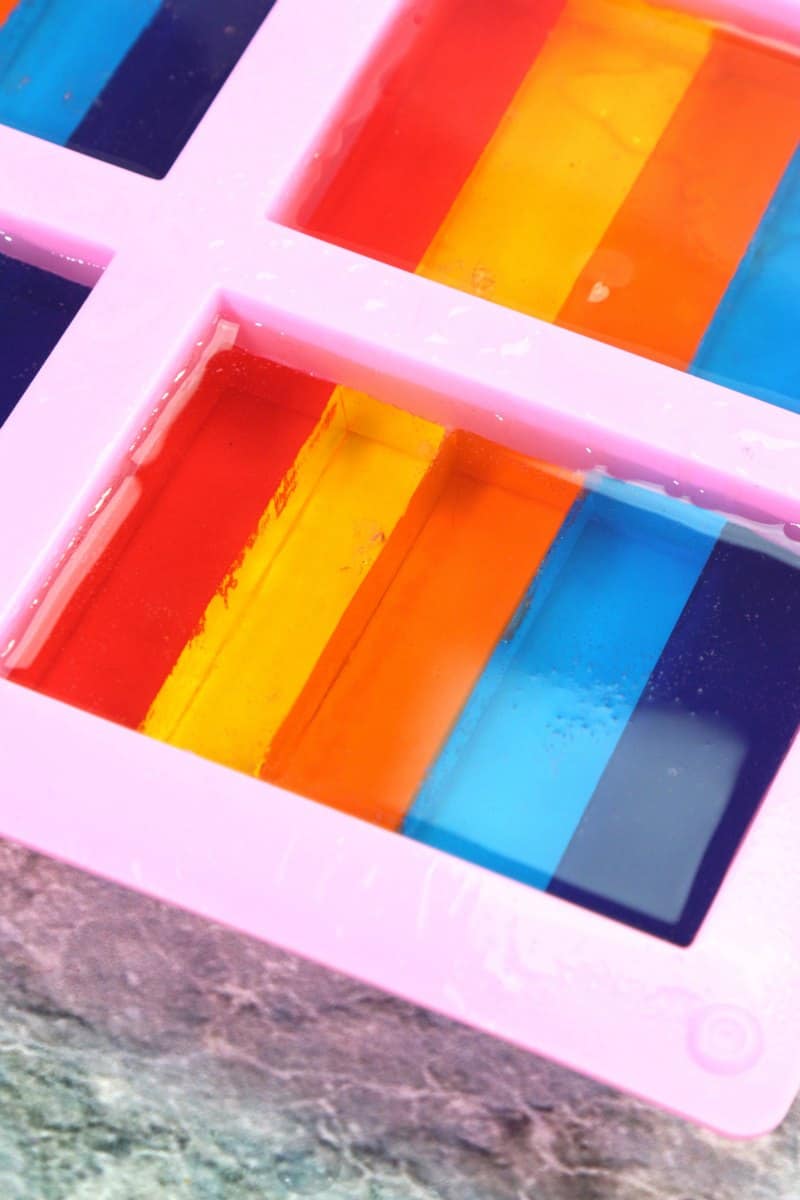
Melt 6 oz of clear melt and pour soap either in the microwave or in the pot on the stove top. Fill each mold up to the top. Allow to harden for 1 hour before removing from the mold.

[dtbaker_banner text=”You Will Also Love:” linkhref=”” type=”brush”]
DIY Creamsicle Orange Scented Soap
How To Make Soap with Essential Oils
Orange Creamsicle Homemade Scented Candles