
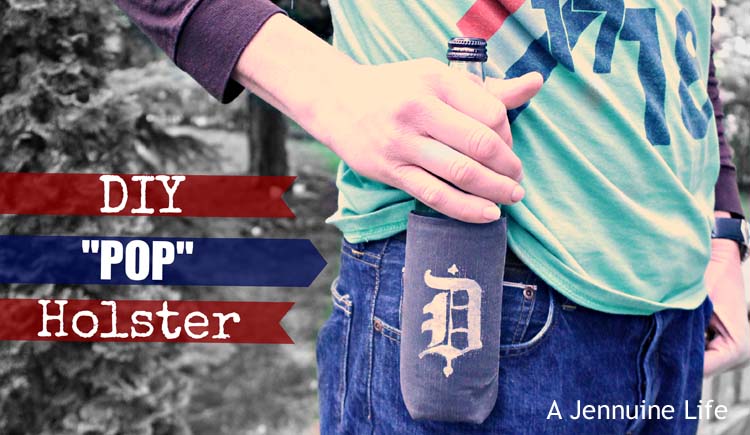
Looking for a unique Fathers Day craft? With this easy sewing tutorial you can make dad his very own personalized beverage holder! Grab dad’s favorite drink and our fun Fathers Day printable for the perfect Fathers Day craft for your dad.
Hey there, Growing Up Gabel readers! I’m Jenn from A Jennuine Life. Camille recently asked for volunteers to join her as a “crafty” contributor, and I jumped at the chance.
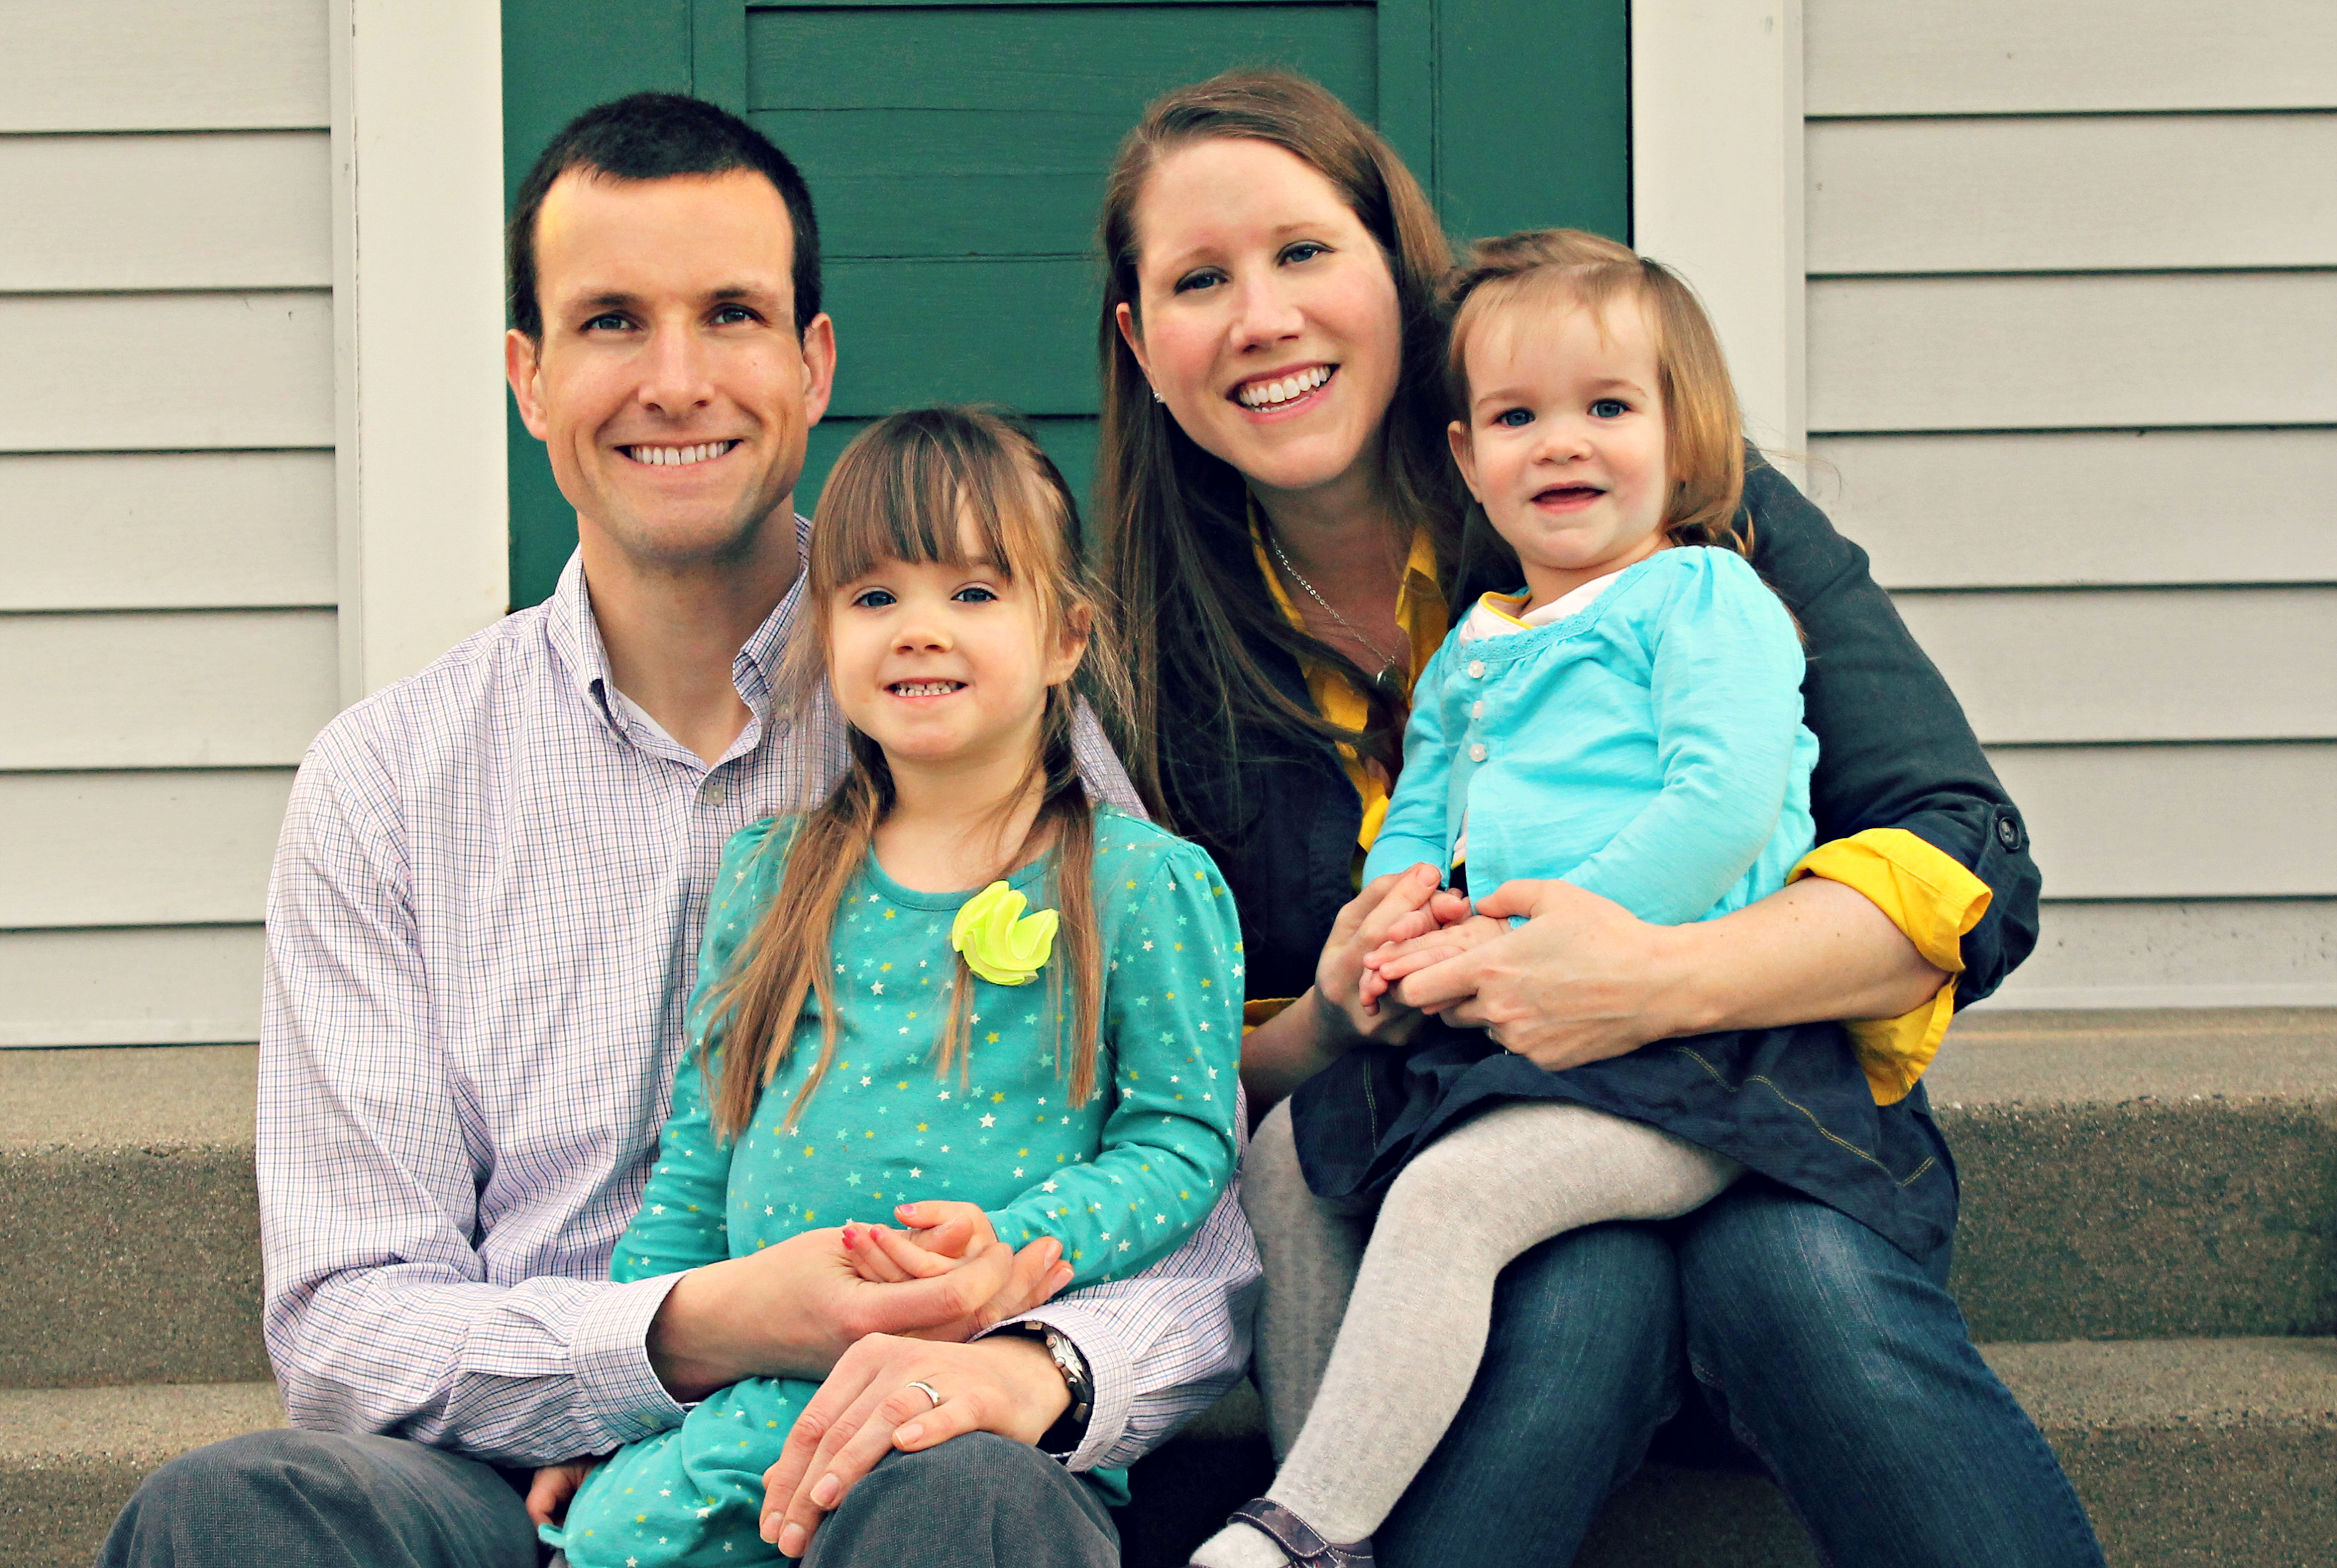
That’s me with my hubby Dave and my two adorable little girls Arden and Hadley. I’m an accountant by day (part time) and a wannabe artisan – sew, knit, stitch, fabricate, paint – I try it all! I do definitely lean towards sewing so that’s likely where most of my projects will begin, but I promise to keep things interesting!
Father’s Day will be upon us in no time flat, so I’m going to share an easy sewing project to create a DIY beverage holster. Perfect for your favorite father to keep his drink at the ready while tending a backyard barbecue or hanging out with his kids while they play. I live in Michigan and Camille told me that she grew up on the opposite side of the state. Here in Michigan we call carbonated drinks “pop” so I thought it worked great as a tie-in to Father’s Day!
Don’t worry – there’s nothing fancy about this project. A few simple seams and you’re done! Here’s what you’ll need to make your own DIY “POP” Holster:
- Outer fabric – a sturdy fabric like canvas or denim will work best
- Belt loop or fabric to make it
- Lining fabric – I used ripstop nylon to give it some moisture resistance
- Fusible fleece
- Coordinating thread
- Bottled beverage of your choice!
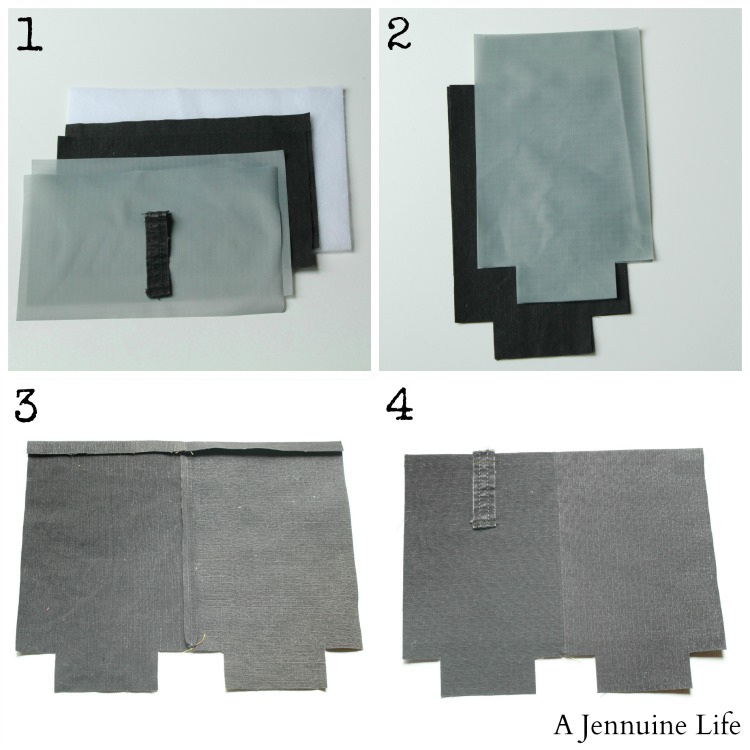 1. Cut your fabrics: two cuts 4.5″ x 7.5″ from each the outer and lining fabrics. Cut one piece 8.5″ x 5.5″ from the fusible fleece. I used a pair of my hubby’s castoff cargo shorts, so I used a belt loop from the shorts. You can make yourself one by cutting a piece 3″ x 1.5″ and ironing the long edges into the middle and one short edge under.
2. Cut a 1″ square from each side of one short end for all outer and lining pieces.
3. Using slightly smaller than 1/4″ seam allowance, sew one long side of the outer fabrics together. Press the seam open. Press the top 1/4″ to same side as the seam you just sewed (wrong side).
4. Sew the belt loop to the right side middle of one side of the outer fabric. Align the one end not pressed under with the edge you pressed under in step 3.
5. Fuse the fleece to the wrong side of the outer fabric as shown. Be sure the adhesive side is towards the fabric and you use a pressing cloth.
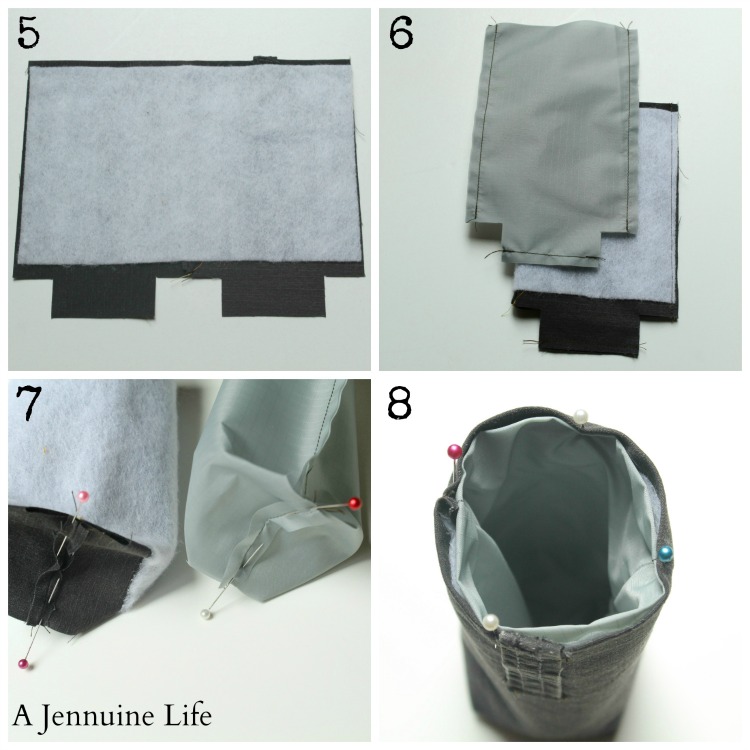
6. With right sides together for both the outer and lining fabrics, sew along the long sides and short bottom piece. Don’t sew along the 1″ lengths at this time. Use a full 1/4″ seam allowance on the lining pieces and the slightly smaller seam allowance for the outer pieces. This is so the liner will slide inside the outer pouch.
7. Box the corners of both pieces by bringing the raw edges together and matching up the side and bottom seams. Pin in place and stitch using the same seam allowances given above.
8. Turn the outer pouch right side out and then slip the liner inside. Turn the top edge of the liner in between the two pouches and line it up with the outer pouch. Pin in place matching seams.
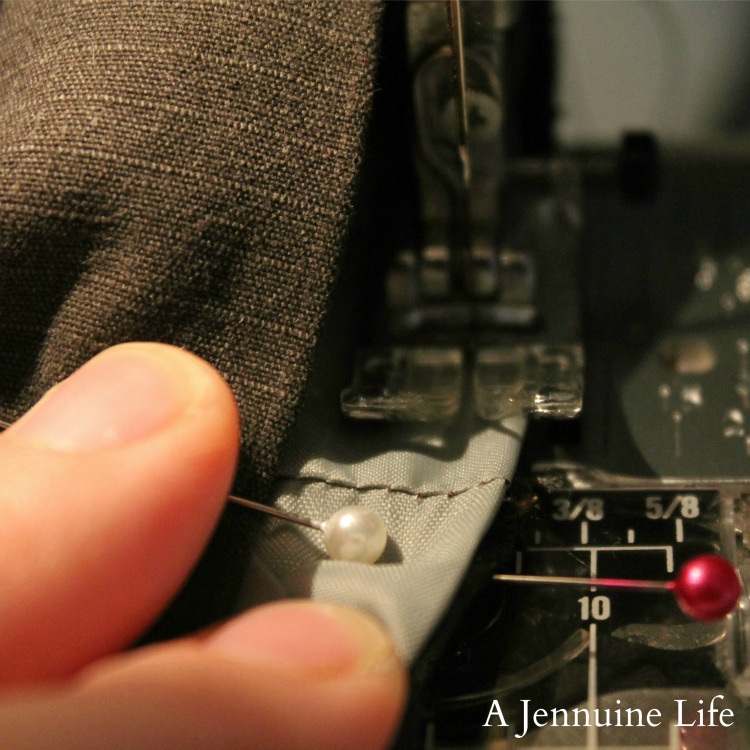
It’s easiest to sew from the inside on a small pouch like this.
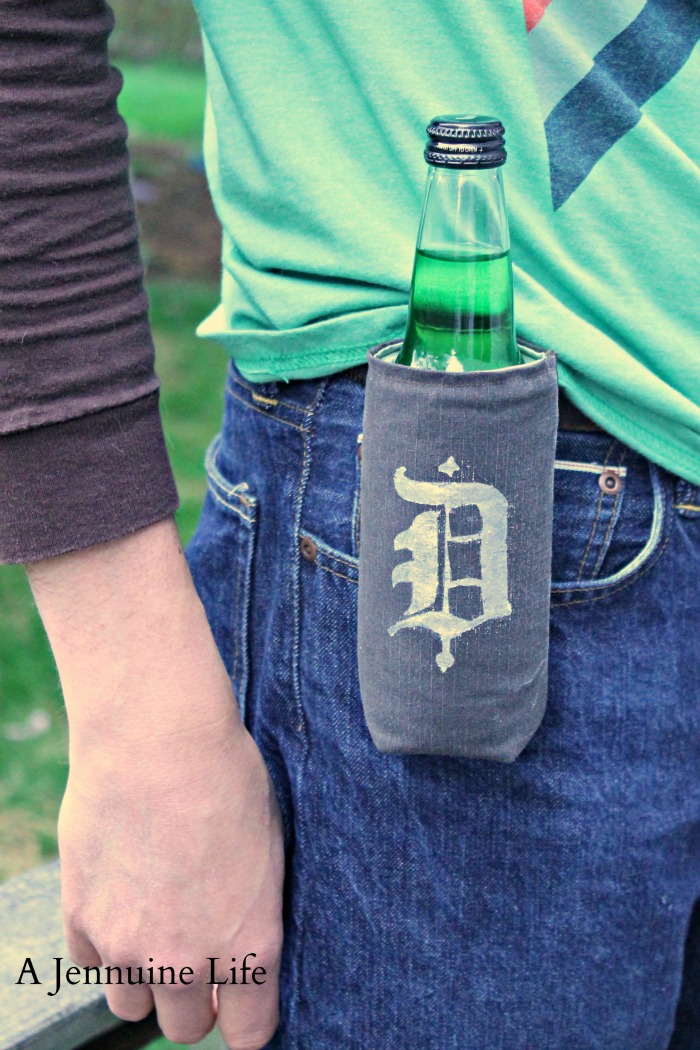
My holster was a little boring so I did a freezer paper stencil to add a “D” for Dave or Dad to the outside of the holster.

Thanks for letting me visit and share this quick project with you. I’ll be back with another project at the end of the month. In the meantime, pop on over and visit for a bit (pun absolutely intended!).